Automate the Flowchart
abstract
To automate a flow, we need to map the flowchart node to the actions performed on the application.
goal
Implement the keywords of the flowchart so that actions are automatically performed on the application when the test is run.
steps
Click on 
Add steps for
Click on
The added step looks like this:
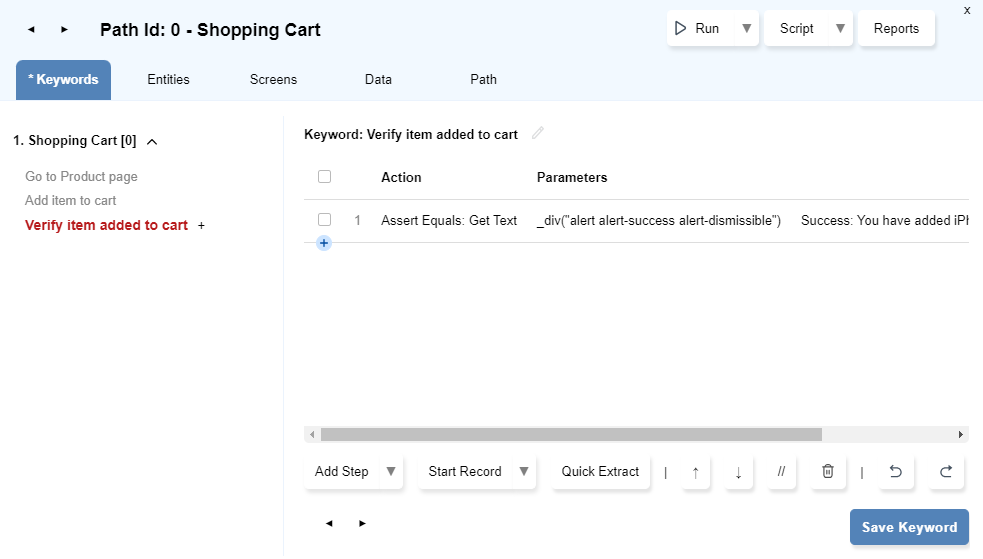
Click on
Launcher Settings
To automate the flowcharts, first we need to add settings for the launcher like, setting browser, start URL etc.- On the Flowcharts window, click on the drop-down arrow next to Launch and then select
Launcher Settings.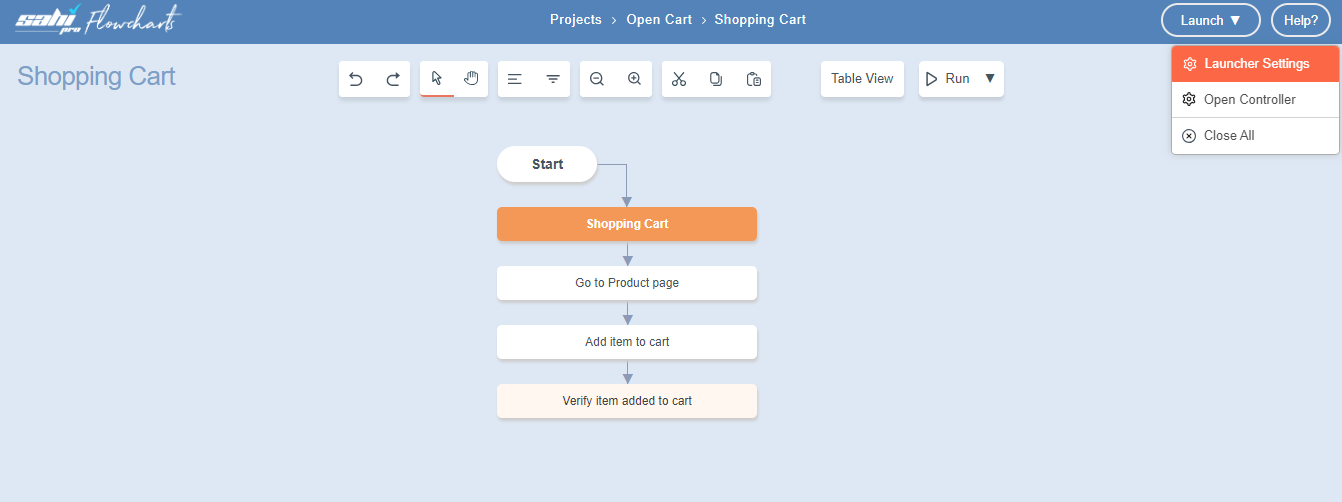
Launcher Settingsdialog opens.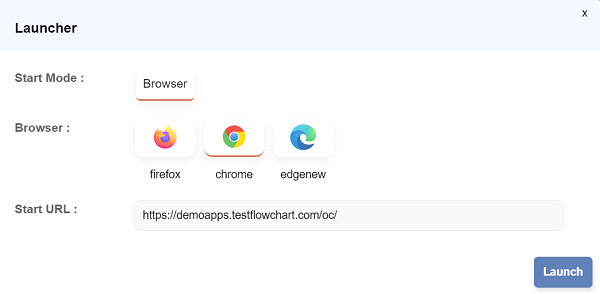
- Select the browser: Chrome
- Enter the URL of the application under test. In this case, the URL will be: http://demoapps.testflowchart.com/oc/
- Click on Launch to launch the webpage, or you can simply close the dialog. It will save the changes automatically.
Open Automate dialog
- Click on any node of the flowchart and select
Automate.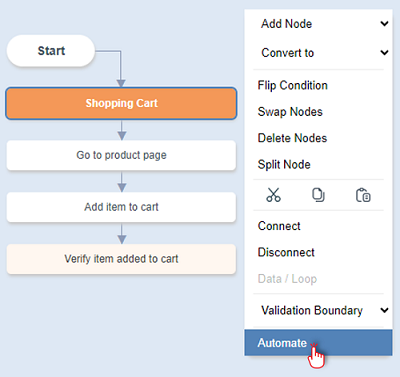
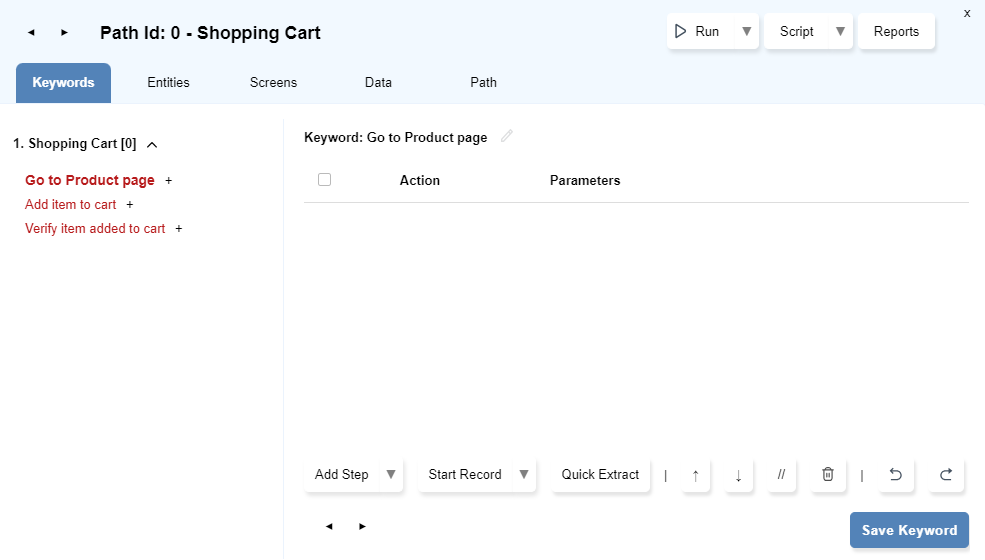
Automatedialog opens up.- Observe that the selected keyword is highlighted and displayed in bold on the left pane. The right pane provides space for adding detailed information.
- You can select any keyword by clicking on it on the left pane.
Add Steps
info
To implement the keyword, we can either record the steps or add them manually.
These steps will be performed automatically during the execution/run.
These steps will be performed automatically during the execution/run.
Record Steps
- Record steps for
Go to product pagekeyword:- Select the first keyword i.e;
Go to Product page. - Click on
Start Recordbutton.
- Set the
Run settingssame asLauncher Settingsif prompted. ( This is a one-time process.) Again click onStart Record. - The website opens up in a new browser.
- Navigate to OpenCart window.
- Click on Phone & PDAs tab
- Notice that in the right pane of the
Automate dialog, your clicks have been recorded and shown as below.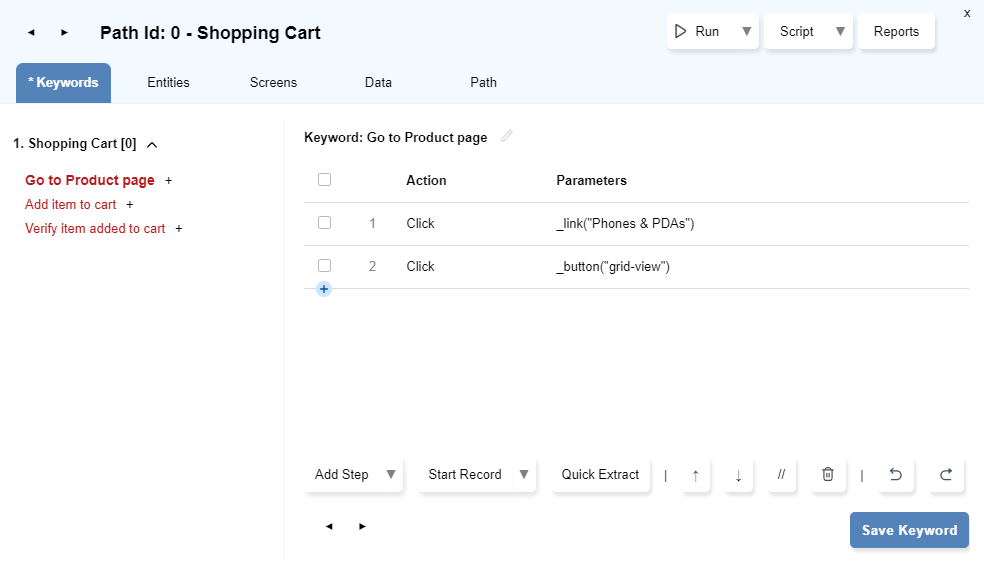
- Click on Save Keyword.
- Notice that, now the implemented keyword has changed its colour to black.
info You can set the Flowcharts window and the OpenCart browser window side by side for ease. While doing so, drag theAutomate dialogto the visible portion.
- Select the first keyword i.e;
- Record steps for
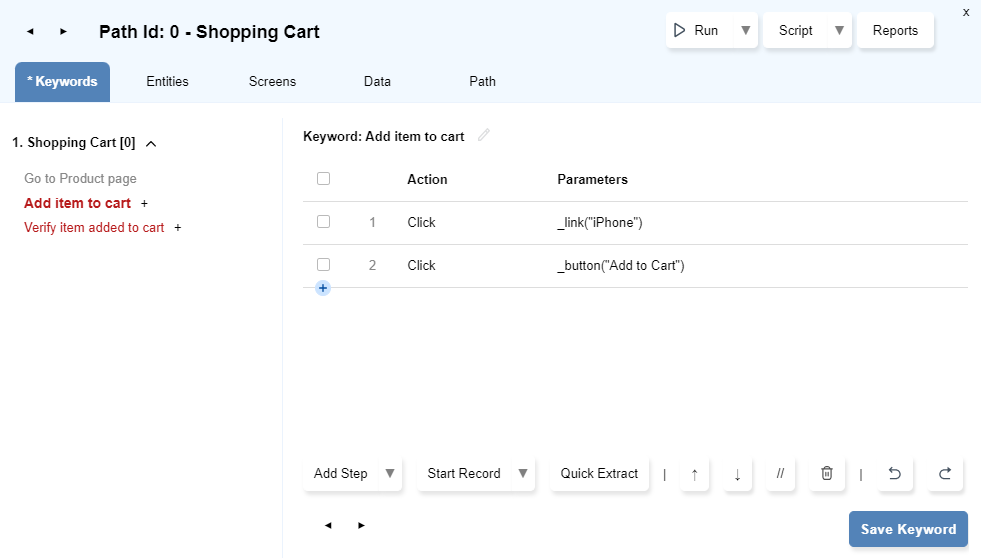
Add item to cartkeyword:- Select
Add item to cartkeyword. - Click on
Start Recordif it is not in recording mode. - Navigate to the Open Cart browser window and select a phone : iPhone
- Click
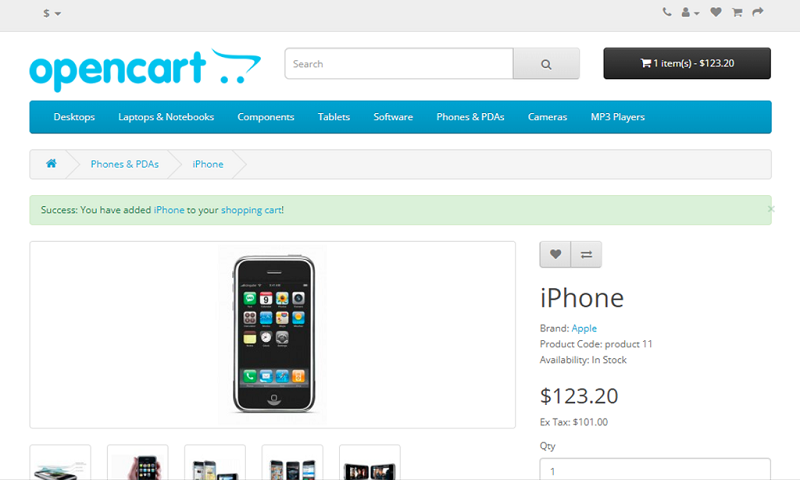
Add to cart. A Success message appears to show that the item has been added to the cart.
- Select
- Notice the step added to the
Automate dialog. - Click on Save Keyword.
infoAt any stage of recording the steps, you can stop the recording and start recording again. This gives the user a buffer to make any corrections or to plan further course of action.
Stop Record button to stop the recording process.

infoThe Controller can be launched using the
Alt + Double Click action on a browser window. By default, Alt + Click and Alt + Double Click actions are not recorded on the browser. To allow recording these actions, enable userdata property recorder.record.controller_hotkey_click.Add Manual Steps
Verify item added to cart keyword:
- Select
Verify item added to cartkeyword. - Click on
Add Stepbutton or the button.

- The
Add Stepdialog opens. Navigate toInspect Elementtab by clicking on it.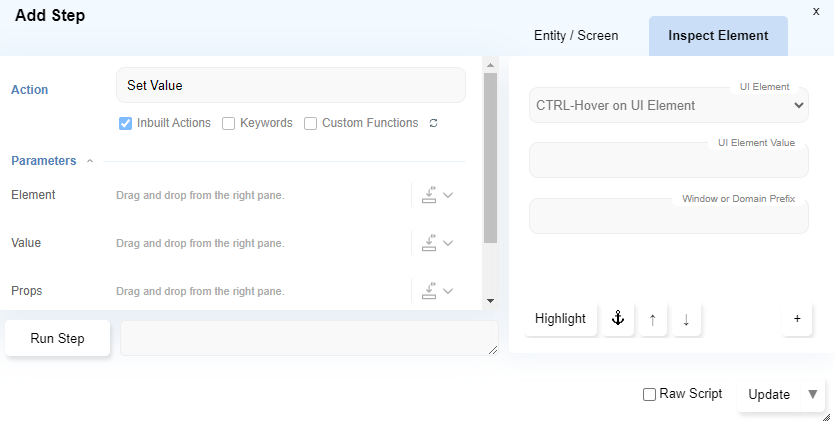
- Navigate to the OpenCart browser window and press the
Ctrlkey and hover the mouse on the Success message (Ctrl + Mouse Hover). The green box gets highlighted by a red outline. - Notice that the
Add stepdialog'sInspect elementtab has got populated with the success message'sUI ElementandUI Element Value.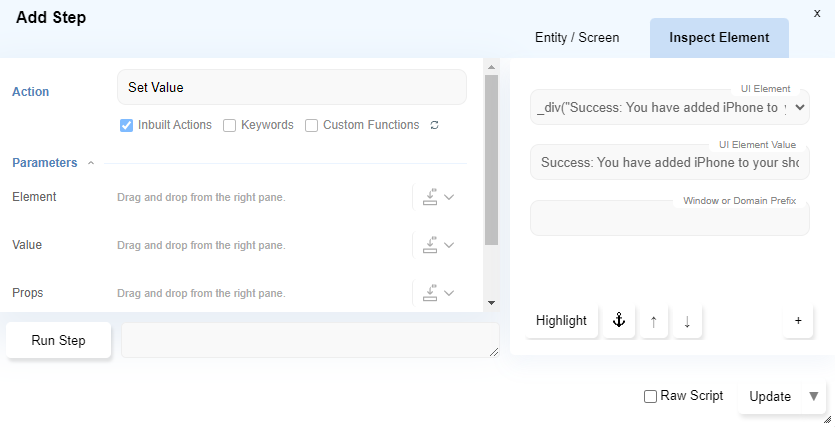
- Click on the Drop-down arrow near UI Element and select the option shown as the image below.
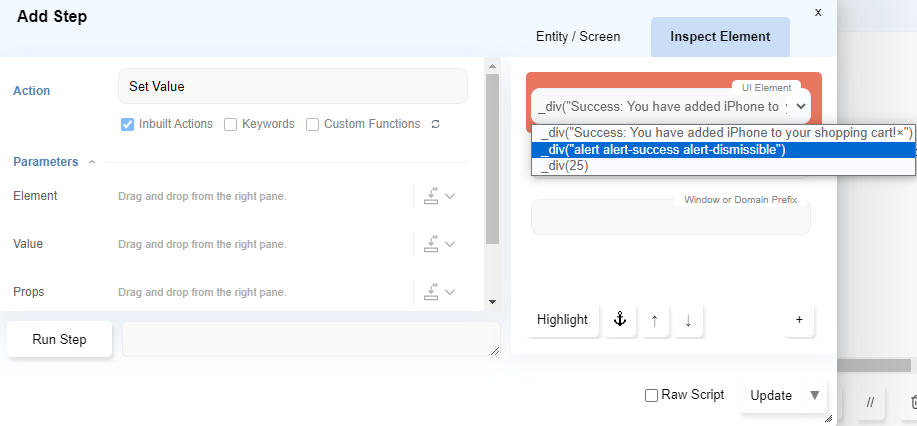
- Click on the
+(select action/assert) button.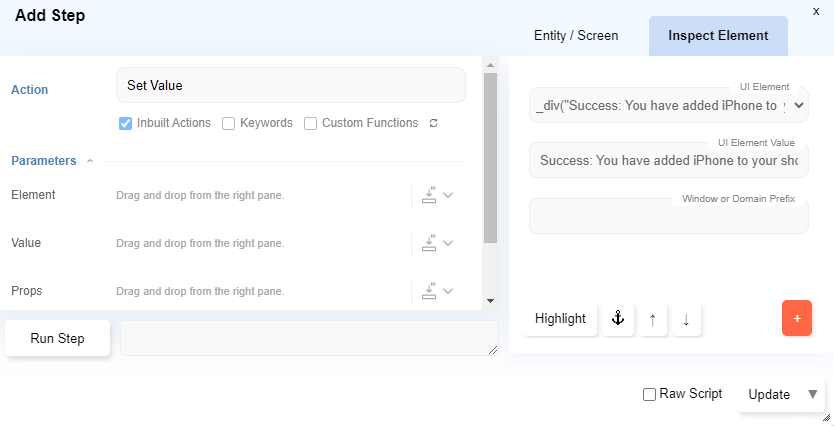
- Select
Assert Text Equalsfrom the pop-up menu.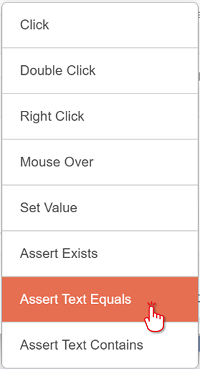
- Notice the changes in left pane of the
Add Stepdialog.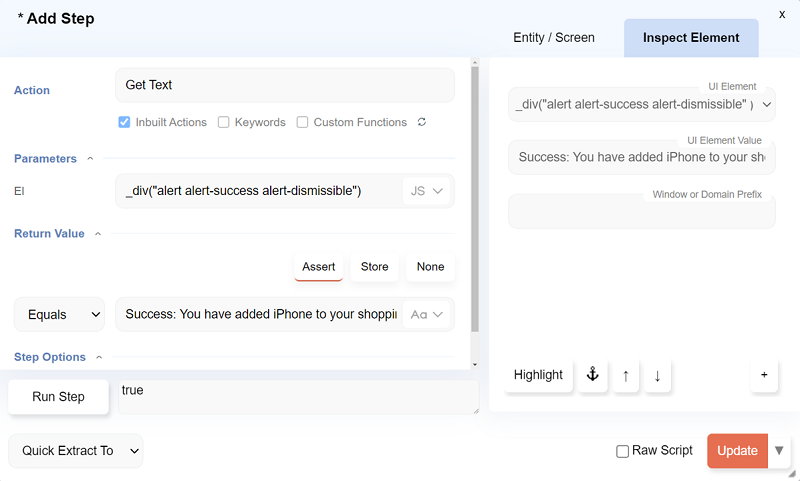
- The
Actionhas been set toGet Text. Elhas been set to the identified element from the web application.- The
Asserthas been set toEqualsand it has the value of the success message. - The above means: Get the text from
Eland assert that itEquals(is the same) as the text specified.
Update button.
Save Keyword.Run the Flowchart
- On the
Automatedialog click onRunbutton.
- The
Run Settingsdialog opens. SelectRun Normal Pathand click theRunbutton.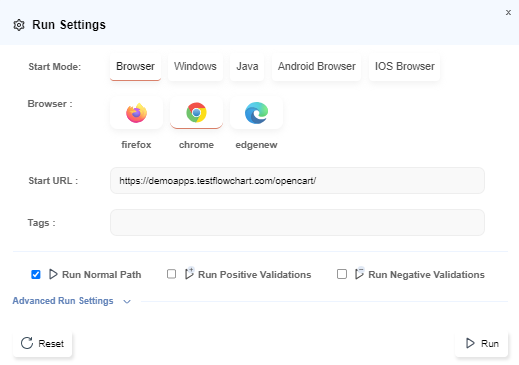
- During the process of execution/running the flow, the following can be observed:
- The target webpage will be launched in a browser.
- All the added steps will execute.
- Here the Product page will open and the product will get added to cart automatically.
- Finally it will verify the success message.
View Report
- Click on the
Reportsbutton..
- The Report opens in a new browser.

- Click further on it to see the individual steps performed.
outcome
Congratulations! You have successfully automated the keywords in the flowchart and run your first flow!
concepts
- Automate
- Keyword
- Implement Keyword
- Launcher
- Recorder
- Step
- UI Element
- Inbuilt Actions
next
Data Drive


