Automate REST API Calls
REST API Call Step in Flowcharts allows calling and verifying REST API calls.
REST Request
- Click on the node where you need to add
REST API callon the flowchart and selectAutomate. Automatedialog opens up with the selected node.- Click on the icon near to
Add Stepand from the drop-down selectREST API Call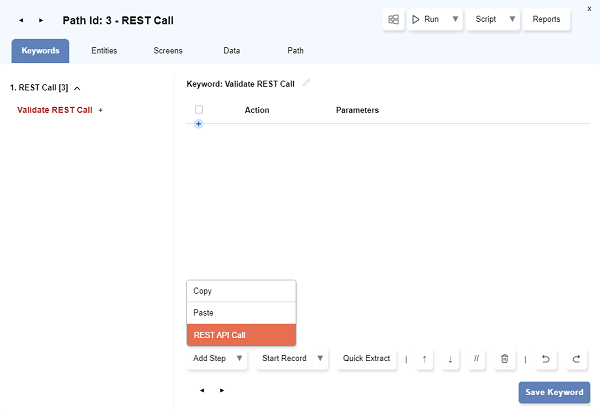
- It opens a
REST APIdialog with the options to callGET,POST,PUT,DELETE,PATCH - Choose relevant call, ex. GET and complete the fields like
URL,Headers, etc - Click
Get Responseto get the response of API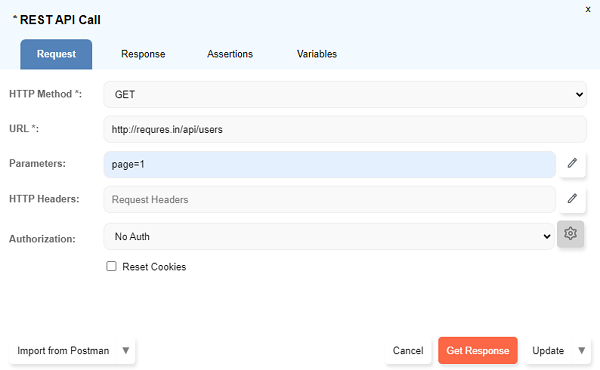
- It will automatically navigate to the
Responsetab and show the response of the API. - Click on the
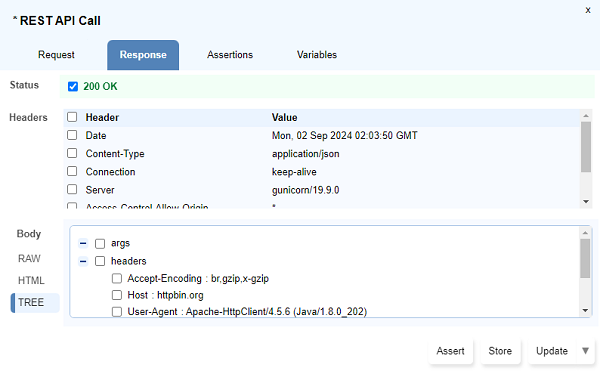
TREEunderBodytab. - Click on the checkboxes for the values that need to be asserted or stored.
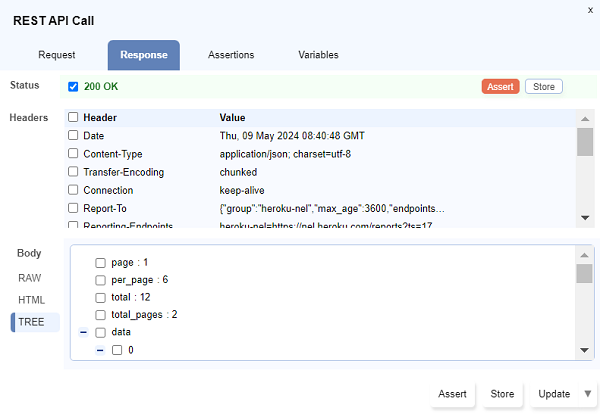
- Click on the
Updateto save the assertion.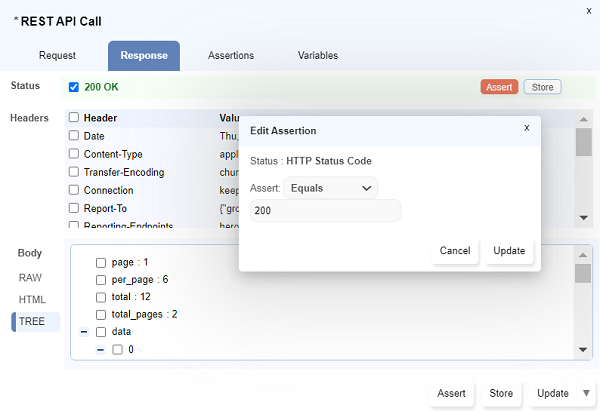
- Click on
Storeto store the value of the response in some variable.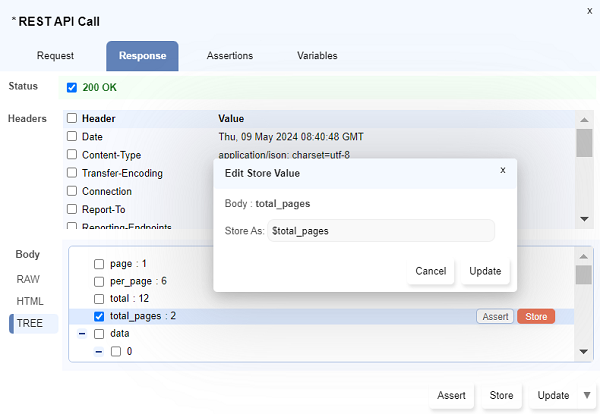
- Assertions can be seen on
Assertionstab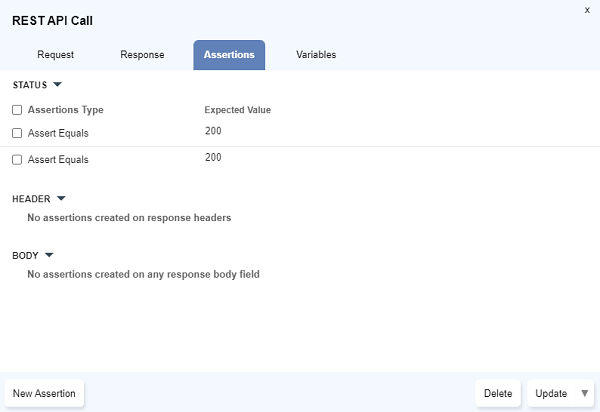
- Variables can be seen on
Variablestab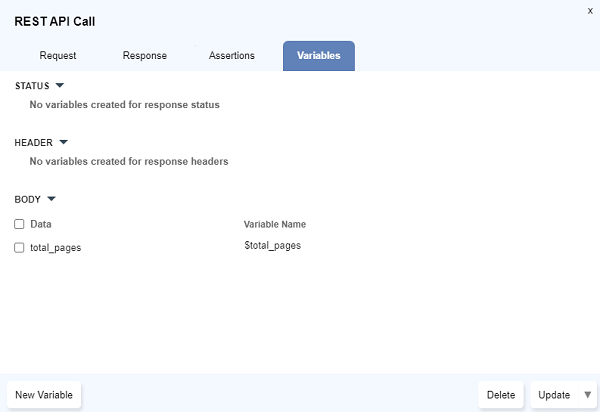
-
Click on
Updatebutton to add theAPI Callin the Keyword.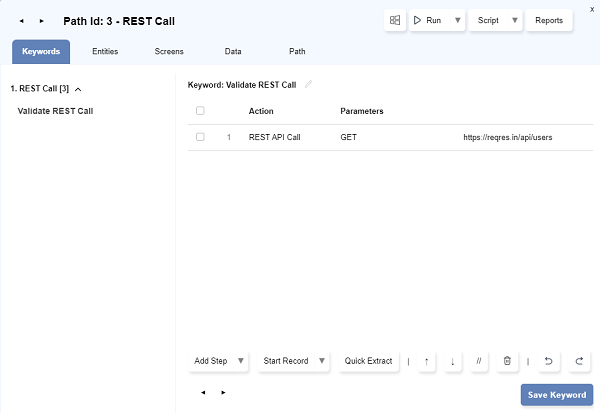
- Similarly, use
Postor any other method.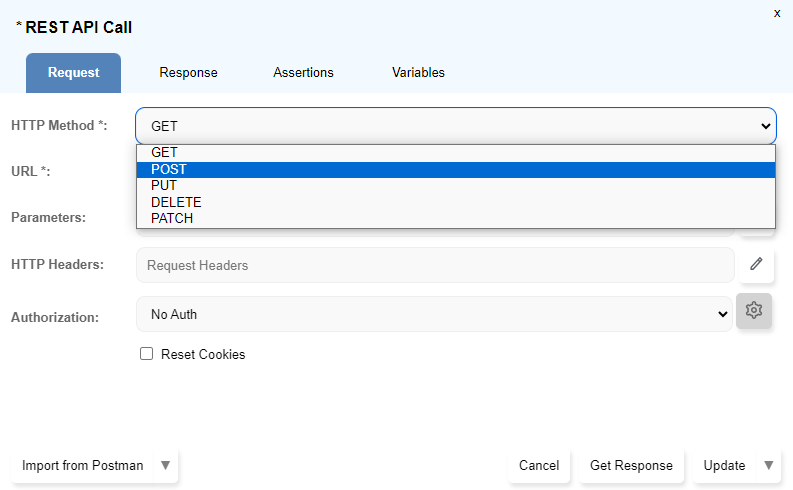
Assert and Store buttons to assert or store the values in one shot.Import from Postman
-
Follow below steps to import requests directly from the
- Launch Postman, open the Postman console (press
Ctrl+Alt+Cfor Windows OS orCommand+Option+Cfor macOS), clear the console, and execute the REST API call to generate a log. - Click on the
Copy all logs to clipboardbutton to copy the log from the console.
-
In the
REST APIdialog, click theImport from Postmanbutton.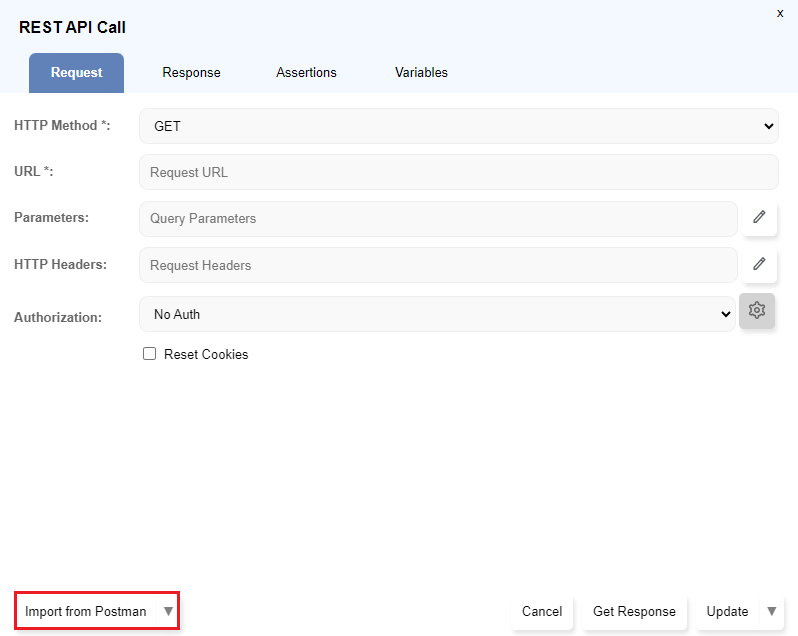
-
Paste the copied Postman's console log into the textarea and click the
Importbutton.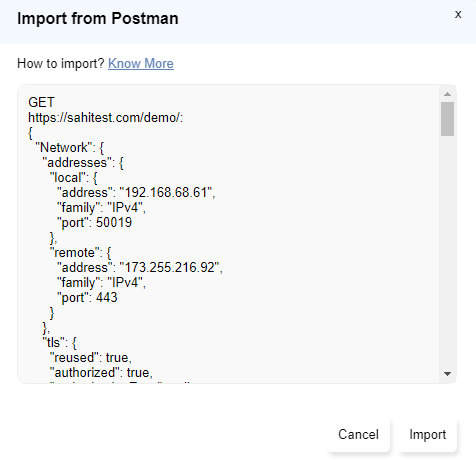
-
This will populate the corresponding fields in the
Requesttab.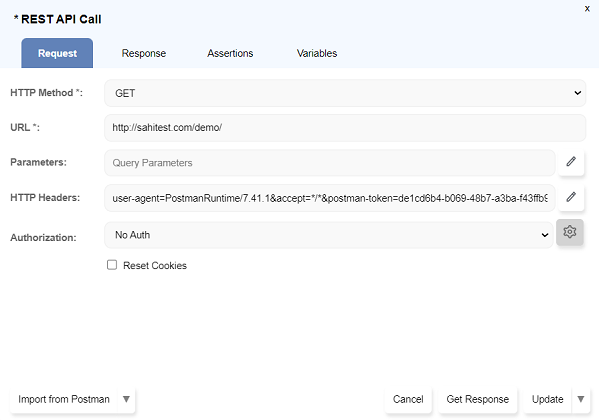
- To accurately capture Postman's console log, first clear the console, then execute the REST API call, and finally copy the log generated in the console.
- Ensure a single log is pasted into the textarea, as certain scenarios may produce multiple logs in Postman's console.
- A sample log from postman would look like:
GET http://sahitest.com/demo/: {
    "Network": {
      "addresses": {
        "local": {
          "address": "192.168.1.4",
          "family": "IPv4",
          "port": 51628
        },
        "remote": {
          "address": "173.255.216.92",
          "family": "IPv4",
          "port": 80
        }
      }
    },
    "Request Headers": {
      "user-agent": "PostmanRuntime/7.41.2",
      "accept": "*/*",
      "postman-token": "eff45327-7ea4-46f1-8c7b-9da18539b01f",
      "host": "sahitest.com",
      "accept-encoding": "gzip, deflate, br",
      "connection": "keep-alive"
    },
    "Response Headers": {
      "date": "Tue, 27 Aug 2024 09:16:51 GMT",
      "server": "Apache/2.4.6 (CentOS) OpenSSL/1.0.2k-fips PHP/5.4.16",
      "last-modified": "Fri, 28 Jun 2024 18:42:46 GMT",
      "etag": "\"fab-61bf79d0cd580\"",
      "accept-ranges": "bytes",
      "content-length": "4011",
      "keep-alive": "timeout=5, max=100",
      "connection": "Keep-Alive",
      "content-type": "text/html; charset=UTF-8"
    },
    "Response Body": "<!DOCTYPE>\r\n<html>\r\n<head>\r\n    <meta name=\"generator\" content=\"HTML Tidy, see www.w3.org\">\r\n    <title>Sahi Tests</title>\r\n    <script type=\"text/javascript\">\r\n        function abc() {\r\n        }\r\n    </script>\r\n</head>\r\n<body>\r\n<h2>Sahi Tests</h2>\r\n\r\n<table width=\"100%\">\r\n<tr><td>\r\n<a href=\"linkTest.htm\" class=\"a x\">Link Test</a> <br>\r\n<br>\r\n<a href=\"formTest.htm\" class=\"a x\">Form Test</a> <br>\r\n<br>\r\n<a href=\"tableTest.htm\">Table Test</a> <br>\r\n<br>\r\n<a href=\"selectTest.htm\">Select Test</a> <br>\r\n<br>\r\n<a href=\"framesTest.htm\">Frames Test</a> <br>\r\n<br>\r\n<a href=\"iframesTest.htm\">IFrames Test</a> <br>\r\n<br>\r\n<a href=\"shadowRoot.html\">ShadowRoot Test</a> <br>\r\n<br>\r\n<a href=\"framesTest.htm\" target=\"popWin\">Window Open Test</a> <br>\r\n<br>\r\n<a href=\"framesTestWithTitle.htm\" target=\"_blank\">Window Open Test With Title</a> <br> \r\n<br>\r\n<a href=\"showModal.htm\">Show Modal Test</a> <br>\r\n</td><td>\r\n<a href=\"spandiv.htm\">Span and Div Page</a> <br>\r\n<br>\r\n<a href=\"isElementOnTopTestPage.html\">Element On Top Test</a> <br/>\r\n<br>\r\n<a href=\"takePageScreenshotTest.htm\">TakePageScreenshot Test</a> <br/>\r\n<br>\r\n<a href=\"label.htm\">Label Page</a> <br>\r\n<br>\r\n<a href=\"headingsTest.htm\">Headings Test</a> <br/>\r\n<br/>\r\n<a href=\"visible.htm\">Visible Test</a> <br>\r\n<br/>\r\n<a href=\"strict_visible.htm\">Strict Visible Test</a> <br>\r\n<br/>\r\n<a href=\"containTest.htm\">Contain Test</a> <br>\r\n<br/>\r\n<a href=\"reactpage/react.html\">React Test</a> <br>\r\n<br>\r\n</td><td>\r\n<a href=\"alertTest.htm\">Alert Test</a> <br>\r\n<br/>\r\n<a href=\"confirmTest.htm\">Confirm Page</a> <br>\r\n<br>\r\n<a href=\"promptTest.htm\">Prompt Page</a> <br>\r\n<br>\r\n<a href=\"jsPopup.htm\">Js Popup</a> <br>\r\n<br>\r\n<a href=\"saveAs.htm\">Save As Test</a> <br>\r\n<br>\r\n<a href=\"/demo/php/fileUpload.htm\">File Upload Test</a> <br>\r\n<br>\r\n\r\n</td><td>\r\n<a href=\"index.htm\" target=\"_top\">Break Frames</a> <br>\r\n<br>\r\n<a href=\"/demo\" target=\"_blank\" id=\"open-self\">Open Self</a> <br>\r\n<br>\r\n<a href=\"javascript:window.close()\">Close Self</a> <br>\r\n<br>\r\n<input type=\"button\" onclick=\"javascript:window.close()\" value=\"Close Self\"> <br>\r\n<br>\r\n<a href=\"blank.htm\">Blank Page</a> <br>\r\n<br>\r\n<a href=\"diffDomain.htm\">Different Domains</a> <br>\r\n<br>\r\n<a href=\"diffDomainExt.htm\">Different Domains External</a> <br>\r\n<br>\r\n<a href=\"iframesDomainTest.htm\">Iframe Different Domains</a> <br>\r\n<br>\r\n<a href=\"https://sahitest1.com/demo/training/login.htm\" target=\"_blank\">Sample Application Different Domain</a> <br>\r\n<br>\r\n<a href=\"onBeforeUnloadTest.htm\">OnBeforeUnload</a> <br>\r\n<br>\r\n<a href=\"errorPages.htm\">Error Pages</a> <br/>\r\n<br/>\r\n<a href=\"php/status.php?code=204\">204 Response</a> <br/>\r\n<br/>\r\n<a href=\"php/delayedLoadInner.php\">Delayed Load page</a> <br/>\r\n<br/>\r\n<a href=\"docWriteIFrame.htm\">IFrame via doc write</a> <br/>\r\n<br/>\r\n<a href=\"HeadRequestWith204Response.htm\">Head request with 204 Response</a> <br/>\r\n<br/>\r\n</td><td>\r\n<a href=\"clicks.htm\">Clicks Page</a> <br>\r\n<br>\r\n<a href=\"clickCombo.htm\">Combo Clicks Page</a> <br>\r\n<br>\r\n<a href=\"mouseover.htm\">Mouse over</a> <br>\r\n<br>\r\n<a href=\"keypress.htm\">Key Press</a> <br>\r\n<br>\r\n<a href=\"dragDropMooTools.htm\">Drag Drop Test</a> <br>\r\n<br>\r\n<a href=\"dragDropDataTransfer.htm\">Drag Drop DataTransfer</a> <br>\r\n<br>\r\n<a href=\"waitFor.htm\">Wait For Condition</a> <br>\r\n<br>\r\n<a href=\"clearTimeoutAll.htm\">Clear Timeout All</a> <br>\r\n<br>\r\n<a href=\"http://www.google.com\">Google</a> <br/>\r\n<br>\r\n<a href=\"https://www.google.com\" target=\"newWin\">HTTPS Google</a> <br/>\r\n<br/>\r\n<a href=\"temp.htm\">Temp test</a> <br/>\r\n<br/>\r\n<a href=\"timer.htm\">Timer</a> <br/>\r\n<br/>\r\n<a href=\"performance.htm\">Performance</a> <br/>\r\n<br/>\r\n<a href=\"responsiveTestPage.htm\">Responsive Page</a> <br/>\r\n<br/>\r\n<a href=\"silverlight/Silverlight_TestApplicationTestPage.htm\">Silverlight</a> <br/>\r\n<br/>\r\n\r\n\r\n<!-- \r\n<a href=\"modal.htm\">Modal Dialogs</a> <br>\r\n<br> -->\r\n<!--\r\n<a href=\"http://narayan:10000/demo/frames/frameset.htm\">Frameset Multi Domain</a> <br/>\r\n<br/> -->\r\n</td></tr>\r\n</table>\r\n\r\n\r\n</body>\r\n</html>\r\n"
  }
Postman API Platform:
-
Note:
Import from HAR
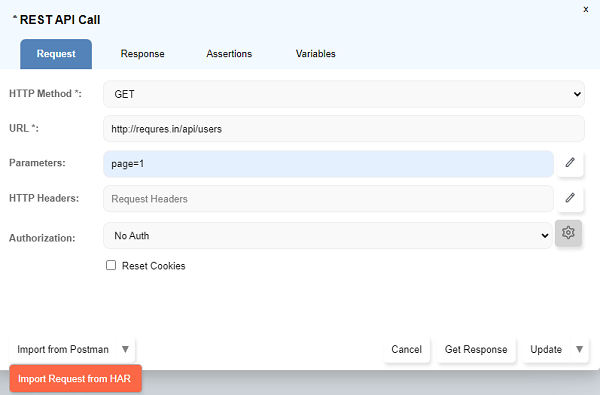
- Click on the drop-down arrow on
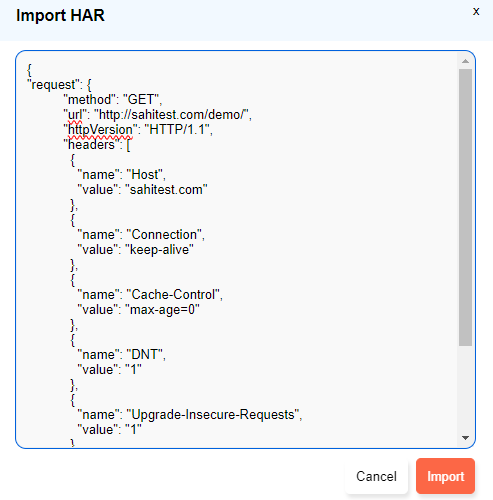
Import from Postmandialog and click onImport request from HARbutton. - Paste the request section of the response to be validated from HAR logs and click on
Import - HAR logs can be accessed from developer's console > Network activity > Right click > save HAR.
- A sample request section from HAR logs would look like:
{
            "request": {
                    "method": "GET",
                    "url": "http://sahitest.com/demo/",
                    "httpVersion": "HTTP/1.1",
                    "headers": [
                        {
                        "name": "Host",
                        "value": "sahitest.com"
                        },
                        {
                        "name": "Connection",
                        "value": "keep-alive"
                        },
                        {
                        "name": "Cache-Control",
                        "value": "max-age=0"
                        },
                        {
                        "name": "DNT",
                        "value": "1"
                        },
                        {
                        "name": "Upgrade-Insecure-Requests",
                        "value": "1"
                        },
                    ],
                    "queryString": [],
                    "cookies": [],
                    "headersSize": 585,
                    "bodySize": 0
                    }
            }
-
Note:
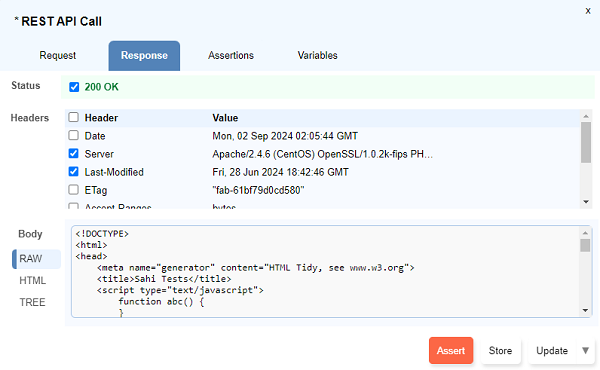
REST Response
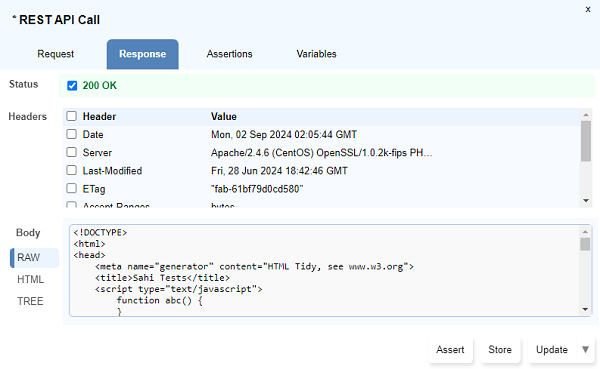
REST Response section displays following information:- Response Status: Displays the response code returned by the server.
- Response Header: Displays the response headers returned by the server.
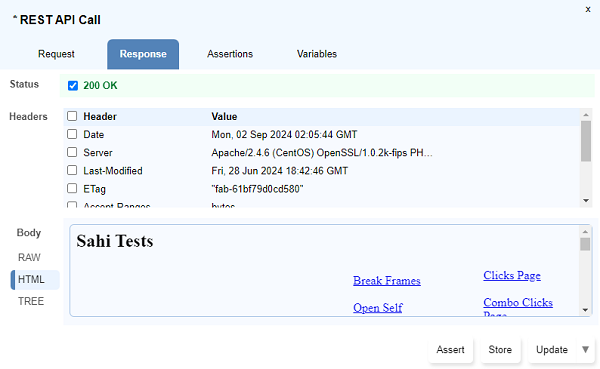
- Response Body: Response Body has 3 tabs:
- Raw: Displays the response body as it is returned.
- HTML: Displays the parsed HTML if content-type returned from server is HTML.
- TREE: Displays the response body in tree structure if content type returned from server is JSON or XML.
Assertions
Assertions can be added through following methods:- On the
Responsetab, click on theAssertbutton next to the response values for assertion.- The
Assertbutton will be visible only on hovering on any value.

- The
- The
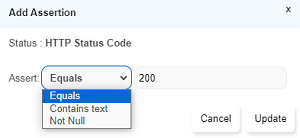
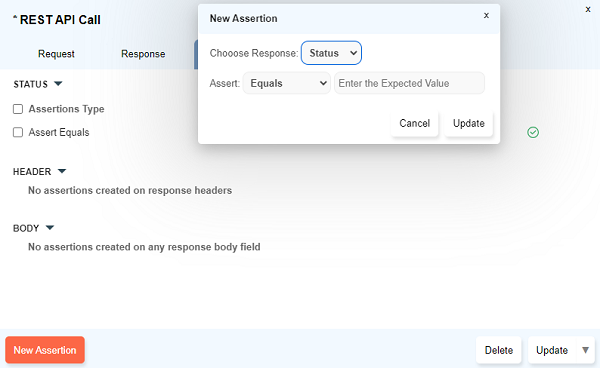
Add Assertiondialog opens up. Select the relevant assertion type and click onUpdate - Multiple assertions can be set simultaneously using the checkboxes to select and then click on
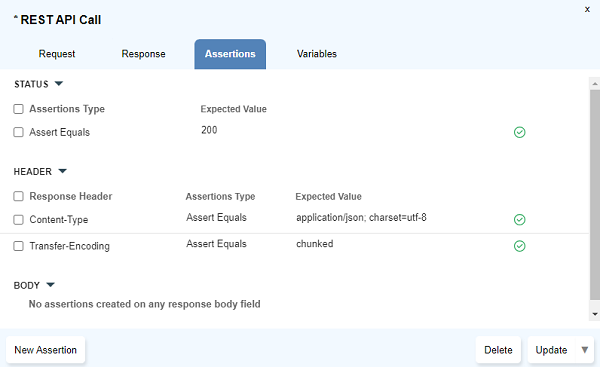
Assertbutton at the bottom. - The added assertions can be seen on the
Assertionstab. - Assertions can also be added from the
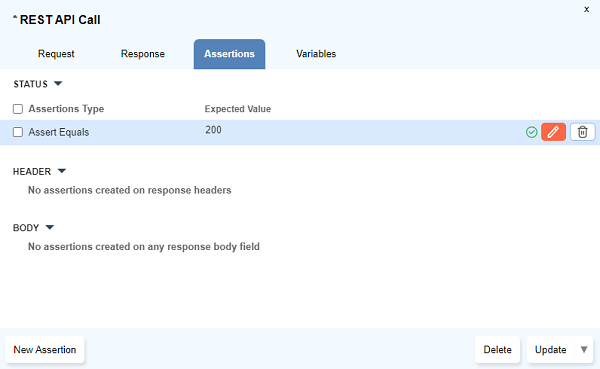
Assertionstab by clicking on theNew Assertionbutton at the bottom. - An assertion can be edited by clicking on the
Editicon next to it.
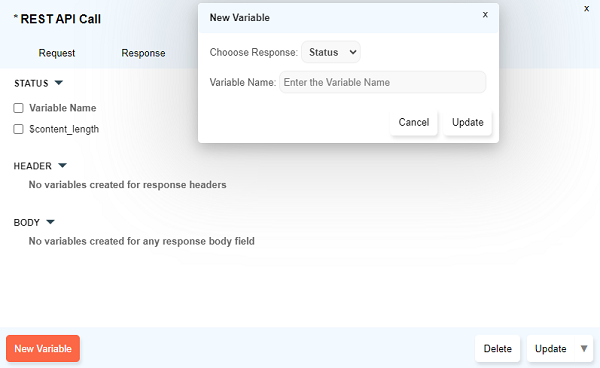
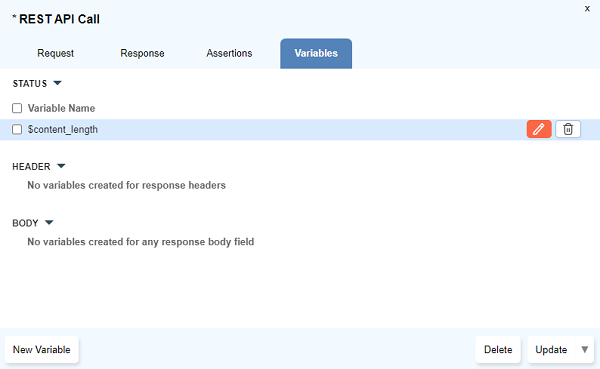
Variables
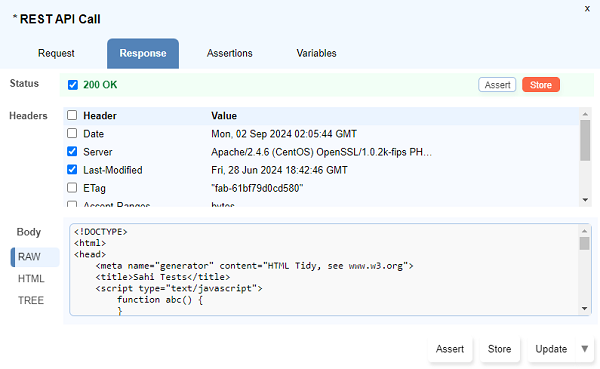
The values can be stored in variables through following methods:- On the
Responsetab, click on theStorebutton next to the response values to store the value on the variable.- The
Storebutton will be visible only on hovering on any value.
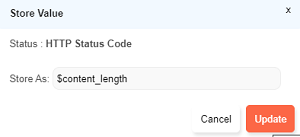
- The
- The
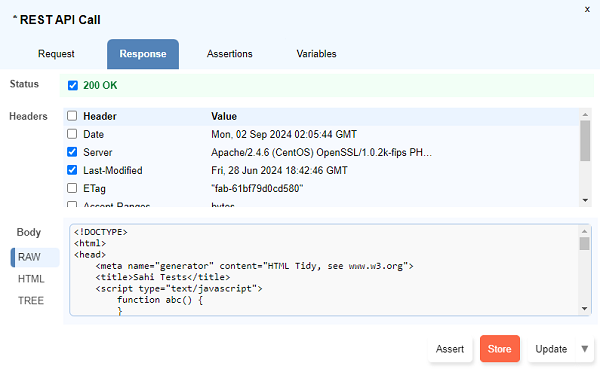
Store Valuedialog opens up. Type the variable name preceding with a$symbol and click onUpdate. - Multiple response values can be stored simultaneously using the checkboxes to select and then click on
Storebutton at the bottom. - When multiple variables are created together, the variable names will be taken automatically.
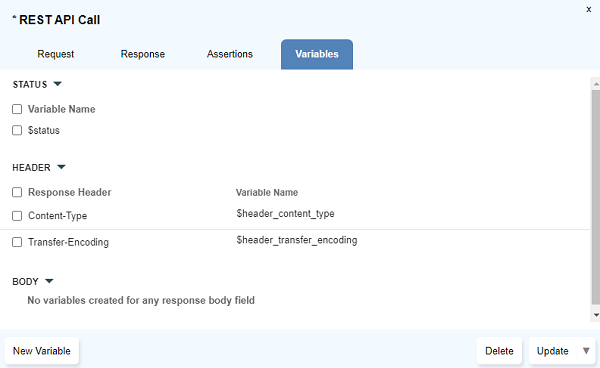
- The added variables can be seen on the
Variablestab. - Variables can also be created from the
Variablestab by clicking on theNew Variablebutton at the bottom. - A variable can be edited by clicking on the
Editicon next to it.
Authorization
Basic Auth
Enter the username and password after selecting Basic Auth from dropdown.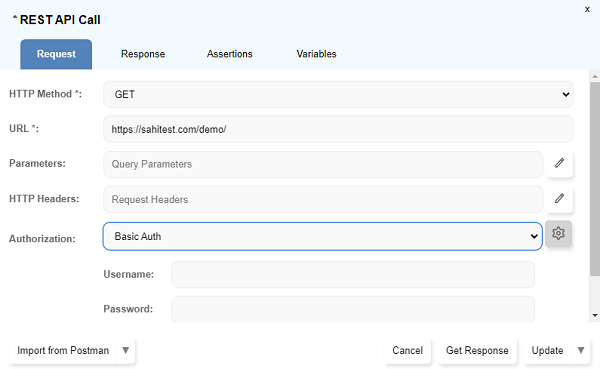
OAuth 1.0:
Choose OAuth 1.0 from the Authorization dropdown.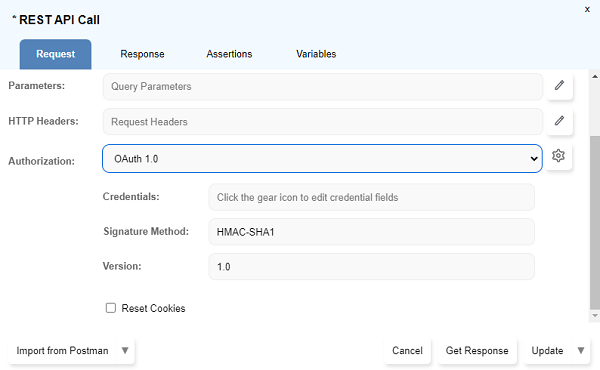
- Credentials: Select an already saved credential or type a new credential to add a new one.
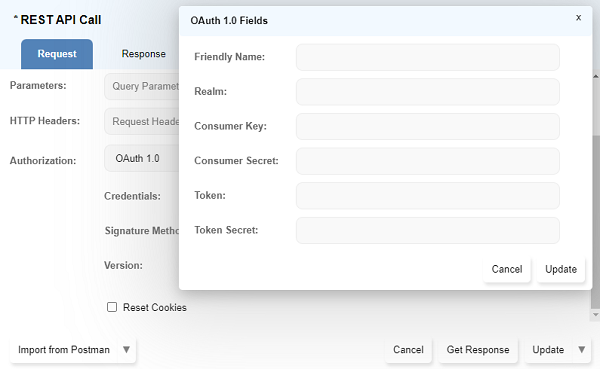 Enter a friendly name to save these credentials against. Enter the
 Consumer Key, Consumer Secret, Token, Token Secret. These details are provided by the API provider. - Signature Method: Sahi currently supports HMAC-SHA1 and HMAC-SHA256 signature methods.
- Version: Enter the version as required by the API under test.
- Realm: Enter the realm as required by the API under test.
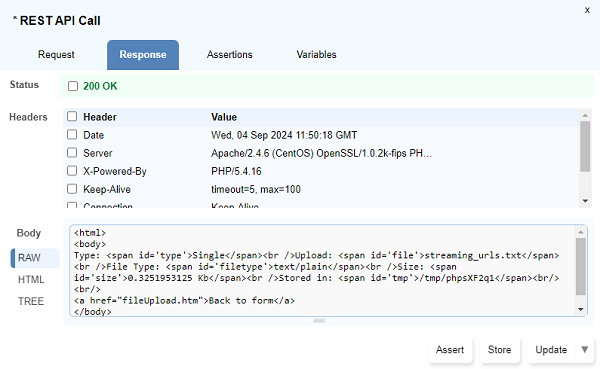
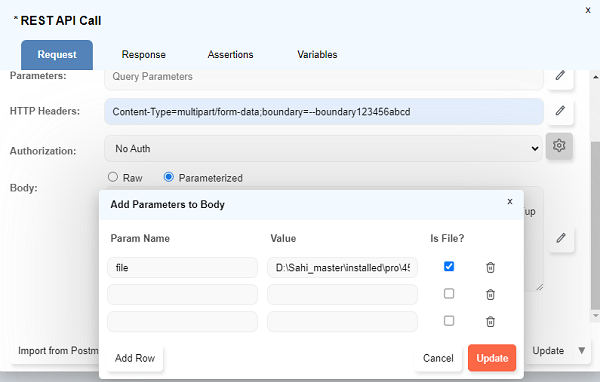
Uploading a file using REST API Call
|
Input |
Description |
Example |
||||||||
|---|---|---|---|---|---|---|---|---|---|---|
|
File name |
Absolute file path to the file that should be provided. |
|||||||||
|
File upload URL |
The URL where you want to upload the file. This URL is usually the action URL which is present in the form response values or URL that is passed as an argument for an XML Http Request |
|
||||||||
|
Content Type |
Content type of the POST data that is being sent. The content type for the file upload is multipart/form-data and is being used by all the browsers. There are special cases where you can specify your own content type |
Content-Type: multipart/form-data; boundary=--boundary123456abcd |
||||||||
|
Boundary |
A random string with 2 hyphens at the beginning |
--boundary123456abcd |
Steps:
- Open
REST API Calldialog by clicking on theAdd Stepdrop down menu. - Select the POST from
HTTP Methodcombo box. - Specify the file upload
URLin the URL field. - Specify the Content-Type header in the
HTTP Headersfield.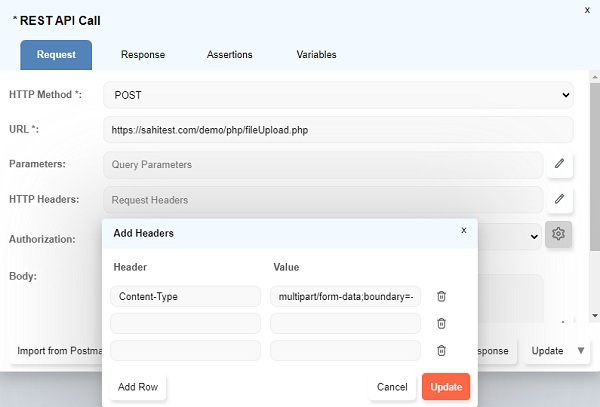
- Select the
Parameterizedradio button forBodyfield and specify the file path or any other body parameters if required. - Click on the
Get Responsebutton. - You will get the following result after the file upload, the response may differ depending on the web application
