Integrate with Existing Sahi Pro Classic Codebase
abstract
Existing Sahi Pro users may want to move to Sahi Pro Flowcharts for newer projects. Flowcharts allows re-use of existing functions, scripts and suites from existing Sahi Pro Classic codebase.
Make Functions Available
By default, Sahi Pro Classic functions are not automatically visible in Flowcharts. We need to explicitly expose them.Functions from Specific Files
If you wish to only include specific files with functions, add those.sah files to <sahipro>/userdata/scripts/flowchartsdata/<project_name>/customfunctions folder.
This is the recommended way.
Functions from All Userdata Scripts Files
If you wish to use all functions from an existing Sahi Pro scripts folder:- Go to
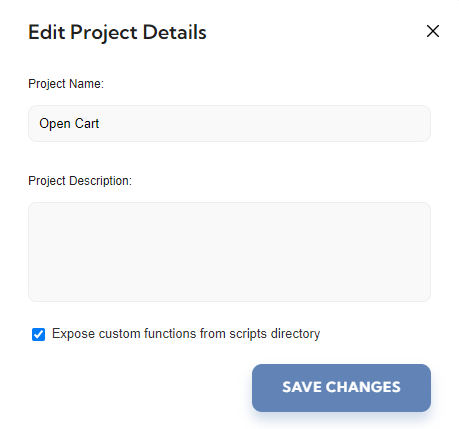
Projectspage. - Click on the triple dots on the top right of the desired project and click on
Edit Project - Check the
Expose custom functions from scripts directorycheckbox
- Save Changes
Calling Custom Sahi Functions
- Open
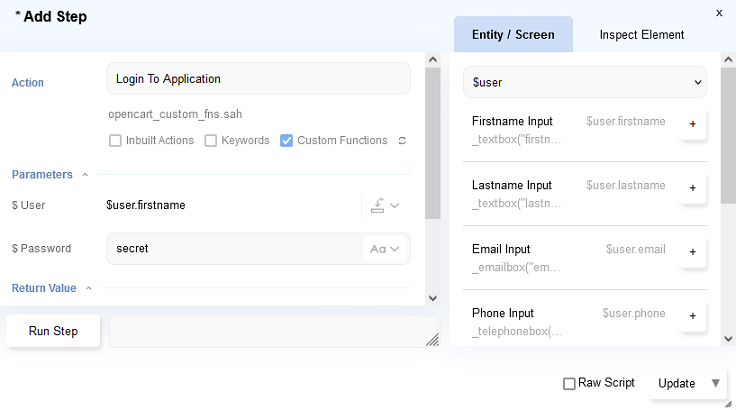
Add Stepdialog. - Keep
Custom Functionschecked. This will expose any custom functions. - Enter the custom function name in Action field with the help of autocomplete. If the function is not visible, click the
Refreshicon nearCustom Functions. - If the function takes any parameters, they will appear under
Parameterssection. - Either populate the parameter with hardcoded values, or drag and drop UI Element or Value references from the Entity Attributes on the right.

- Click
Updateto save the Step
Calling Data Driven Suites
You may wish to use Flowcharts for newer tests but want to call older existing Sahi scripts as part of a single suite/batch execution. To call existing scripts and suites inside a Flowcharts Project run:- If only a single Sahi scenario (.s.csv) or .sah file needs to be run, first put it inside a Data Driven Suite (.dd.csv) file
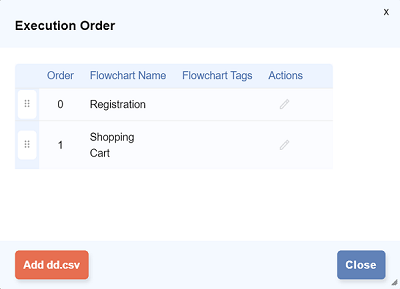
- On the Flowcharts Project page, click on the dropdown near the Run button, and click on
Execution Order
- Click on
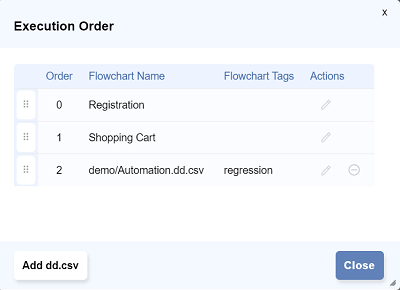
Add dd.csvbutton at the bottom left - Choose the Script Directory, the
dd.csvfile name and add any tags as needed
- Click
Save. Thedd.csvfile now appears in the Execution Order table
- If needed, drag the drag handle on the left of the
dd.csvfile to change its place in the execution order
dd.csv suites will also run.


