Override Behaviour
abstract
Automation may need to support variations in implementation based on various factors.
Branch based Behaviour Override
Use cases:- The flow may be different for different types of entities. For example a Free User vs a Paid User may have different flows for accessing some resources.
- The Application Under Test (AUT) can have different flavours of the same application. For example, country specific slight changes.
- Application behaves differently based on configuration
Eg. Branch the flow based on conditions like
$user._isPaid? or $salesforce._isClassic? or $application._isEuropean
Entity Override
Data Generator Override
Use cases:- Different data may need to be input based on some entity attribute. For example, an adult user's age has to be above 18 years to access specific content.
- Make sure that you have at least one Condition Node with
$user._isAdultin it. Eg.$user._isAdult?. - Go to Entities tab, choose the relevant Entity (
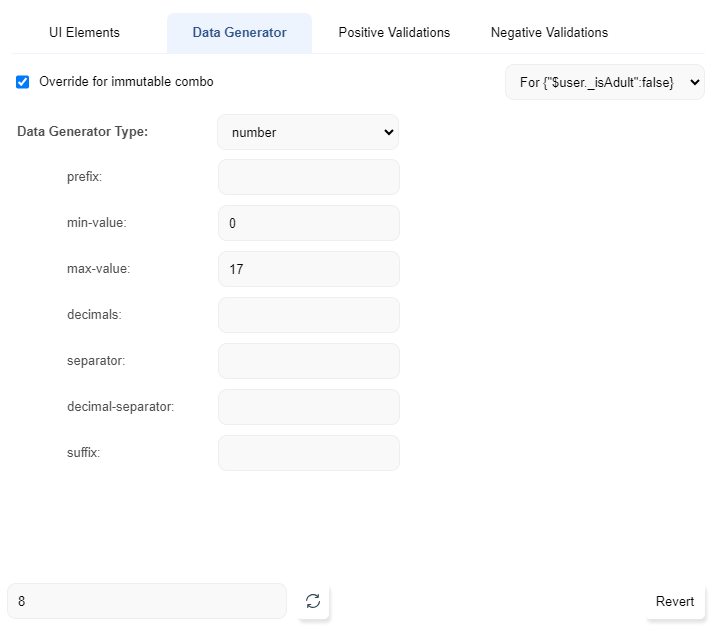
$user) and Attribute (age). Go toData Generatortab. It may look like this: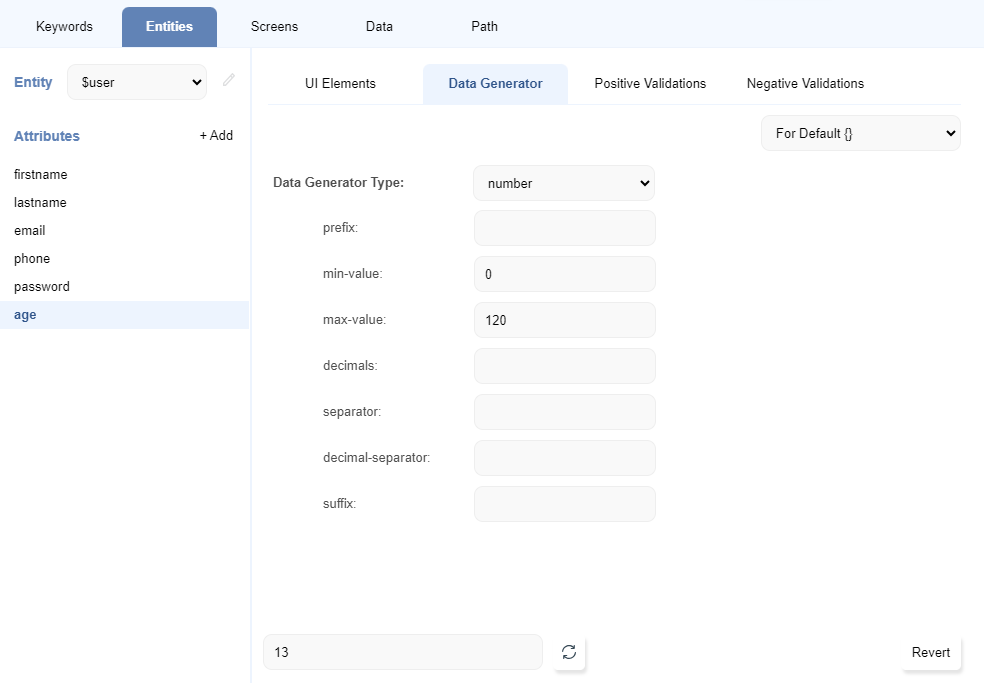
- On the top right, there is a drop-down with text
For Default {}. Click on it and click on theCreate Newoption. - In the section
Matching Path Conditionsthe condition$user._isAdult?will appear. Check the checkbox next to it. Choose valuetrue.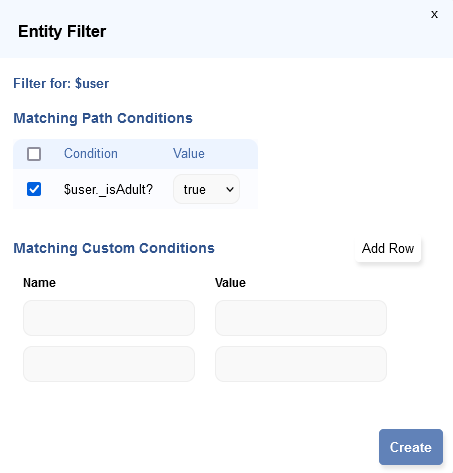
- Click
Create. All the data generator fields will still appear, but disabled - Check the
Override for immutable combocheckbox. The fields become editable. - Set the
Data Generator TypetoNumberand set themin-valueto18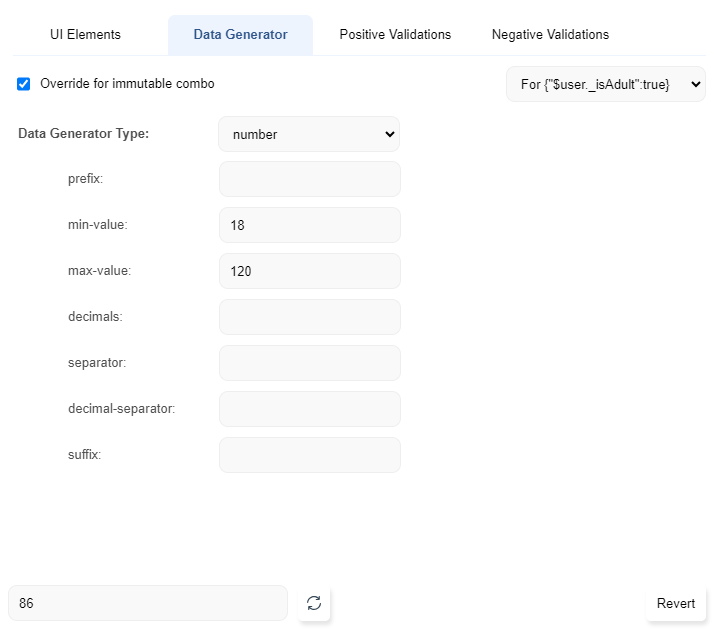
- Save the Entity
- Create another immutable combo with condition
$user._isAdult?and valuefalse. In this set themax-valueto 17.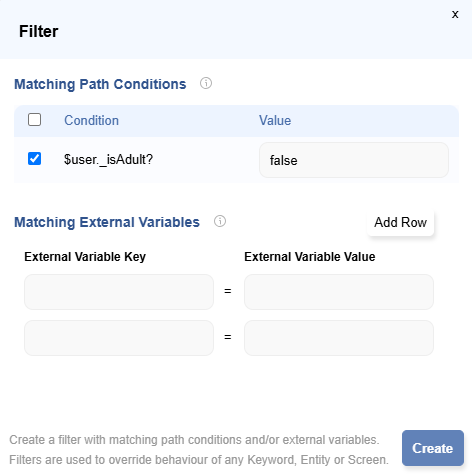
Valid Values Override
For an adult user, the valid lower boundary value would be 18. For non-adult higher boundary would be 17.- Create Entity Filters as mentioned in the Data Generator Override section.
- Go to Positive Validations tab
- Default may look like this

- Override for Adult

- Override for Adult false

Invalid Values Override
For an adult user, 17 should be an invalid value. For non-adult 18 should be an invalid value.- Create Entity Filters as mentioned in the Data Generator Override section.
- Go to Negative Validations tab
- Default may look like this

- Override for Adult

- Override for Adult false

UI Element Override
Use cases:- Application is evolving from an older UI to a newer UI and the UI Elements have changed.
- Application has iOS and Android apps and they differ slightly in the way objects are identified.
- Go to Entities tab, choose the relevant Entity ($coupon) and Attribute (discount). Go to UI Element tab.
- On the top right, there is a drop-down with text
For Default {}. Click on it and click on theCreate Newoption. - In the section
Matching Custom Conditionsadd Name:_isNewUIand Value:true
In this,_isNewUIis the custom condition andtrueis the value of that custom condition. Refer here to learn about how to pass custom condition/variable during run.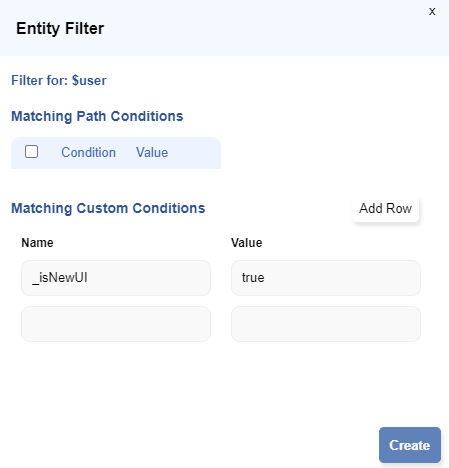
- Click
Create. All the existing UI Elements will still appear, but disabled - Click on the Override Accessor checkbox to the right of the UI Element we want to override.
The UI Element and UI Error Element become editable. - Change the UI Elements as they appear for new UI

- Save the Entity
info
For an
Entity, Filter having conditions only from that entity or custom conditions will be visible.
Screen Override
Use cases:- Application is evolving from an older UI to a newer UI and the UI Elements have changed.
- Application has iOS and Android apps, and they differ slightly in the way objects are identified.
- Go to
Screentab, choose the relevant Screen. The following is an example of the default screen UI Elements: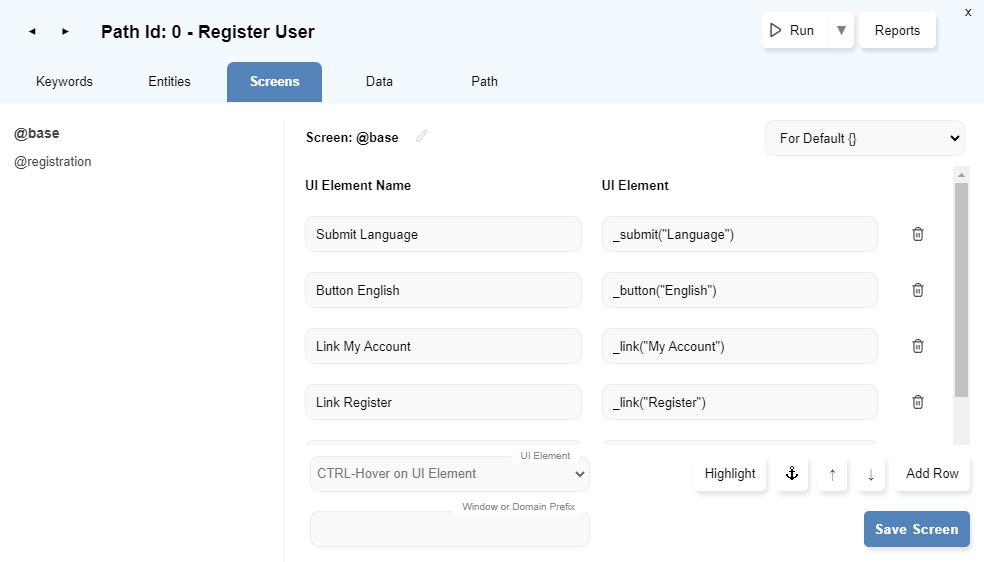
- On the top right, there is a drop-down with text
For Default {}. Click on it and click on theCreate Newoption. - In the section
Matching Custom Conditionsadd Name:_isNewUIand Value:true
In this,_isNewUIis the custom condition andtrueis the value of that custom condition. Refer here to learn about how to pass custom condition/variable during run.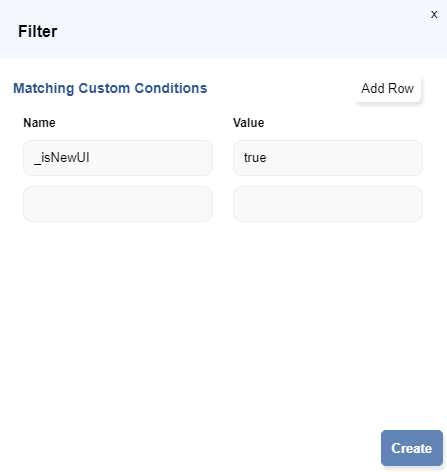
- Click
Create. All the existing UI Elements will still appear, but disabled. - Click on the Override Accessor checkbox to the right of the UI Element we want to override.
The UI Element become editable. - Change the
UI Elementsas they appear for new UI.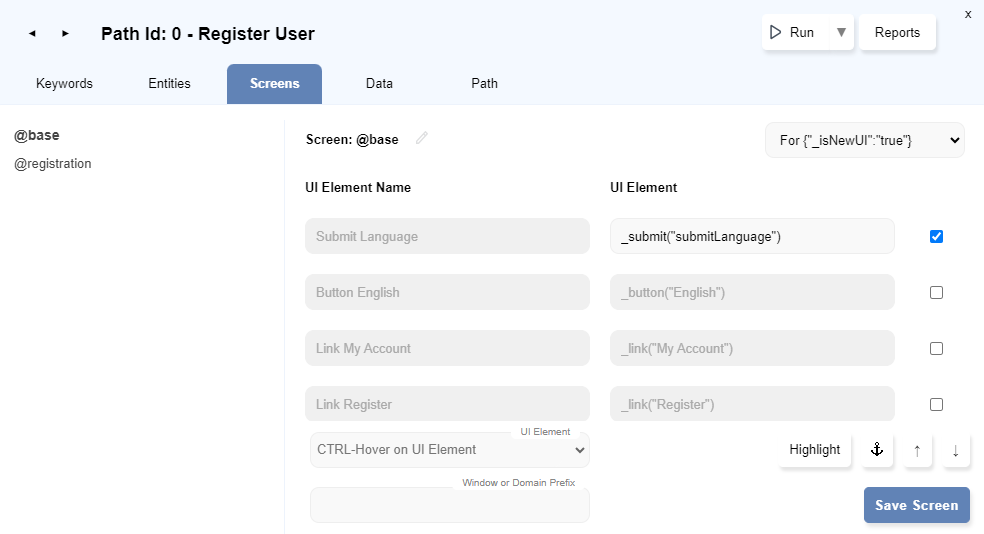
- Save the Screen
info
For
Screen, Filters with only custom conditions will be visible.
Keyword/Step Override
Use cases:- Application is evolving from an older UI to a newer UI. Actions to be performed on both these user interfaces are similar except they could differ for specific steps. Also, an entire keyword may need to be overridden for the new UI.
- Application has iOS and Android apps. Actions to be performed on both these apps are similar except they could differ for specific steps. Also, an entire keyword may need to be overridden for one of these apps.
Step Override
- To override specific step(s), go to
Keywordstab. Select the Keyword containing the step(s). The following is an example of the default Keyword steps: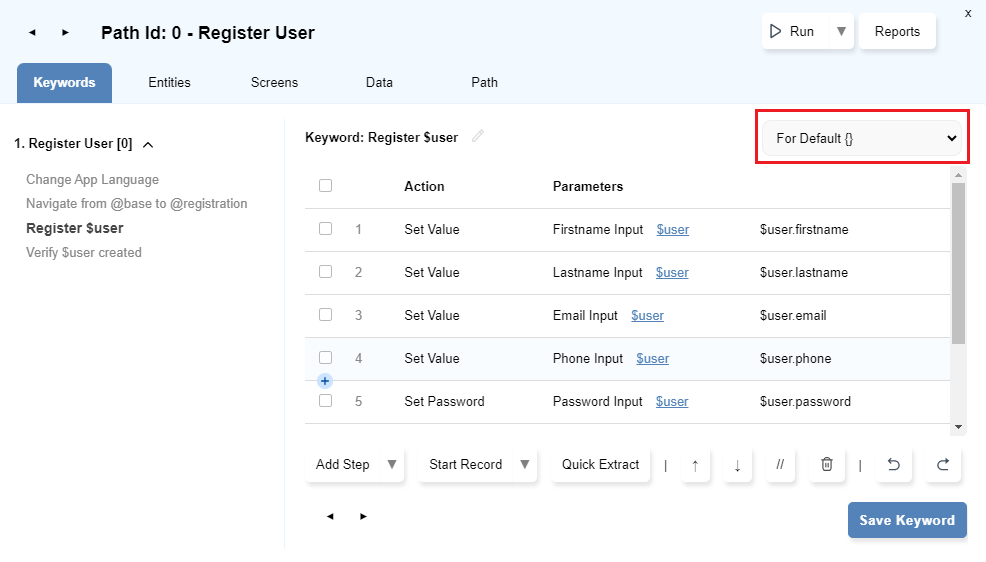
- On the top right, there is a drop-down with text
For Default {}. Click on it and click on theCreate Newoption. - In the section
Matching Custom Conditionsadd Name:_isNewUIand Value:true
In this,_isNewUIis the custom condition andtrueis the value of that custom condition. Refer here to learn about how to pass custom condition/variable during run.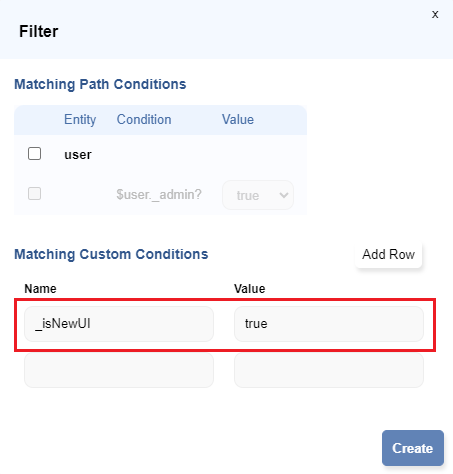 info Note: We can also select entity conditions along with custom condition for creating new Filter.
 - Click
Create. All the existing steps will still appear, but disabled. - To override a step, check the
Override Stepcheckbox at the right. This makes the step editable. - Override all such steps as required for this Filter
_isNewUI.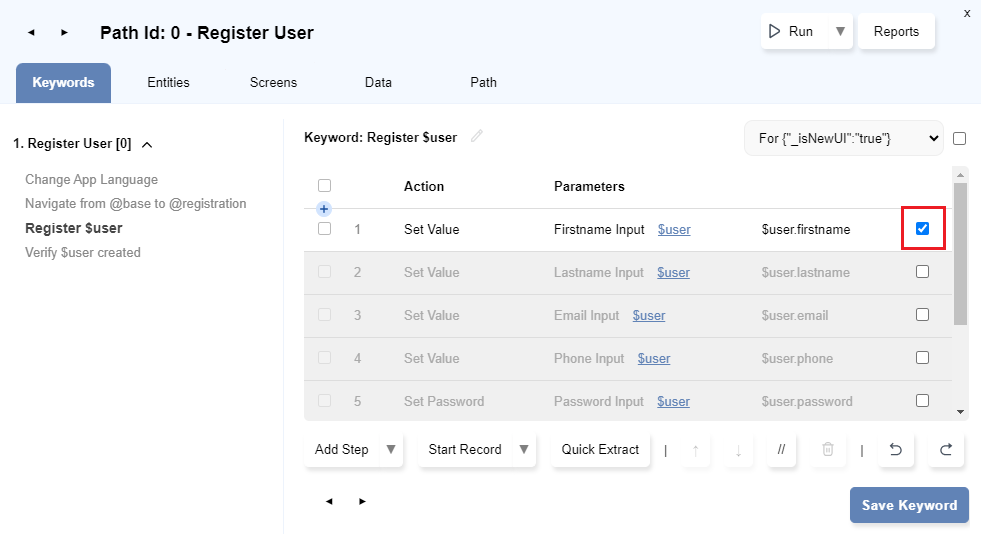
- Save the Keyword.
Keyword Override
- We can select the keyword to be overridden as a whole, i.e; all the steps can be redefined.
- Select the
Filterand check theOverride Keywordcheckbox to the right of the filter drop-down.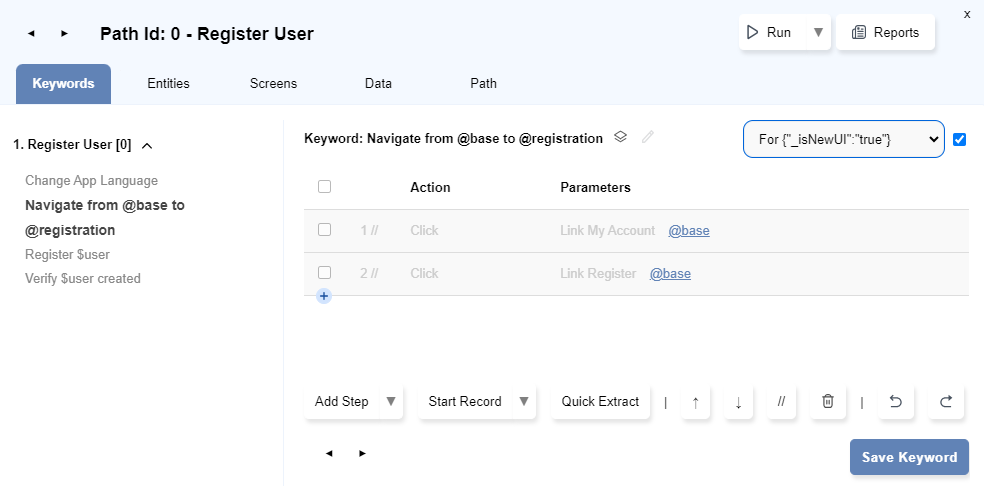
- At this stage, all the default steps are shown as commented. We can add/delete steps as per the requirement. Operations performed on steps when Keyword Override is selected will not impact the steps in default filter.
- Save the Keyword.
info
Note:
- If for a Filter,
Keyword OverrideandStep Overrideare defined then theStep Overrideswill be ignored for that Filter. - If a Filter contains only custom conditions, it will be available for all keywords. However, if a Filter contains entity condition(s), it will be available only for keywords which have that entity in their name.
Pass the condition/variable during Run
To pass external conditions or variables to a flow, you can follow these steps:- Click on the
Runbutton to open theRun Settingsdialog. Click onAdvanced Run Settings. - In the
External Variablestextbox, add your conditions/variables in the form ofkey-valuepairs.
Each line should contain only one key-value pair in the formatkey=value.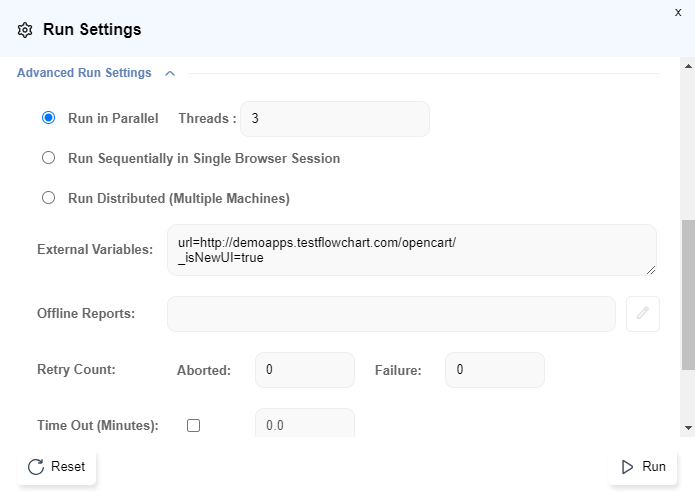
- Click
Run. Now, the new UI Element will be used during execution.


