Loop over Dataset
abstract
Datasets allow running the same path with multiple sets of data. This is useful for:
- Data setup
- Verifying against calculations
info
Verifying against calculations:
Some test cases verify the state of an application. For example, can a product be created correctly, can it be edited, can it be searched, can it be deleted etc.
In these tests, the input just needs to be valid data. It does not matter what the specific value is. This can be accomplished using Data Generators.
However, in some flows, we may need to verify a calculation that is performed on a particular attribute. For example, we may want to check if a coupon discount is applied correctly to the cart total. To test this, we will need to set up the product price (say $100) and the discount value (say 10%) to known values so that the discounted cart total ($90 here) can be verified. Since these values are on different entities it is not possible to use data generators here. We need to explicitly specify the values via datasets.
However, in some flows, we may need to verify a calculation that is performed on a particular attribute. For example, we may want to check if a coupon discount is applied correctly to the cart total. To test this, we will need to set up the product price (say $100) and the discount value (say 10%) to known values so that the discounted cart total ($90 here) can be verified. Since these values are on different entities it is not possible to use data generators here. We need to explicitly specify the values via datasets.
Create Dataset
Dataset can be created in two ways:- From
Automate Dialog - From
Node
From Automate Dialog
Let us create a simple Dataset.- Open the
Automate dialog. - Navigate to the
Datatab. - Click on the
plus iconto create new dataSet.
- Set the
Data Sourcename touser_details.csv.info TheData Sourceis where the data will be stored. Currently supports csv files.
A single Data Source can contain multiple Datasets. So all datasets pertaining to user may be clubbed into a single Data Source ofuser_details.csv.
These files reside in<sahipro>/userdata/scripts/flowchartsdata/<project_name>/datasetsfolder. - Enter a dataset identifier in the
Dataset. (If not provided, it will bedefault). - Choose the attribute from
Add Columnsdrop-down. Eg.$user.firstname, $user.lastname.infoWe need to provide values for these attributes.
For other attributes which are not specified in the dataset, data generators will be used. - Type the values for the attributes below the attribute names.
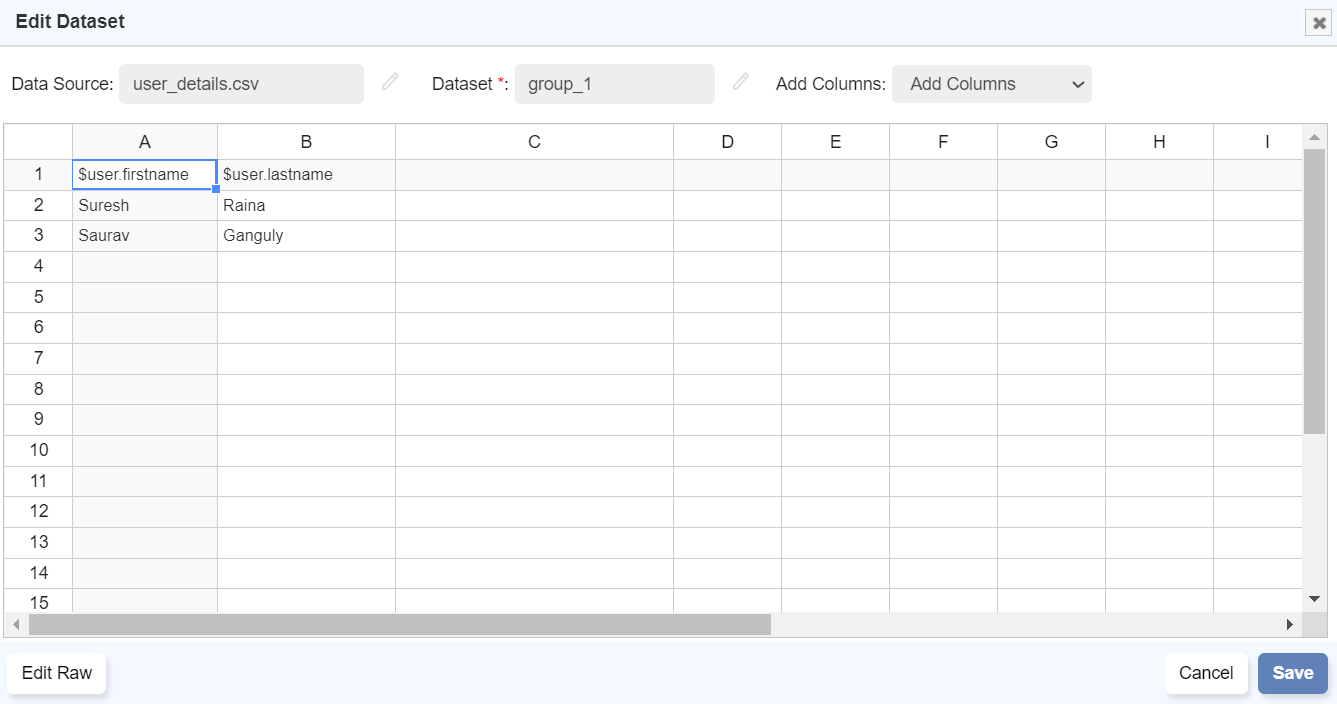
- Click on
Save.
From Node
- On the
flowchart page, right click on theNodefor which dataset needs to be created. - Click on
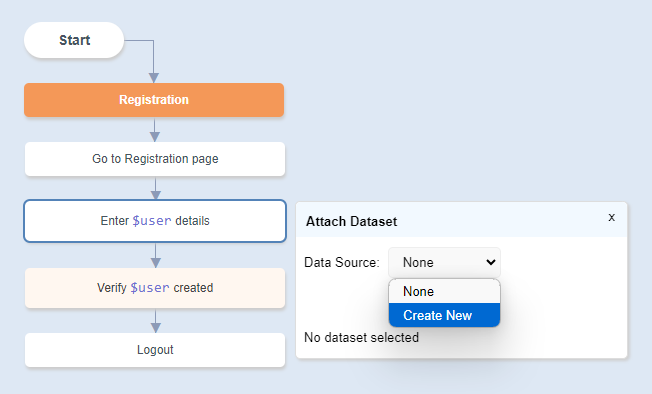
Dataset Loop. - In the
Dataset Loopdialog box, click onplusicon, to create new dataSet. - The
Edit Datasetdialog opens up. Enter the required data and save.
Password Encryption in Dataset
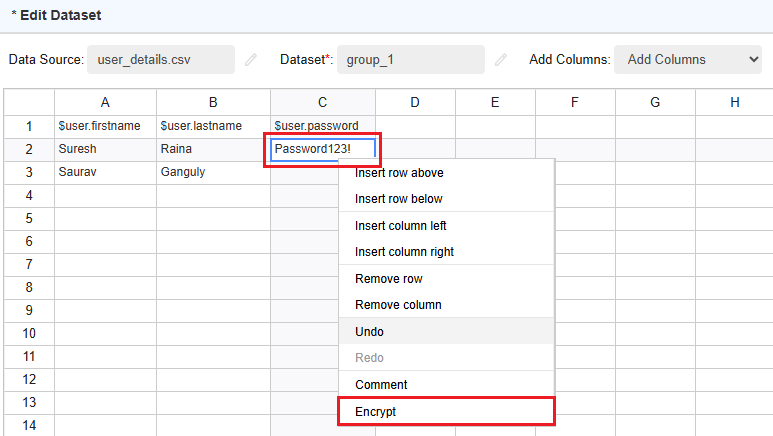
- Enter the plaintext password values in the cells beneath the corresponding attribute names.
- Right-click the desired cells and select
Encryptfrom the context menu. The plaintext password will be converted into an encrypted string.

Run Dataset
Path Level
- On the
Automatedialog, go toDatatab - Select the
Data Sourceand aDataset(group name) to associate it with the Path. - Select the dataset row to run by default when run from Automate dialog.
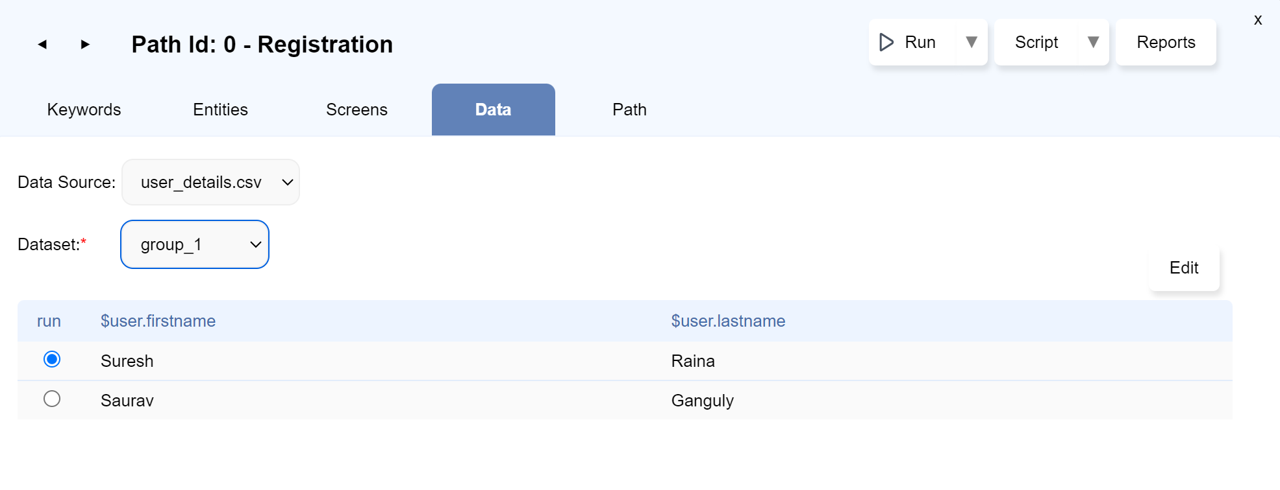
- Click on
Runbutton onAutomatedialog. - On the
Run Settingsdialog, select theRun Normal Pathand click onRunbutton. - The flow executes one time and uses the select dataset row.
View Report
- Open the report by clicking on the
Reportsbutton/option either from theAutomatedialog or from the flowcharts page. - The detailed report shows the execution with the used dataset row details.

Flowchart level/Project Level
- Click on
Runbutton on the flowchart page or the project page. - On the
Run Settingsdialog, select theRun Normal Pathand click onRunbutton. - The flow will be run multiple times to exercise each row of the dataset. For each row in the dataset, an individual target website browser will open and the steps will be carried out.
View Report
- Open the report by clicking on the
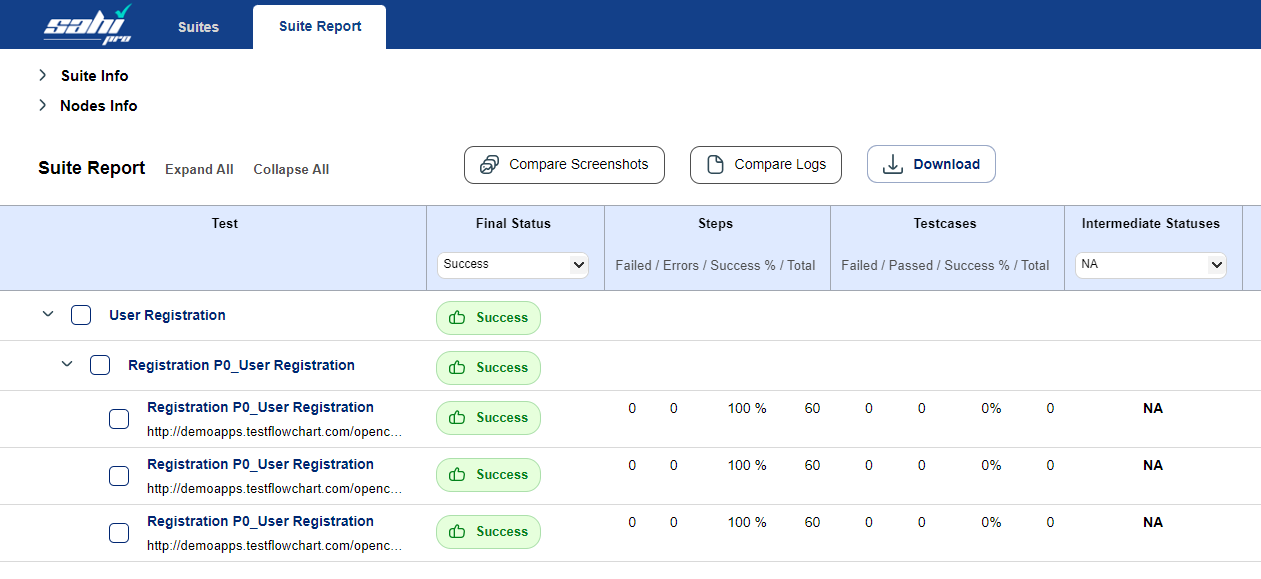
Reportsbutton/option. - The detailed report shows the multiple path execution with the used dataset row details.
Node level
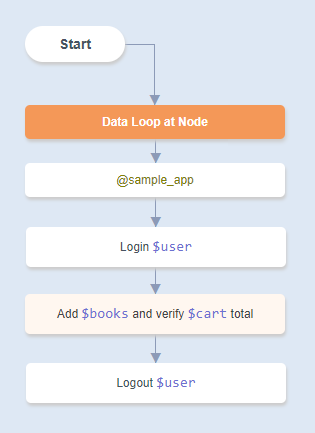
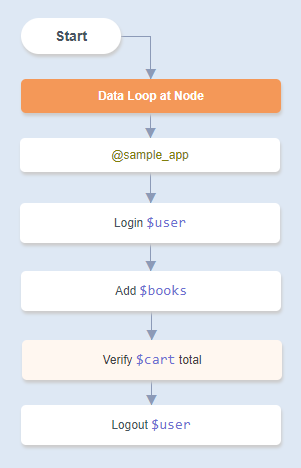
- Lets take another example where the flowchart verifies the cart total for books purchase.
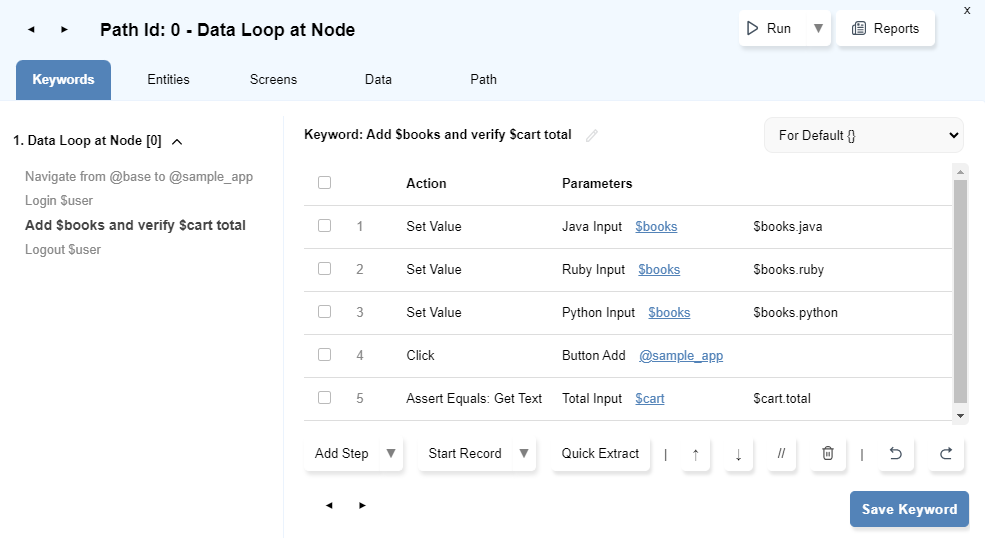
- The
Add $booksandVerify $cart totalkeyword will be automated and extracted as follows:
- Click on
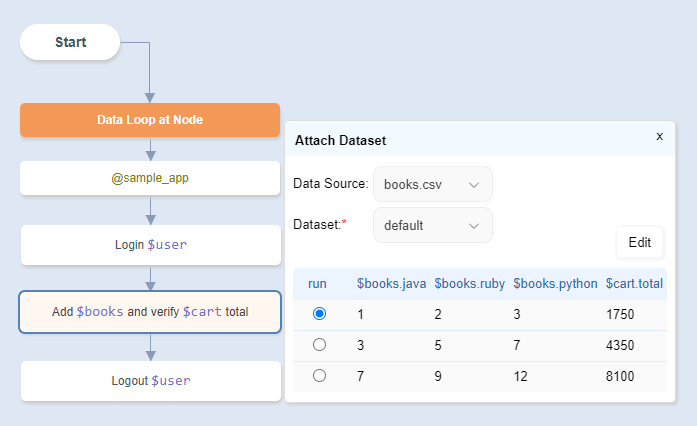
Add $booksandVerify $cart totalnode and chooseDataset Loopfrom the menu. - Choose the Data Source and Dataset or Create a new one.
- Data source and dataset may be set from a variable as well.
- The keyword in the Node will be run in a loop over all rows of the dataset.
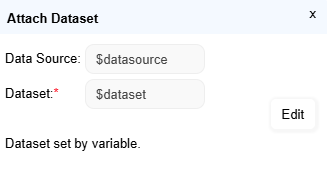
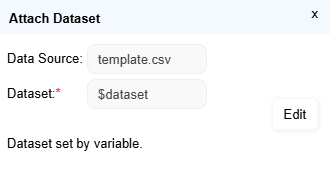
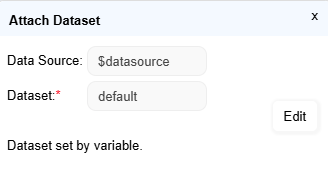
View Report
- Open the report by clicking on the
Reportsbutton/option. - The detailed report shows the multiple path execution with the used dataset row details. The keyword
Add $booksandVerify $cart totalhas executed thrice.
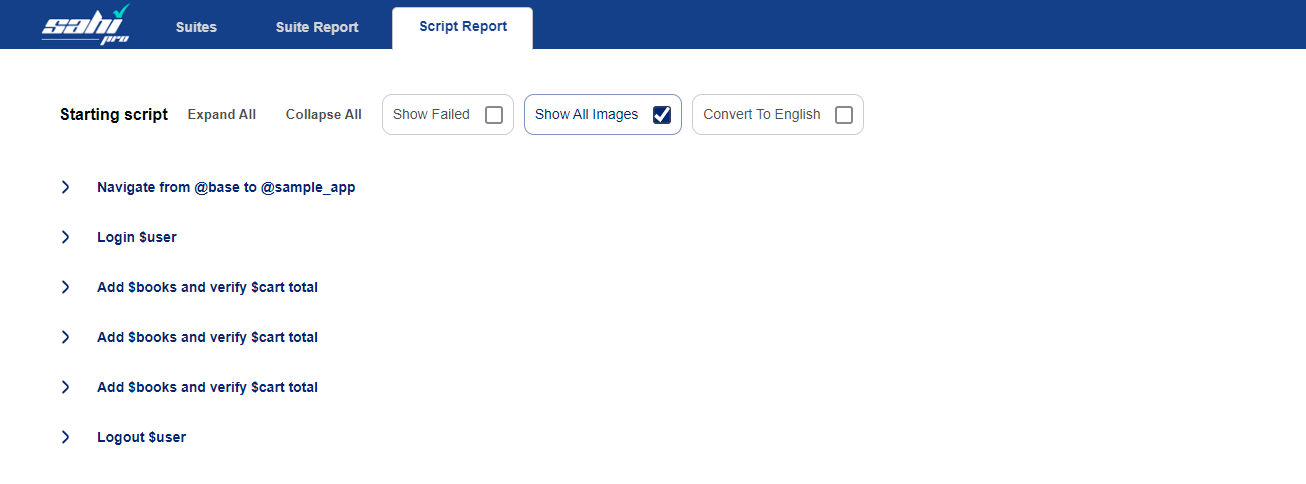
Dataset Loop Boundary
The start and end boundaries can be defined for the dataset attached to a node.The Keywords in the Nodes inside the start and end boundaries will be run in a loop over all rows of the dataset.
- Lets take the above example but split the keyword
Add $booksandVerify $cart totalinto two nodes.- The
Add $booksandVerify $cart totalkeywords will be automated and extracted individually as follows:
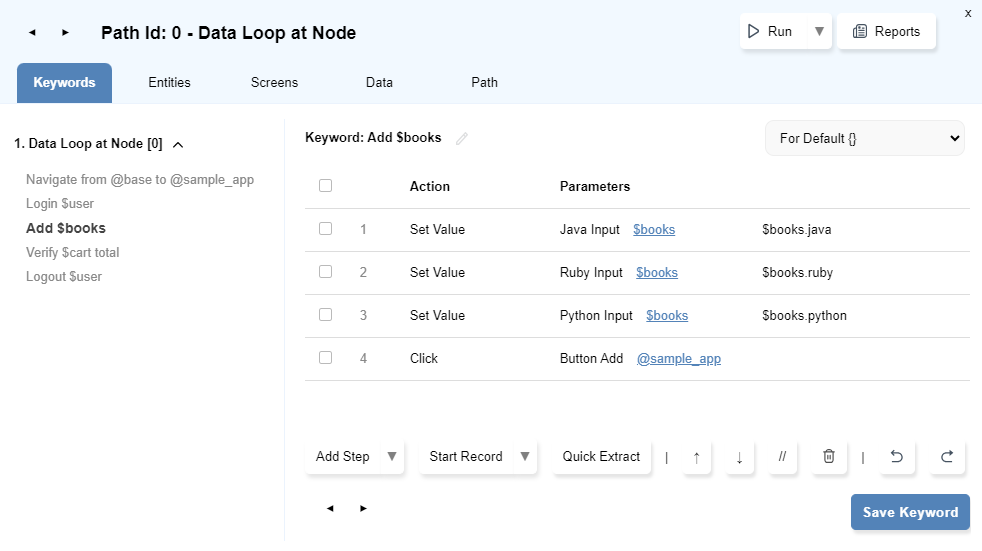
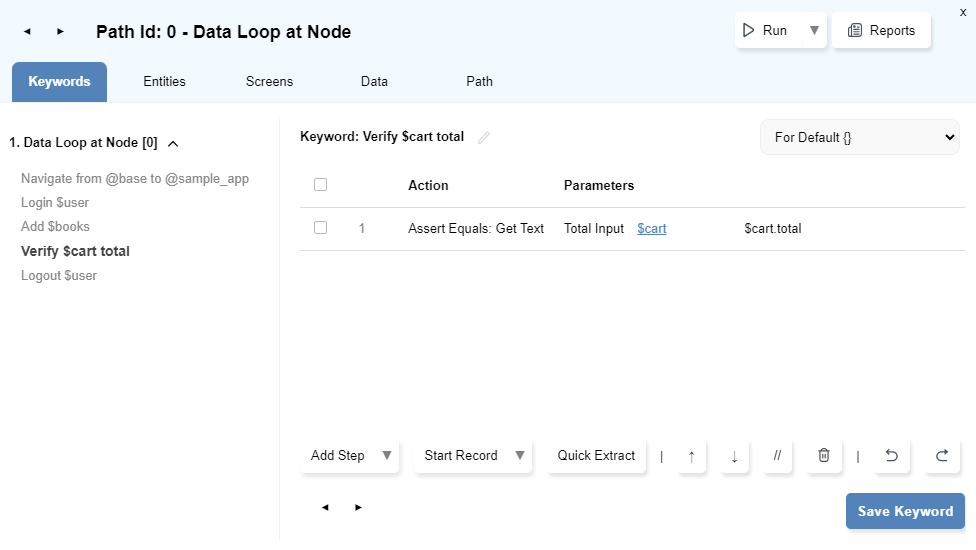
- Select
Add $booksnode andVerify $cart totalnode and chooseDataset Loopfrom the menu to attach the datasetbooks.csvwith the node. - Since two nodes are selected,
Add $booksnode act as starting point of the dataset loop andVerify $cart totalnode act as ending point of the dataset loop.
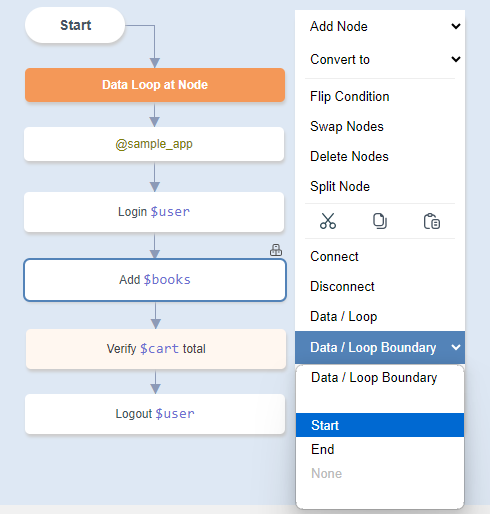
- When executed, the whole flow will be executed once but within that flow the set of nodes within the data loop boundary will be executed multiple times to exercise each row of the dataset.
View Report
- Open the report by clicking on the
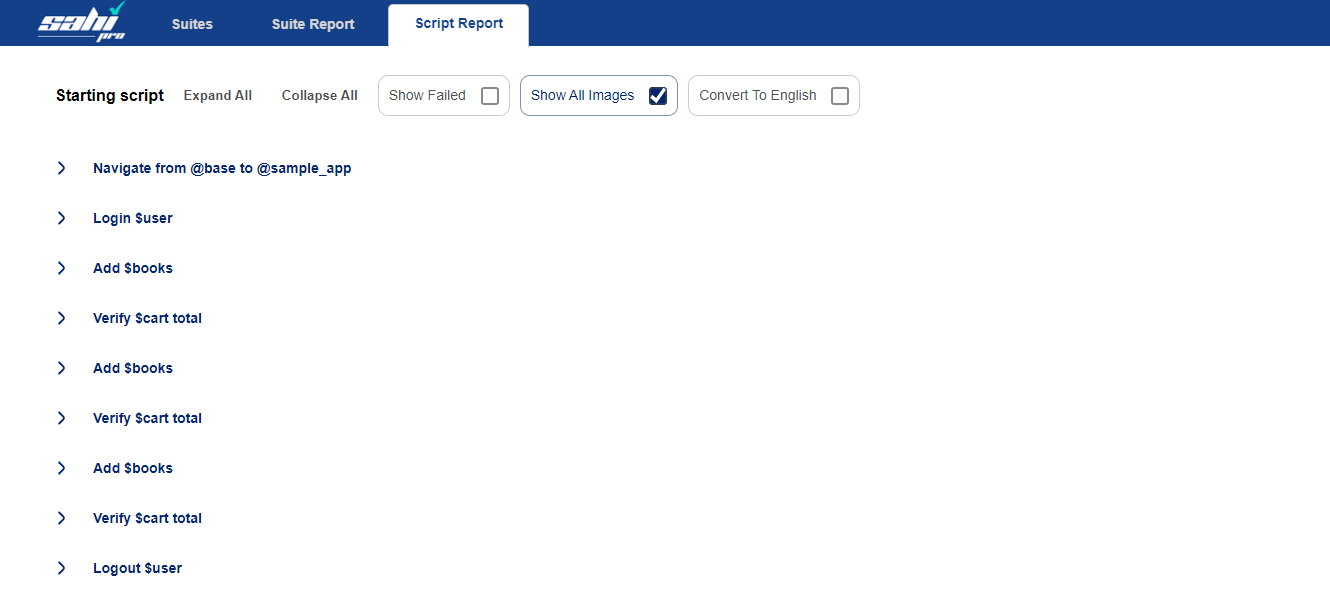
Reportsbutton/option. - The detailed report shows the path execution with the used dataset row details. The keywords
Add $booksandVerify $cart totalboth have executed three times.
 info Note:
- The selected row from a dataset will execute only in cases of Path run, Run Till Here and Run This.
- Flowchart level run and Project level run will use all the rows of the dataset irresepective of the selection of rows.
Data/LoopandData/Loop Boundaryoptions will use all the rows of the dataset.- Flowchart level or Project level run will run the whole flow multiple time to exercise each row of the dataset. For each run, a new browser will open.
- You can change the dataset or click
Editto edit the dataset.
Environment based Datasets
Datasets can be overridden to use different data in different environments.
For example, to use different data for default, QA and production environments.
- Create a new dataset as shown here.
- Open the Edit Dataset dialog.

-
To create new environment, click on the drop-down near
Envand selectAdd New.
- Enter the
env namein the prompt. - This will clear the
Edit Datasetdialog and a new folder with givenenv namewill be created underdatasetsfolder of the project.
- Enter the required data and save.
-
To create new environment, click on the drop-down near
-
To set the environment of execution, set
sahi_envvariable inExternal Variablesunder Advanced Run Settings section ofRun Settingsdialog before running.
Data will be picked from data file of given environment instead of the default dataset.
info Note:- A dataset must exist in the default environment before it can be overridden in other environments.
- If the given environment does not have a dataset, data is picked up from the default dataset.
- The


