


Windows Desktop Automation
abstract
This section details how to test Windows Desktop Applications.
If you are not familiar with Sahi Pro Flowcharts, see Introduction to Sahi Pro Flowcharts
To automate windows desktop applications using Sahi Pro Classic, refer Windows Desktop Automation.
Start Windows Desktop Automation
- Start Sahi Dashboard
- Click
Processeslink on Sahi Pro Dashbord. Ensure thatWindows Automationis turned on. "Sahi windows agent started!" message appears on Sahi Pro console.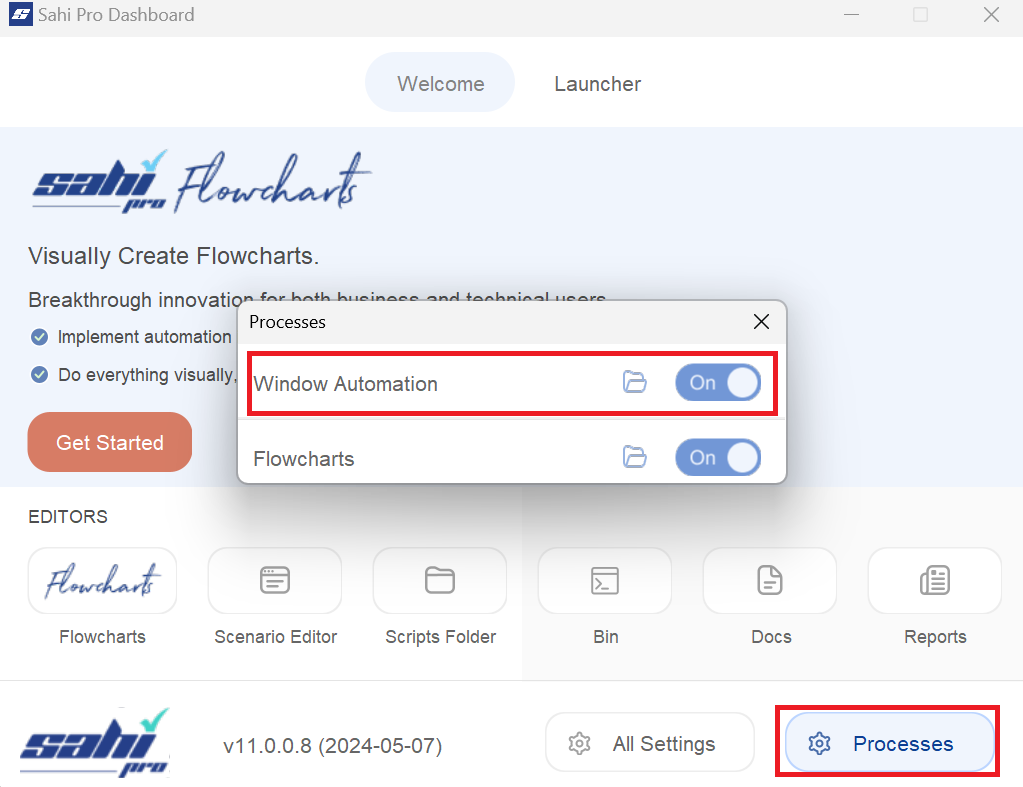
Using the Controller
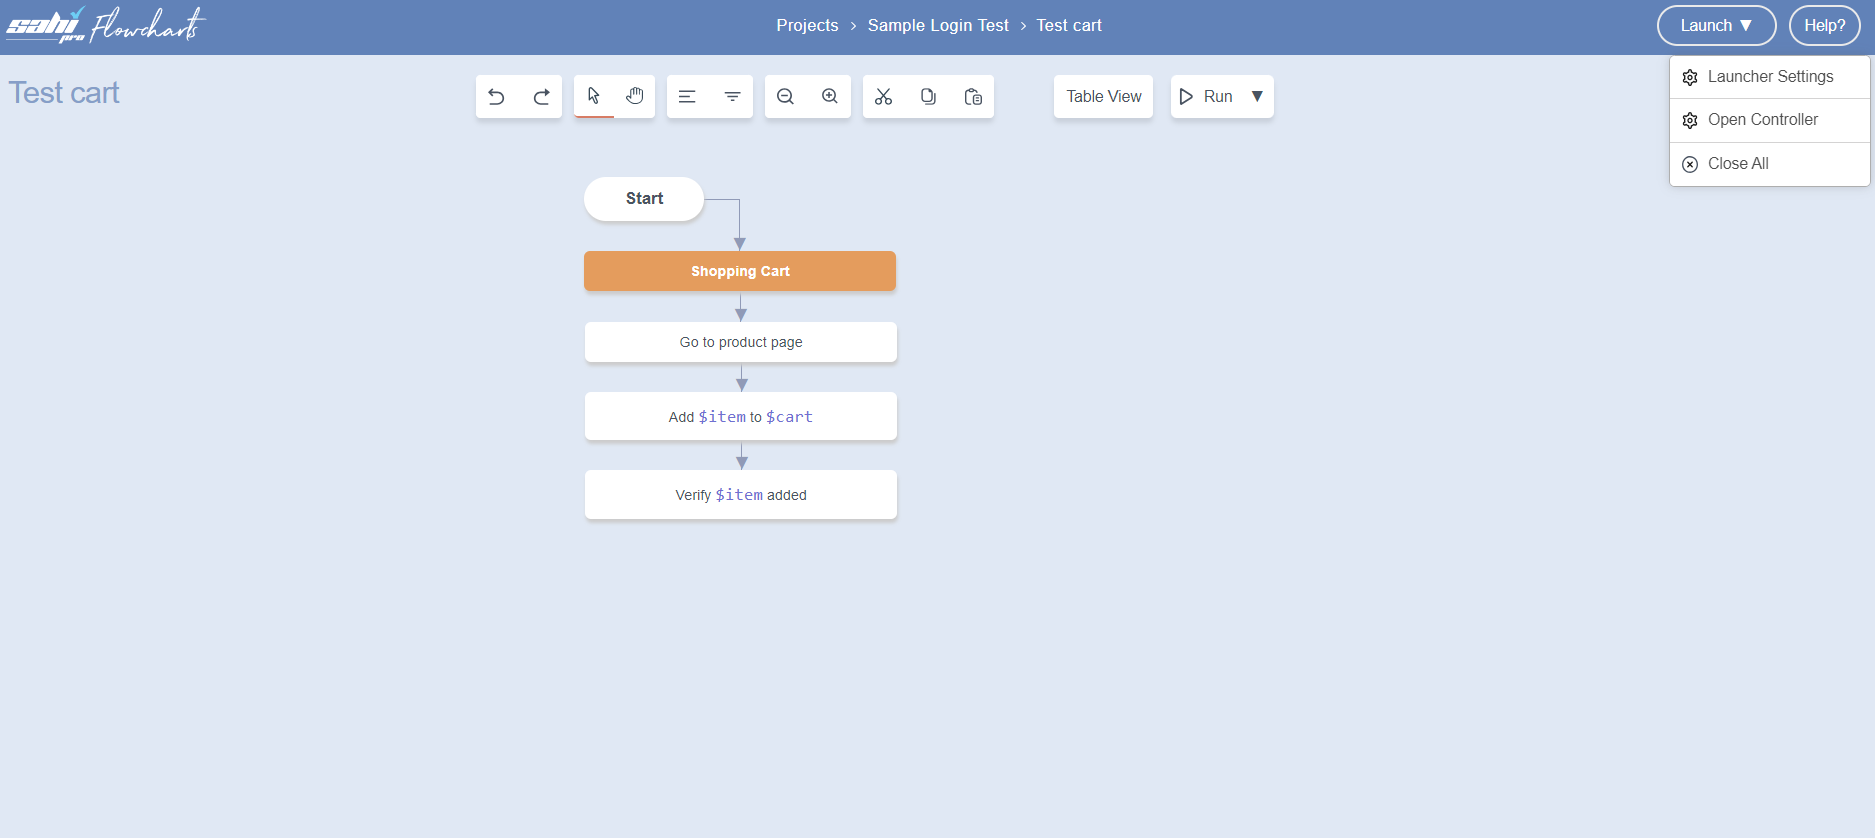
- First we need to create a Flowchart. If you are not familiar with creating a flowcharts, see Create a Flowchart
- To launch Flowcharts Controller, visit the Flowcharts window. Click on the dropdown arrow next to Launch and then select
Open Controller. - Click on any node of the flowchart and select
Automate. - From the Automate dialog, click on the window icon
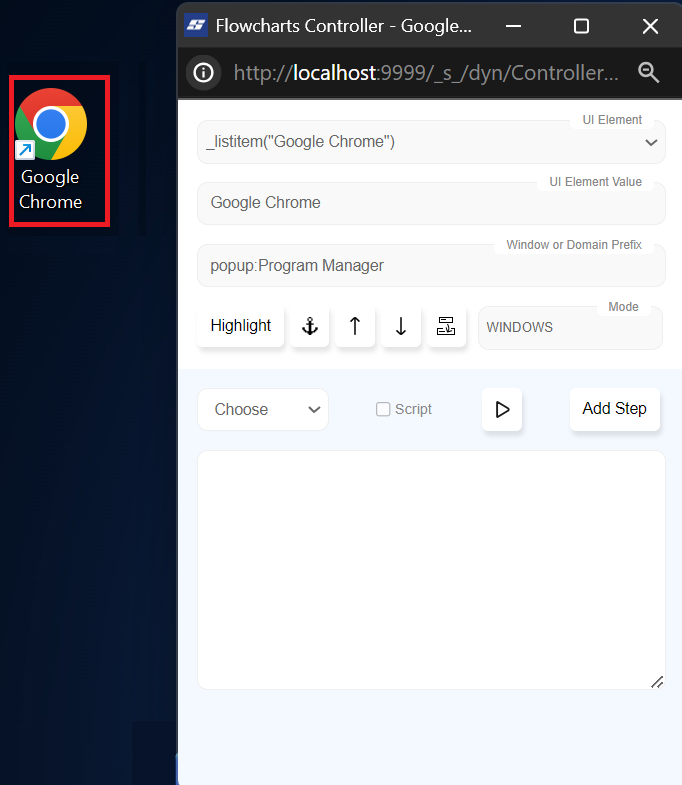
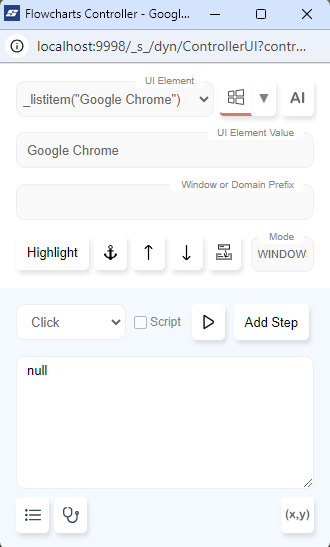
 The Controller can be used to interact with the desktop application. You can Identify, Click, Set, Assert, choose Other Actions on the Windows Desktop application.
Element Identification
- Launch the Flowcharts Controller and click on any node of the flowchart and select
Automate. - In the Automate dialog, click on the Windows button. This enables the identification for Windows automation.
- To identify an element, press the CTRL key, hover over any element and release the CTRL key.
infoThe accessors will not be populated till CTRL key is released. This is an optimization to stop Sahi from unwanted processing.
info
- Ensure that
Window Automationis on from the Sahi Pro Dashboard's 'Processes' settings. Also, identification for Windows automation must be enabled by clicking on the Windows button in the Automate dialog. - If during identification, Sahi Pro Flowcharts is identifying background elements, then go to display setting of PC and change
Change the size of text, apps and other itemsto 100% (Recommended). - For SilverLight, XBAP (i.e browser based desktop applications) during identification, if Sahi Pro Flowcharts is not identifying some boundary elements, then maximize the browser.
Restricted Identification/Recording
- To automate a Windows application, you would start recording actions on the application. However, Windows automation allows you to automate on the entire system screen. Thus, actions performed on other applications, Taskbar, Windows Start Menu, etc. also get recorded. To ignore such actions, restrict recording and identification to a specific application process, follow below steps:
- In the Automate dialog, expand the dropdown for the Windows button. It lists the processes that are running in the system. Hovering over a process name will display all the window titles it encompases. Select the process name to restrict the Windows automation.
- Note that the provision to add this restriction is also available in the
Flowcharts Controller.


Automating a Keyword
This is similar to automating a Sahi Pro Flowcharts keyword for normal browser testing.WINDOWS mode, Window icon at the top left of the Automate dialog must be clicked during identification or automation and click on Start Record button. Actions done on the Windows Desktop application are recorded automatically.
-
A. You can use Click, Set, Assert, choose 'Other Actions' to perform an action on the Windows Desktop Application.
B. You will need to record these steps explicitly by clicking on 'Add Step'.
info
- Ensure that
Window Automationis on from the Sahi Pro Dashboard's 'Processes' settings. Also, identification for Windows automation must be enabled by clicking on the Windows button in the Automate dialog. - Cursor Feedback:
 During recording, mouse cursor turns to Arrow with Red dot until the step is recorded.
 - Refer Record a steps for a better understanding.
Playback
- On the
Automatedialog click onRunbutton.
- The
Run Settingsdialog opens. Select the Mode Windows if we did not mentioned in the scipt and click RUN.
View Report
- Click on the
Reportsbutton..
- The Report opens in a new browser tab.

infoNote: A script cannot be played back if
Window Automation is not enabled from the Processes setting on Sahi Pro Dashboard.infoRefer Run Flowchart for a better understanding.
Scripting Notes
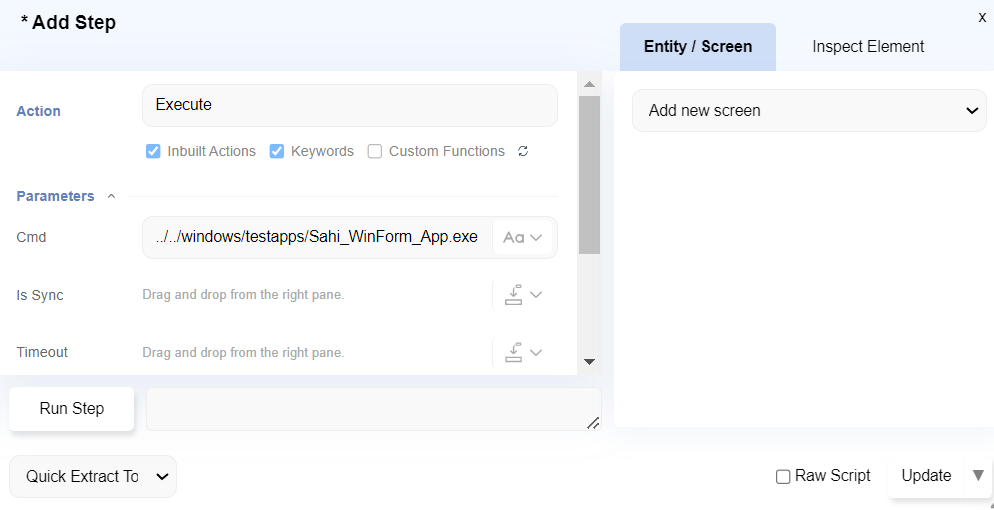
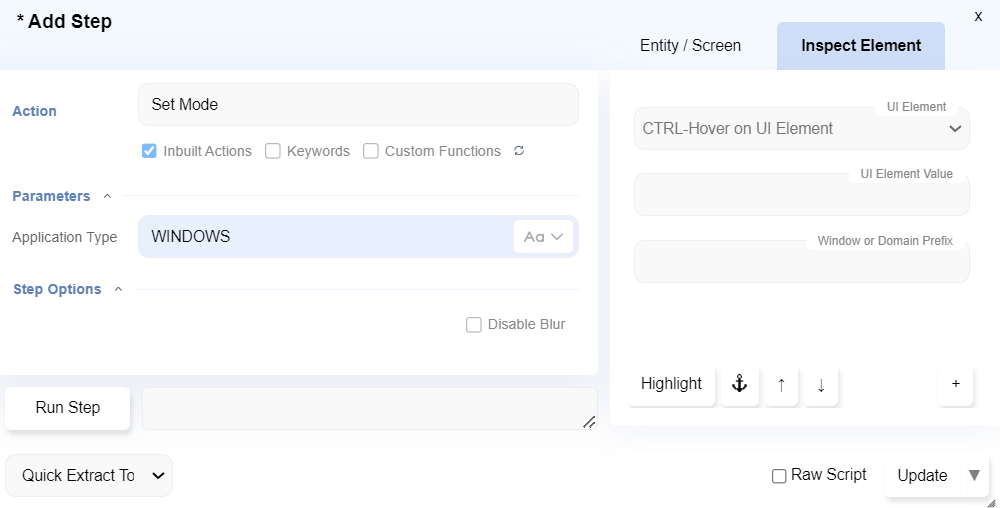
-
To start a Windows application from flow, use
Executeinbuilt action. - All code interactions with Windows will need to be preceded by
Set Modeinbuilt action and Application Type asWINDOWS.
Additional Configurations
- Execute Faster by Ignoring Hidden and Disabled Elements
- While searching for an element during Playback, Sahi internally iterates through all the elements on the application screen. At times, this iteration may be slower for few screens in your application. This iteration can be made faster by adding below properties to the userdata.properties file as applicable.
// Add below property to ignore hidden elements in your application
sahi.desktop_automation.windows_automation.ignore_hidden_elements=true

// Add below property to ignore disabled elements in your application
sahi.desktop_automation.windows_automation.ignore_disabled_elements=true- In some applications, inner elements may not be identified from the Sahi Controller. Lets say a pane element contains child elements like textbox, button, etc and the child elements are not getting identified from Sahi Controller. To fix this, find the entry for the parent element type in
<Sahi_Installation>\config\accessor_metadata\mswindows.jsonfile. Add a new key "deepSearchAlgo" with value as "child" in this entry for the parent element type.
For example, the key "deepSearchAlgo" can be added for a pane element as shown below.
{"type": "pane", "name":"_pane", "id":"50033", "deepSearchAlgo":"child", "attributes": ["name", "automationId", "helpText", "className", "index"], "action": "setValue", "value" : "transform", "assertType":"TEXT", "since": ["NA", "NA", "NA", "7.0.0"]}