Negative Validations
abstract
Applications should correctly reject invalid data and show meaningful error messages.
Negative Validations are test flows that input such invalid data and verify the error messages.
info
Form fields that take user input can be restricted or free-form.
- Restricted fields are radio buttons, checkboxes, select boxes etc. where only valid values can be chosen.
- Free-form form fields are textboxes, textareas etc. Validations are normally needed on such fields because the user may input incorrect values.
Examples:- First Name which should be between 1 and 32 characters: Should not accept 0 character or >32 character long strings
- Email field: Should not accept invalid emails like
abc@examplecomorabc.example.com
info
Note that there are 3 aspects to a negative validation:
- The input value should be rejected
- An appropriate and meaningful error message should be shown
- The error message should appear at the right place
- The UI Element to input the value into
- The Input Value
- The Error Message
- The UI Error Element - placeholder where the error value is shown
goal
Using Negative Validations feature, define and run a test flow with various invalid data and check that the application rejects them with the correct error message .
Discover Values for Negative Validations
The values we need to check for Negative Validations can be derived from various sources:- Requirement documents
- Standardized documents like RFCs etc.
- Validation error messages
- Prior experience / common sense
Navigate to the registration page manually and click on Submit without entering any value.
The following error messages are seen:
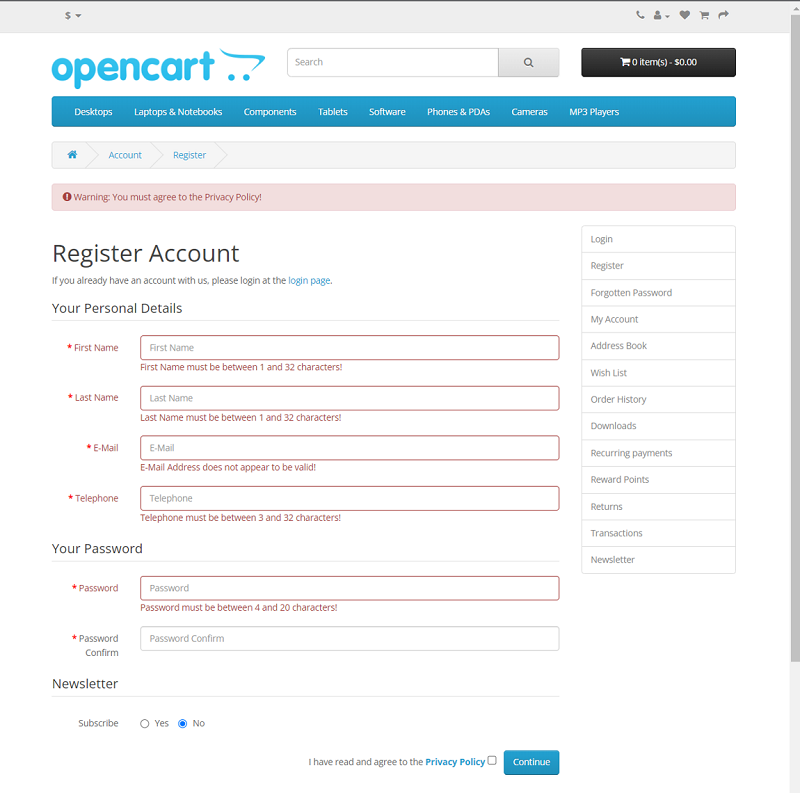 This suggests that we could check for blank name and names with more than 32 characters for First Name.
Add Negative Validations
- Navigate to Automate → Entities → Select Entity
$user→ Select Attributefirstname - Choose
Negative Validationstab - Add values to check for under
Input Valuecolumn. Let us check for an empty value. Leave the Input Value empty. - Add the
Error Messagethat should be visible on the UI.- You can either copy paste this from the application UI or from documentation
- If you want to get it from the UI, you can
Ctrl + Mouse Hoveron the error message on the UI. The message will appear in the text box at the left bottom. You can copy paste from there.
- We can add a comment about the value for further clarity. Eg. "Should not be blank".
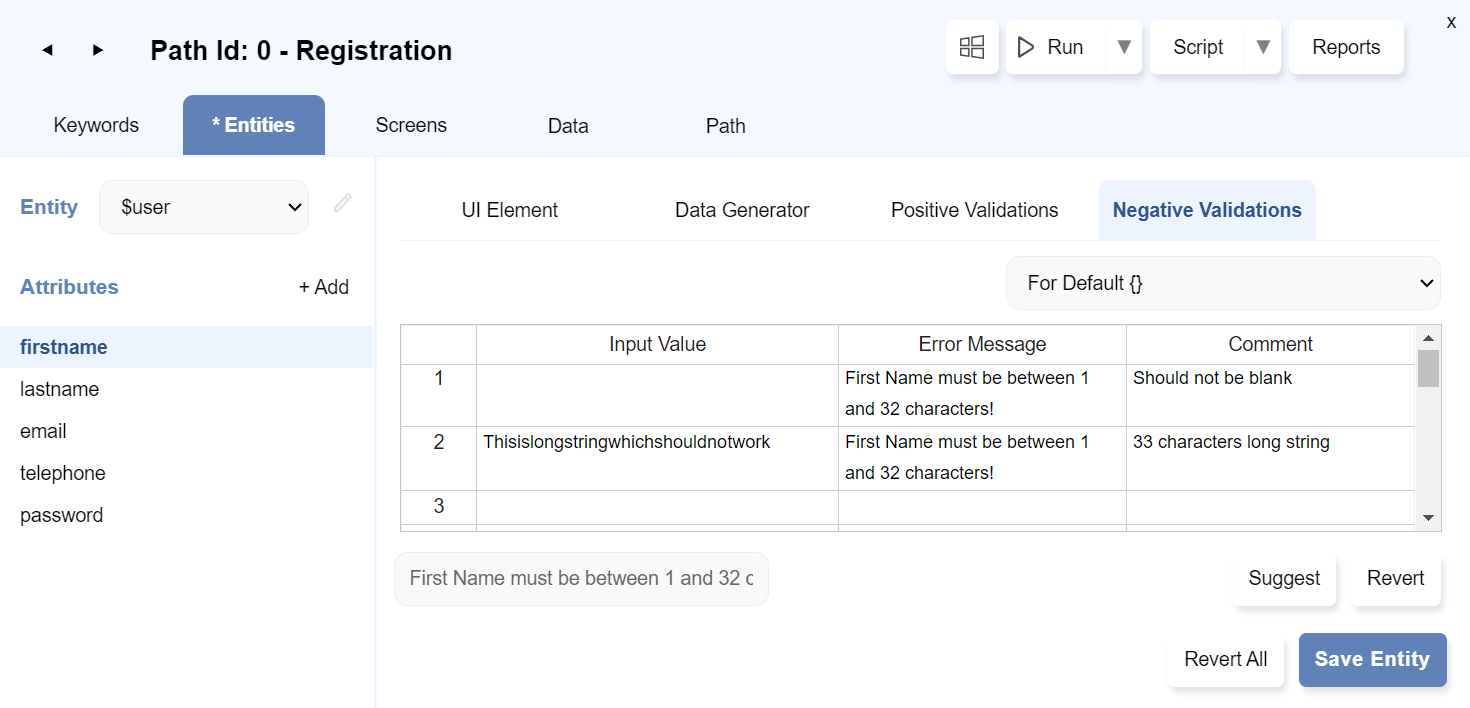
- Add one more row for a character string with >32 characters
Thisislongstringwhichshouldnotwork, as shown in the image - Click
Save Entityto save
Set UI Element and UI Error Element
As mentioned above, we will also need to know the UI Element where the input will be made, and the UI Error Element where the error message will appear.- Navigate to the
UI Elementsub-tab - It should already be populated with UI Element for First Name Input
If not already populated, go to the application andCtrl + Mouse Hoveron the First Name textbox.
The UI Element textbox at the bottom will get populated. Drag the value onto the UI Element column. - For
UI Error Element, we willCtrl + Mouse Hoverover the error message. We notice that the identifiers are either using the error text itself or are using a generic css classname.
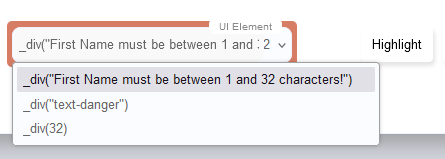 Let us use the anchor button to get a better identifier.
- Navigate to the Opencart window,
Ctrl + Mouse Hoveron LabelFirst Name. A red outline highlights the label and it appears in the UI Element box. - Click on the
Anchorbutton.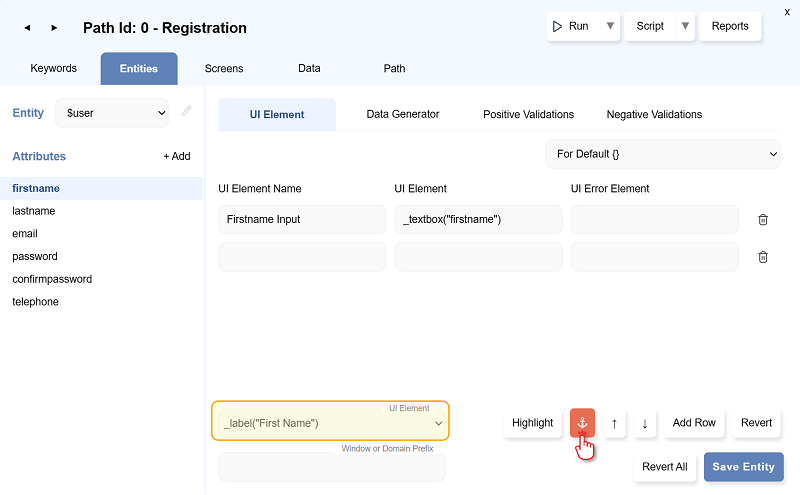 The
The Anchorbutton gets an orange line at the bottom to show that it is on. - Navigate to the Opencart window,
Ctrl + Mouse Hoveron the error message for theFirst Name.
A red outline highlights the error message and it gets added to the UI Element box. - Click on the drop-down arrow next to the UI Element box. It shows the various identifiers.
Notice that the identifiers use_near(_label("First Name"))to show that we are identifying the error message box relative to the First Name label.
Using _near, _in, _under etc. makes the identifiers more resilient to changes in the application UI. - Select the option
_div("text-danger", _near(_label("First Name")))
- Drag the UI Element box and drop to the UI Error Element.

- Click the Anchor button again to turn of relative identification.
- Navigate to the Opencart window,
UI Element and UI Error Element
Using Suggestions
For some types of values, Flowcharts can suggest possible invalid values to check for.For example, an email is of a standard format no matter what the application is.
So Flowcharts provides suggestions for such standard data types.
Let us add Negative validations for
$user.email.
- Navigate to Automate → Entities → Select Entity
$user→ Select Attributeemail - Choose
Negative Validationstab - Click on Suggest button.
- Select datatype
email - A long of list of values are shown with comments. For now, select the first two suggestions.
- Click on Add button.
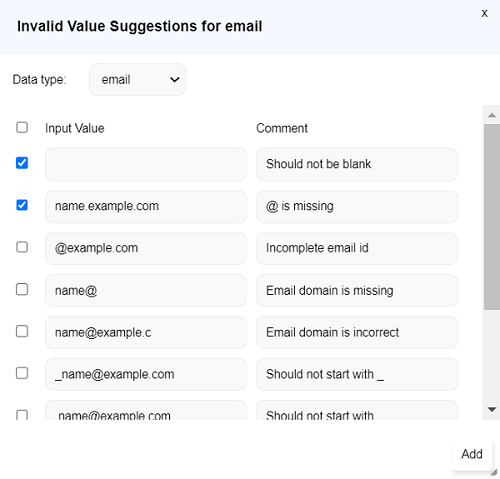 These values get added to Negative Validations.
- Identify the error message from Opencart window with
Ctrl + Mouse Hovermethod. - Copy the identified error message and paste into the Error message column for both the rows.
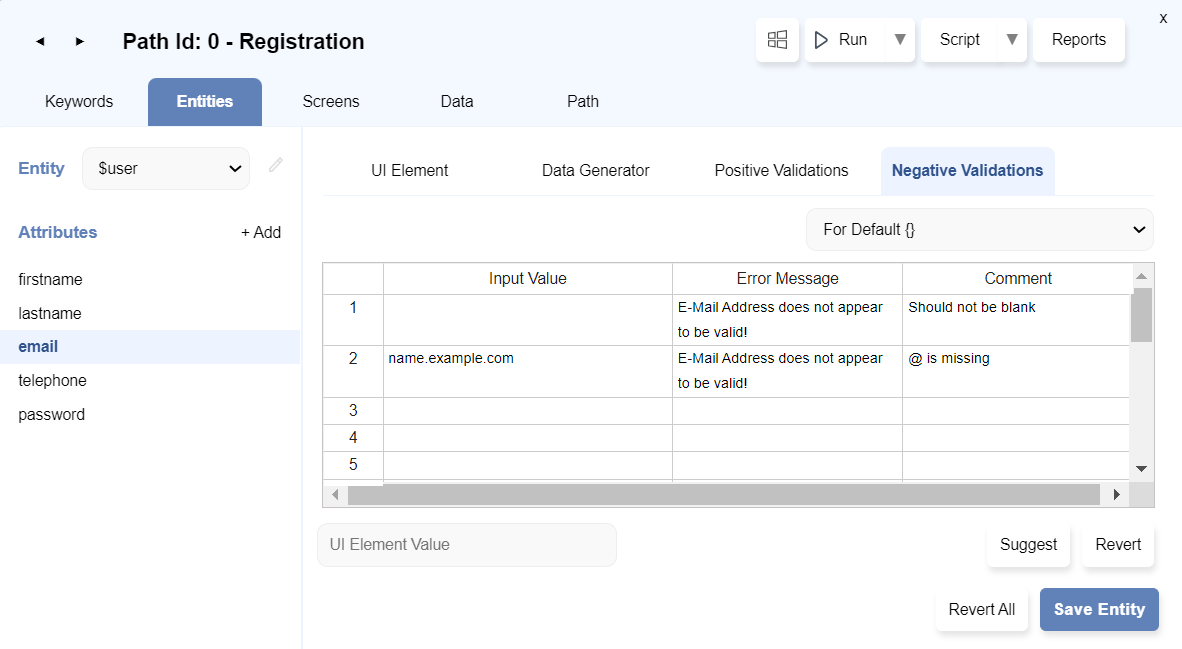
- Make sure to also add UI Element:
_emailbox("email")and UI Error Element:_div("text-danger", _near(_label("E-Mail")))foremail
- Click
Save Entityto save
Run the Negative Validations
- Check for the path settings:
Click onpathtab and select the checkbox forEnable Validations.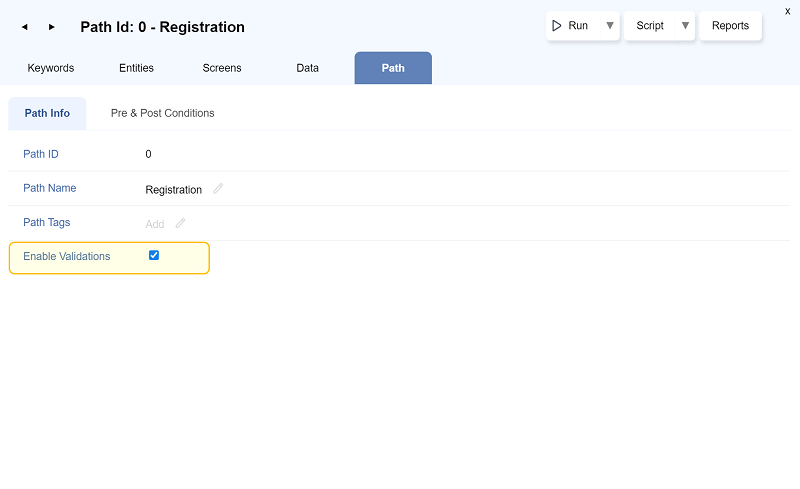
- Click on the
Runbutton.
Run Settingsdialog opens. Select the checkboxRun Negative validationsonly and deselect others.- Click on
Runbutton.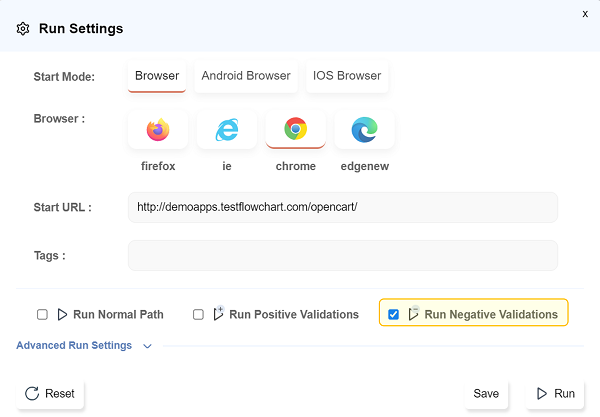
View Report for Negative Validations
Follow the steps to check the Report after running/executing the Negative validations :- Click on the
Reportsbutton.
- The
Reportwindow will open in a new tab. - Click on
Registration P0 NEGATIVE VALIDATION.
- Suit Report tab opens. Click on
Registration P0 NEGATIVE VALIDATION.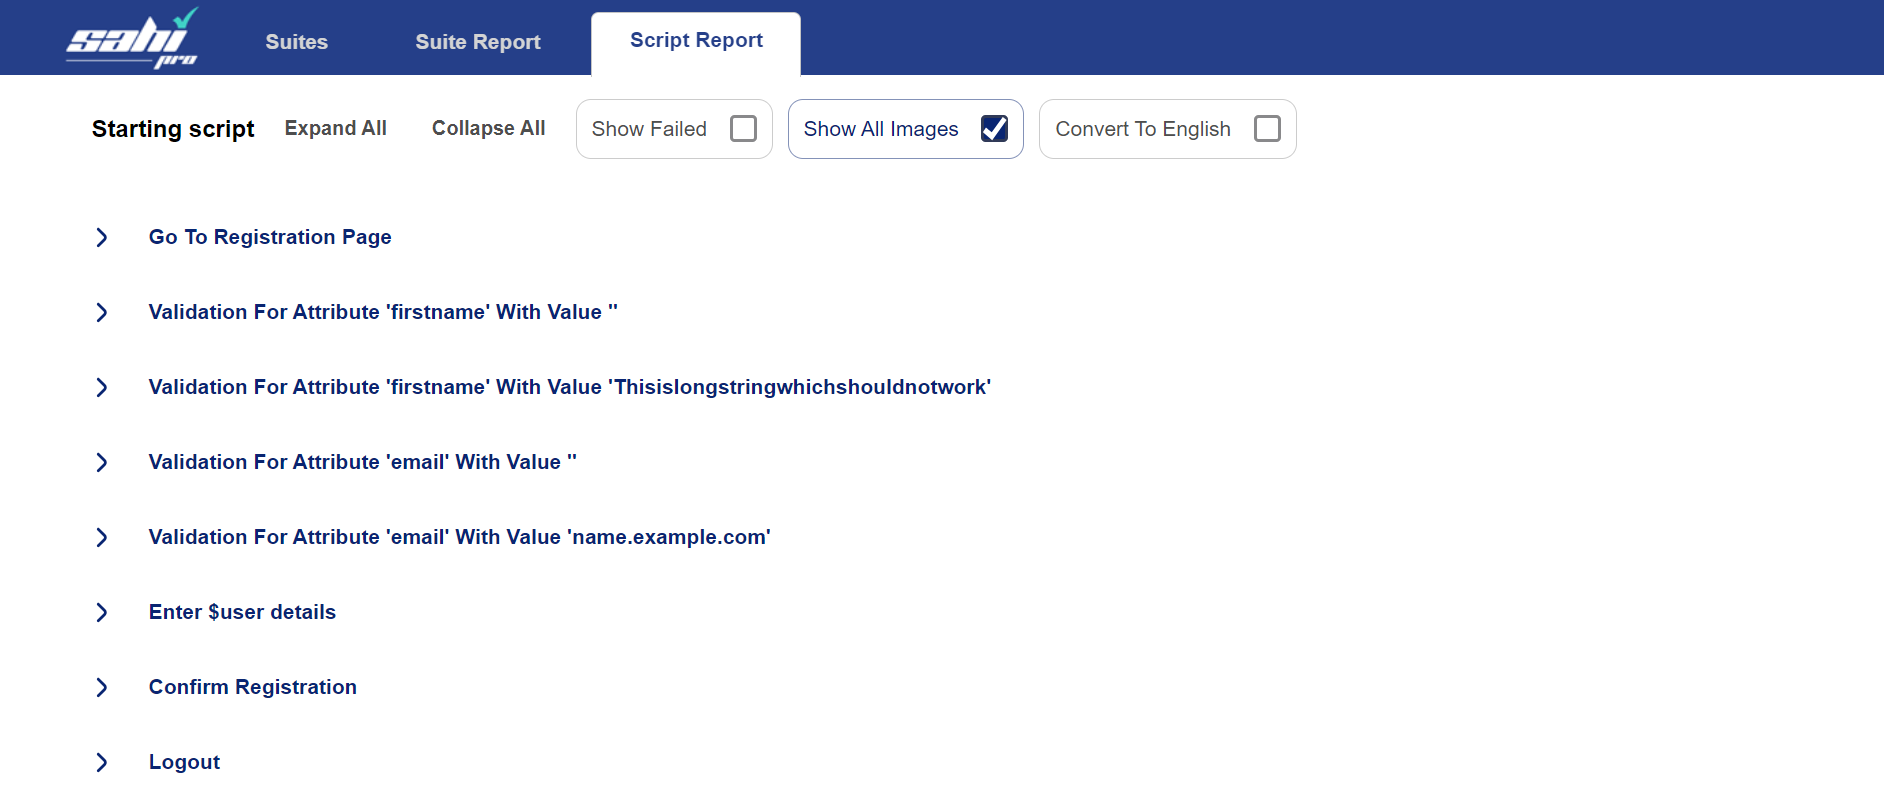
- It opens the
Script Reporttab. Click onExpand Allto view details of each attribute, or click on each validation to see its details.- Report for the case where firstname is blank
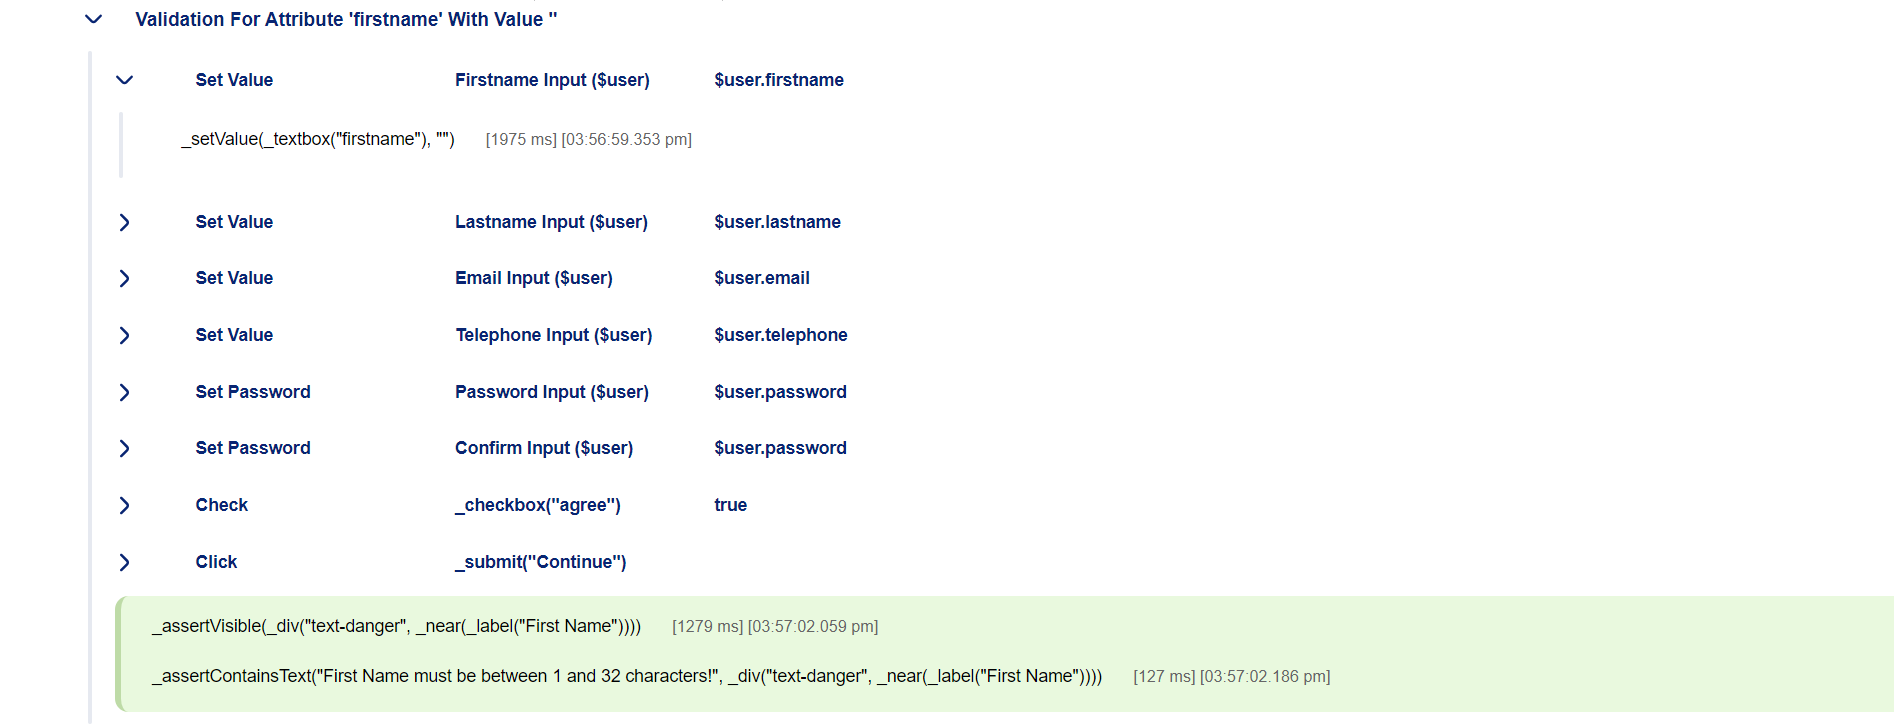
- Report for the case where firstname is more than 32 characters long
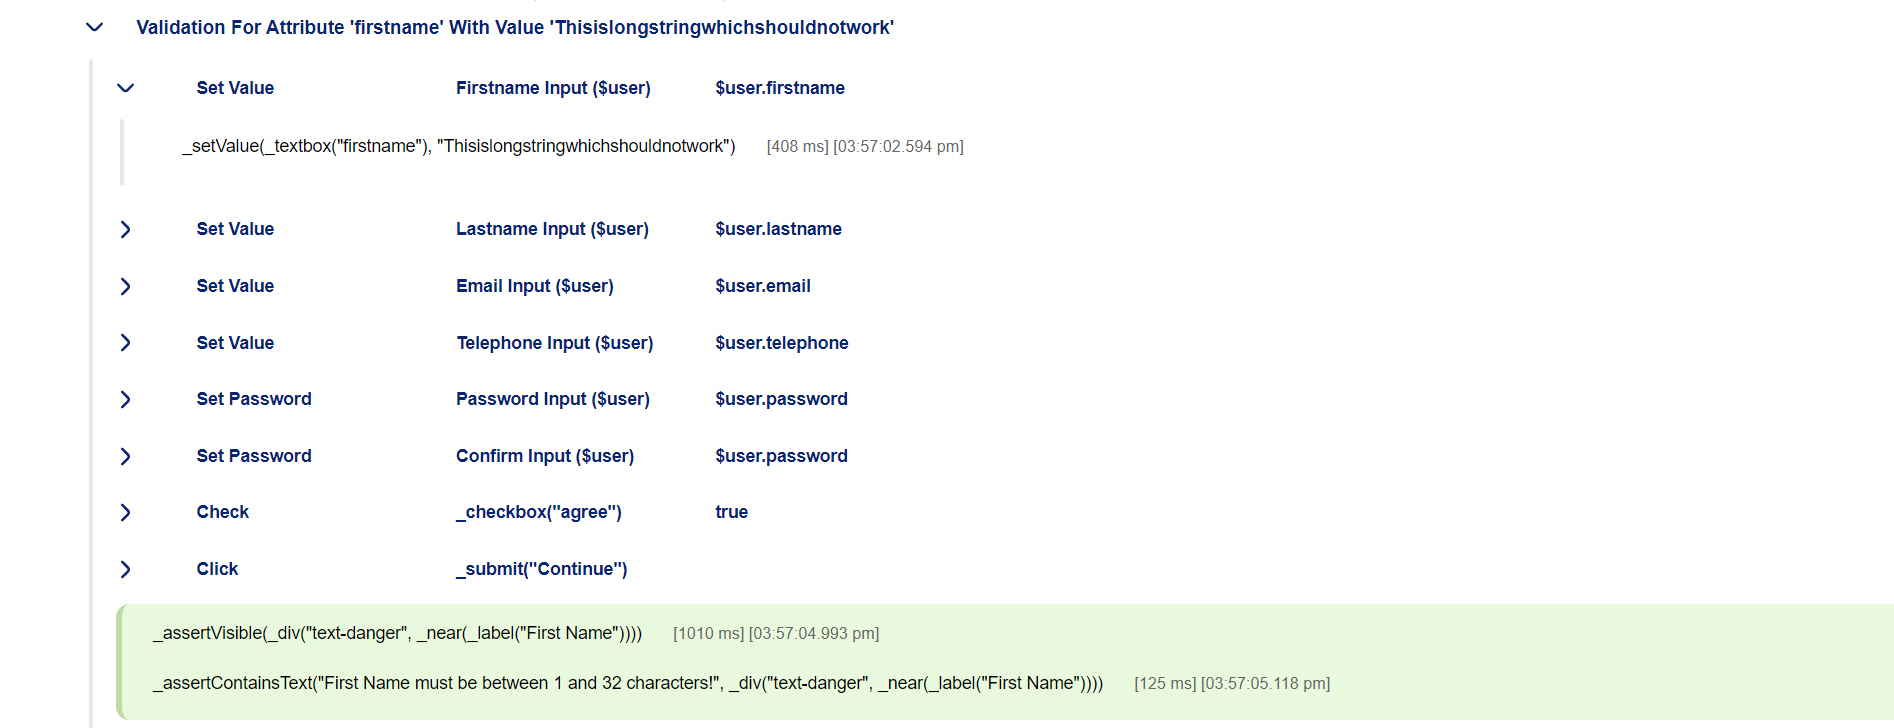
- Report for the case where email address is not correct
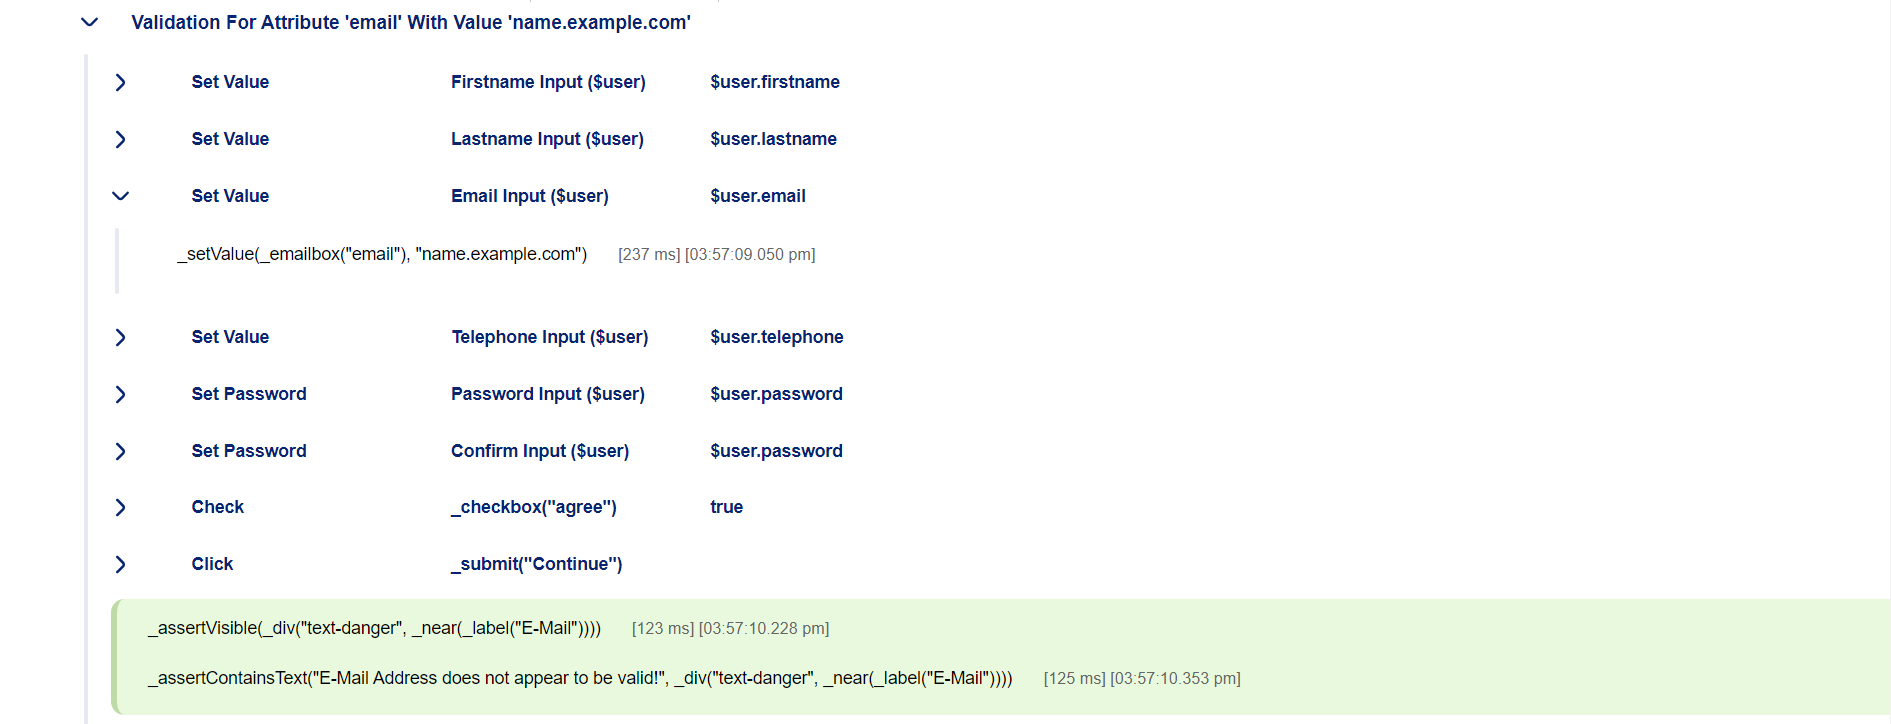
- Report for the case where firstname is blank
outcome
Congratulations! You have successfully run a few Negative Validations!
next
Loop over Dataset


