Positive Validations
abstract
Positive Validations are test flows that verify that the application works correctly for specific valid data.
info
There may be some types of valid data that the application should definitely accept.
Examples:
Examples:
- Boundary Values: If the valid age allowed in an age field is greater than or equal to 18, we need to specifically ensure that age 18 works correctly.
- Specific Data: We may know from prior experience that Japanese characters break a form submission. We could check specifically with such Japanese characters.
goal
Define and Run a test flow with various valid data using Positive Validations.
Discover Values for Positive Validations
The values we need to check for Positive Validations can be derived from various sources:- Requirement documents
- Validation error messages
- Prior experience / common sense
Navigate to the registration page manually and click on Submit without entering any value.
The following error messages are seen
 For Firstname, the message says "First Name must be between 1 and 32 characters!"
As a tester, we need to ensure that the firstname field accepts the following:
- A string with just 1 character. Eg. "a". This is the lower boundary value.
- A string between 1 and 32 characters. Eg. "Mahi"
- A string with exactly 32 characters. Eg."thirtytwocharacterlongstringabcd". This is the higher boundary value.
Set Values for Positive Validation
- Click on the Flowchart path node.
- Click on
Automate. - On the
Automatedialog, navigate toEntitiestab. - Entity tab shows the Entity's Attributes on the Left pane and it has more sub-tabs on the Right pane.
- Navigate to the
Positive Validationstab and select Entity:$userand Attributefirstname. - Type the Input values and comments to define it.
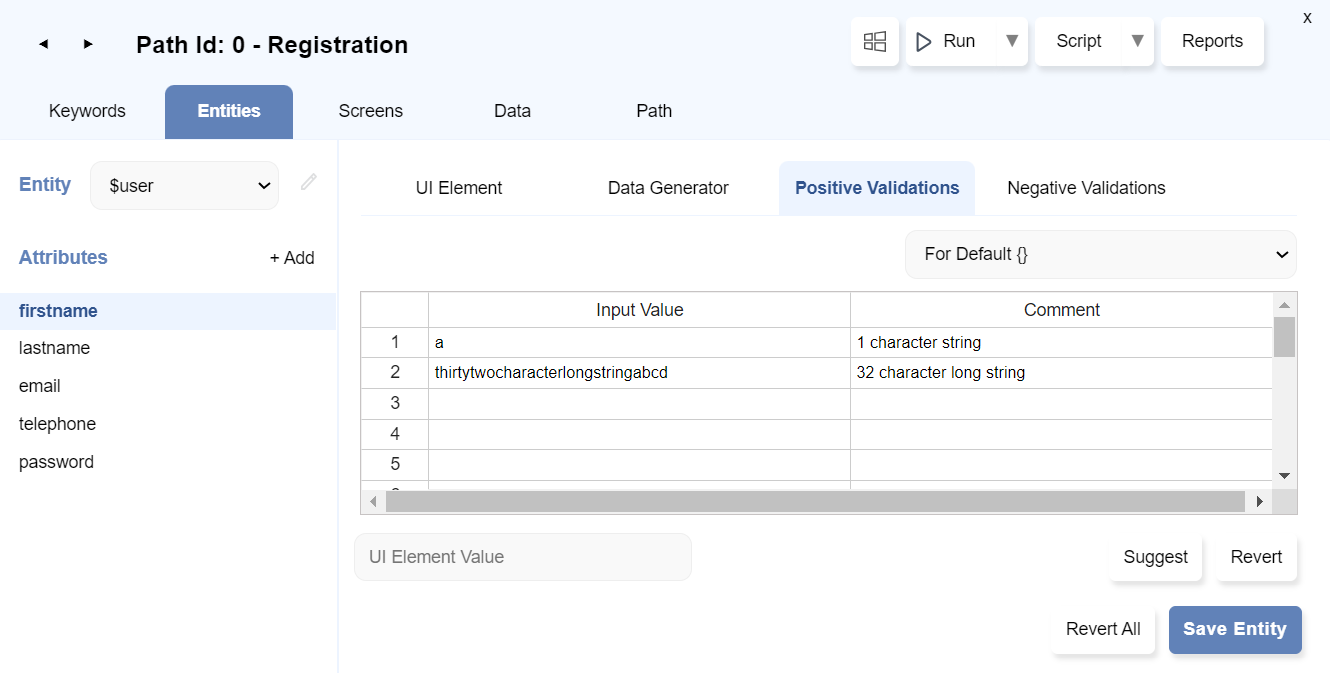
- Similarly, it can be defined for other attributes too.
- Once we are done with setting Input values for Positive validations, click on
Save Entitybutton.infoThe '*' mark on the Entities tab shows that the Entity's changes have not yet been saved. Once we save the Entity, the '*' mark disappears.
Run the Positive Validations
- Check for the path settings:
Click onpathtab and select the checkbox forEnable Validations.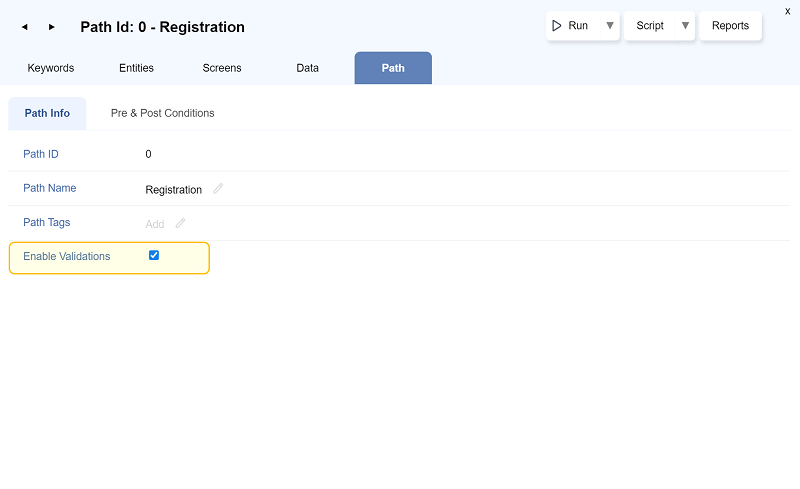
- Click on the
Runbutton.
Run Settingsdialog opens. Select the checkboxRun Positive validationsonly and deselect others.- Click on
Runbutton.
View Report for Positive Validations
Check the Report after running/executing the Positive validations :- Click on the
Reportsbutton.
- The
Reportwindow will open in a new tab. It will show theSuccessof flow. - Click on
Registration VALIDATION POSITIVE P0
Suite Reportwill open :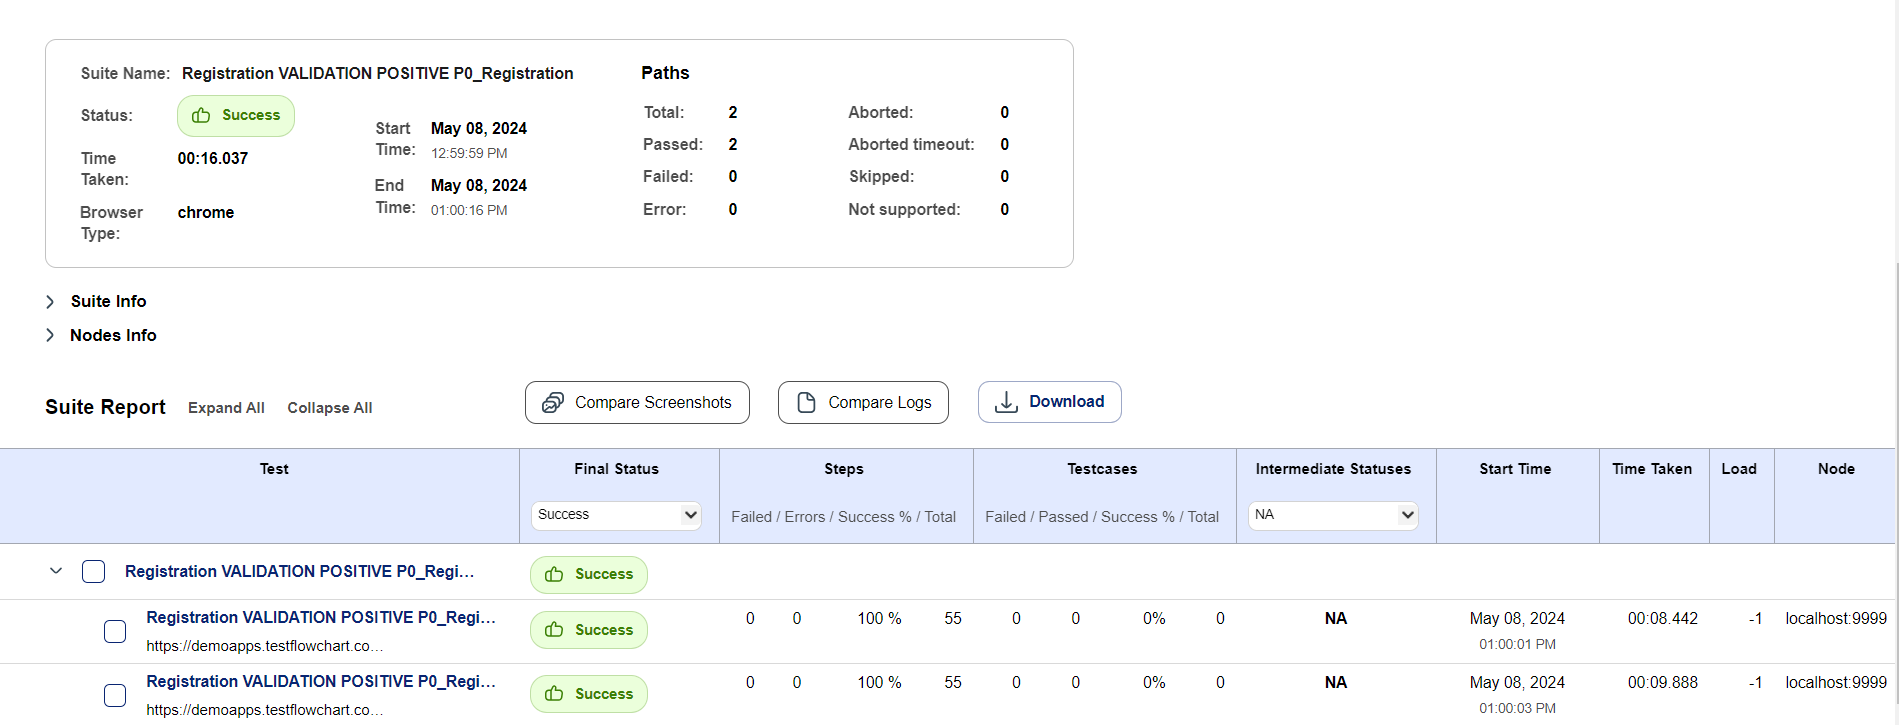
- In the suite report, it can be seen that the same flow has been executed twice with different sets of test data in parallel.
In the first report, the firstname is given asaand in the second test firstname isthirtytwocharacterlongstringabcd -
Click on each to see more details.
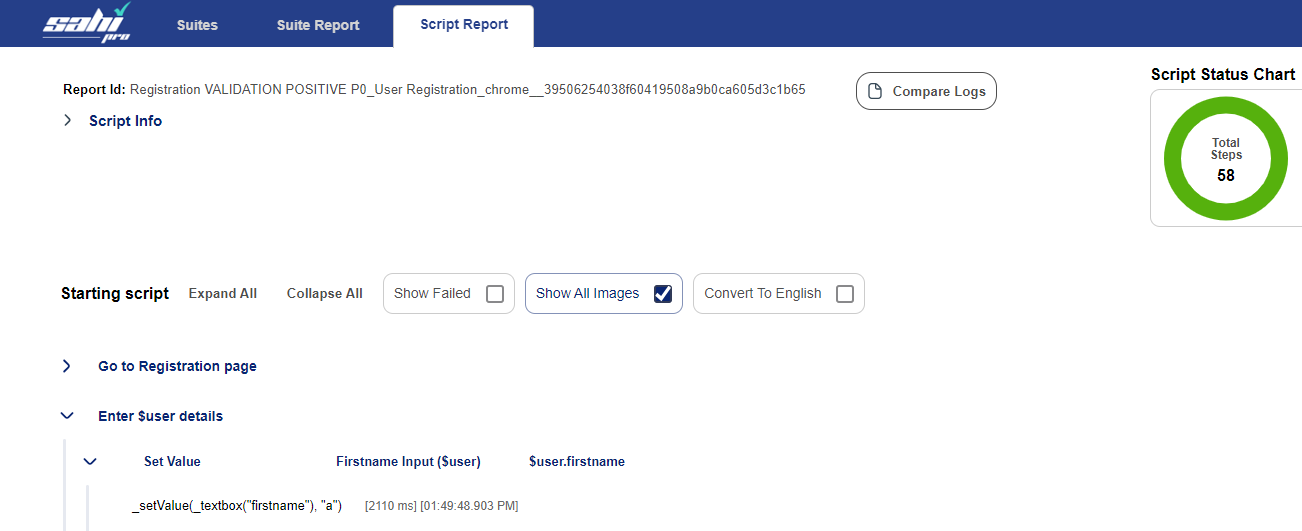
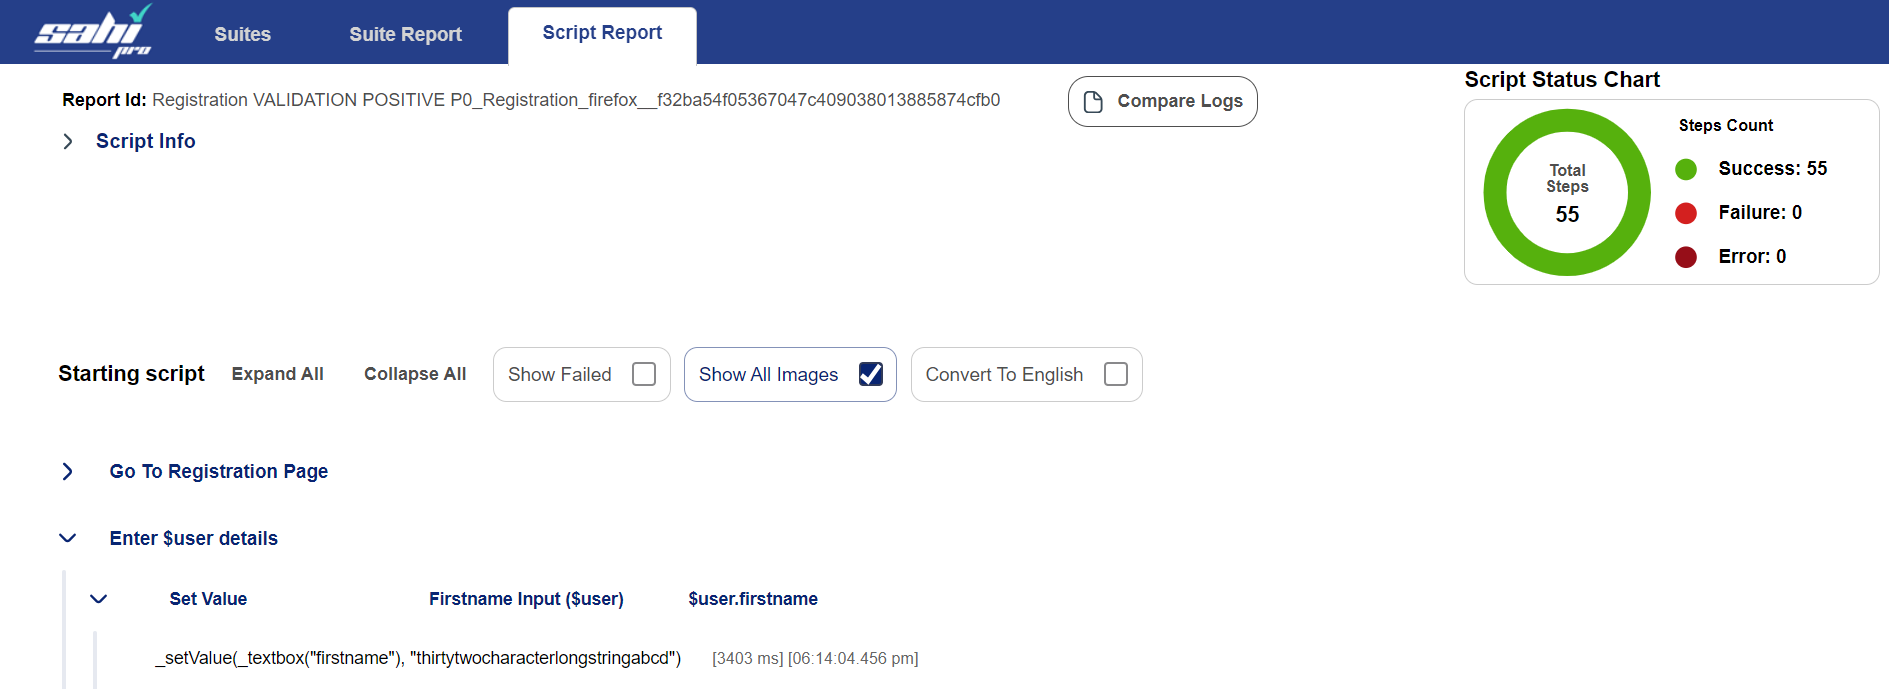 You can click on
 Expand Allto view details of each attribute.
Under the expandedEnter $user detailskeyword, you can see the details of values taken as input for each attribute.
outcome
Congratulations! You have successfully run a few Positive Validations!
next
Negative Validations


