

Flowcharts Controller
The Flowcharts Controller helps identify elements, interact with the Application Under Test and implement automation steps.
The Add Step dialog has an Inspect Element tab where we can identify and interact with the application.
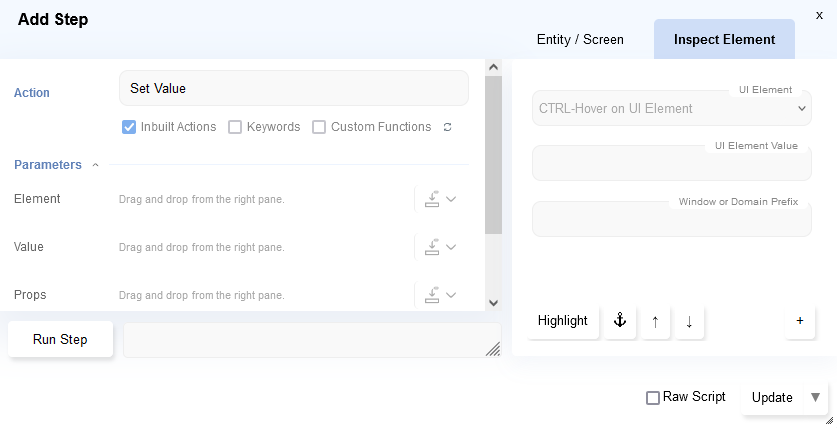
To work with the application and identify elements, we can keep the application window and Flowcharts window side by side.
However since the Flowcharts window is big, this can be inconvenient - especially on Mac, since focus is needed to interact with the browser.
Flowcharts Controller solves this problem.
In-Page Controller
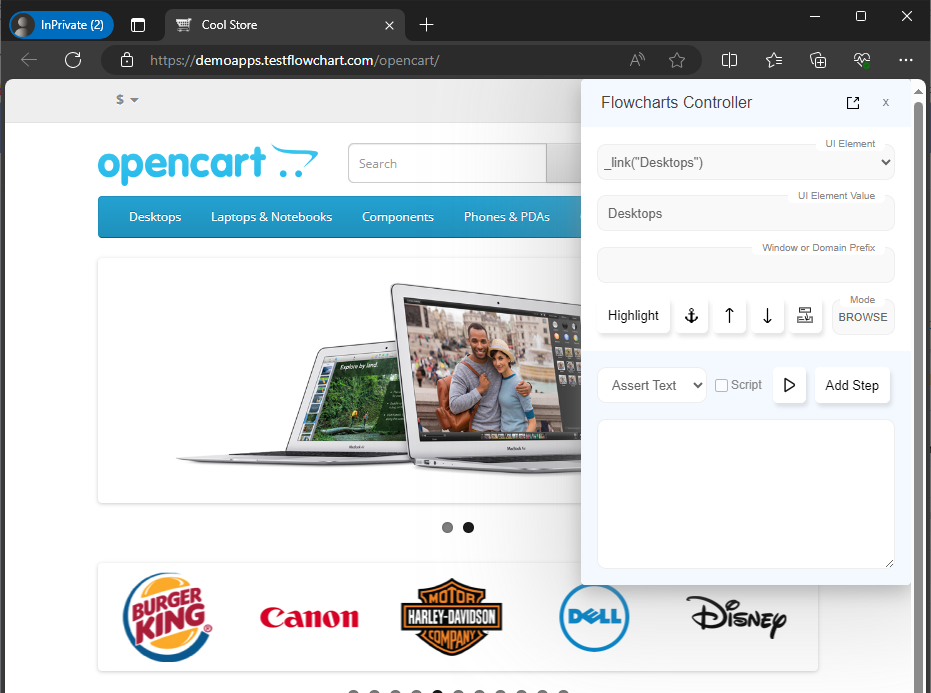
Section titled “In-Page Controller”Flowcharts Controller can be launched from a web application using ALT + Double Click (pressing ALT key and Double Clicking) on the page.
For Mac, use Alt/Option + Double Click.
This will open a Controller inside the page itself.
Controller Functionality
Section titled “Controller Functionality”-
CTRL + Hoveron any element on the UI, will show theUI Element,UI Element Value,Window/Domain PrefixandMode. -
The Controller can be dragged around inside the window to allow identification of elements underneath it
-
Clicking the
Highlightbutton will highlight the UI Element on the application -
To identify one element relative to another,
CTRL + Hoveron the first element, Press the Anchor button, thenCTRL + Hoveron the second element.
The second element will be identified relative to the first element -
Use the Up arrow to identify the Parent element
-
Use the Down arrow to traverse back to the child
-
The Copy button copies the element from UI Element text field to Script box
-
Actions are available in Actions dropdown
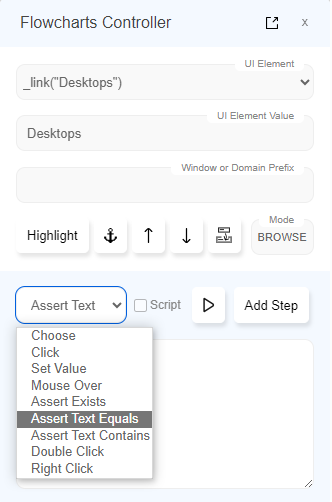
Choose an action and then press the
Run Stepbutton.
The action will be executed on the Application window and the result will be visible in the textbox below. -
Clicking on
Add Stepbutton will add it to the opened Keyword in Automate Dialog on Flowcharts UI. -
Clicking the
Scriptcheckbox will show a textarea (Script box) for interacting using Sahi Script.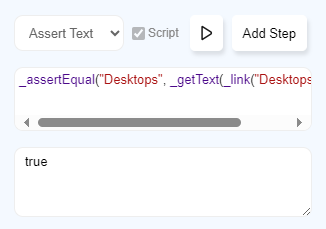
If Script is checked,
Run Stepwill execute the code in the Script box.
If Script is checked,Add Stepwill add the code in the Script box as aRaw Script Step -
Clicking on
List Propertiesbutton will list the properties of UI Element.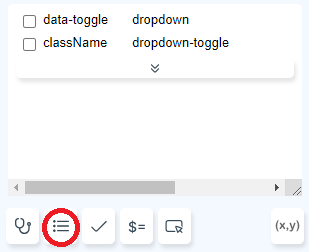
This will also show 3 new buttons: Assert, Store and Create UI Element.
-
Select desired properties and click the
Create UI Elementbutton to create a custom UI element based on the selected properties.

-
Click the Assert button to add steps for asserting the value of selected properties in the opened Keyword in Automate Dialog on Flowcharts UI

-
Click the Store button to add steps for storing the value of selected properties in the opened Keyword in Automate Dialog on Flowcharts UI

-
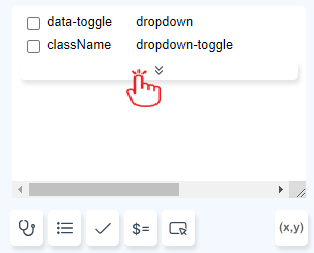
Some properties are hidden as they are not useful for creating custom UI Elements, click the arrow button to show them
-
Pop-out Controller
Section titled “Pop-out Controller”When working with multiple browser windows or when working with other modes, we may need the Controller to be separate from the web application window.
-
On a browser, the Controller can be popped out by clicking on the Controller Popout button on the top right of the in-page Controller.

-
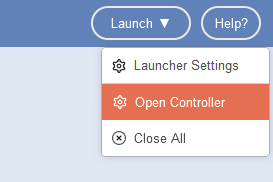
For other modes, the Controller can be launched by clicking on Open Controller option under Launch button dropdown.
Anchor Button & Relation API
Section titled “Anchor Button & Relation API”Relation APIs let Sahi relate one element to another.
- The
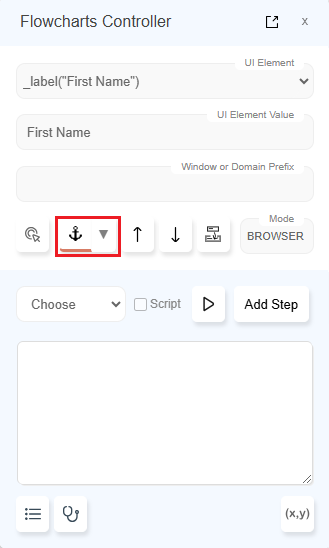
Anchorbutton helps to identify the element with relation to the position of another element. - By default
nearandinrelation API’s are used for element identification. - To use a specific relation API for an anchor element, such as
leftOf,rightOf,under,aboveetc., click the dropdown arrow next to theAnchorbutton. - To select multiple anchor elements, you can use additional anchor element identification mechanisms
Identify an element with relation to anoher element:
Section titled “Identify an element with relation to anoher element:”Steps:
-
First identify the relative element by
CTRL + Mouse hovermethod.- Example: Identify the label ‘First Name’
-
To use Relation API, press the Anchor button. The relative element will be added to anchor elements list.
-
Next, identify the required element using the same
CTRL + Mouse hovermethod.- Example: Identify the text box ‘firstname’
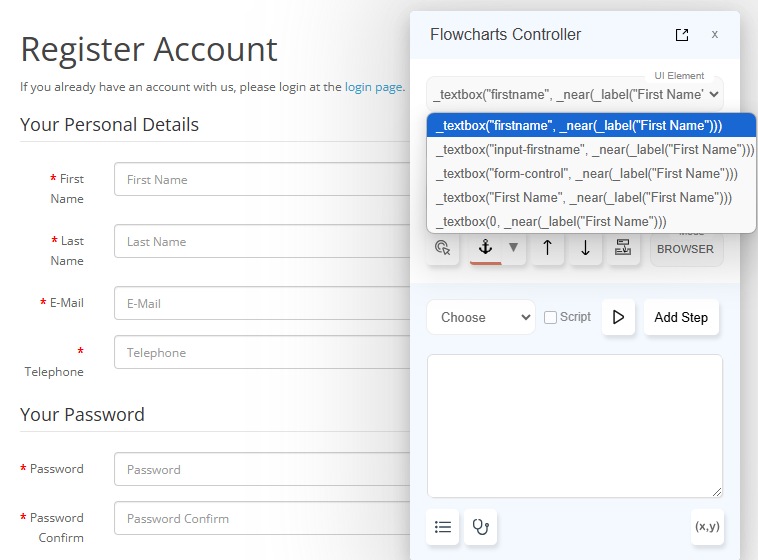
-
Click on the dropdown arrow near anchor button to see list of anchor elements.
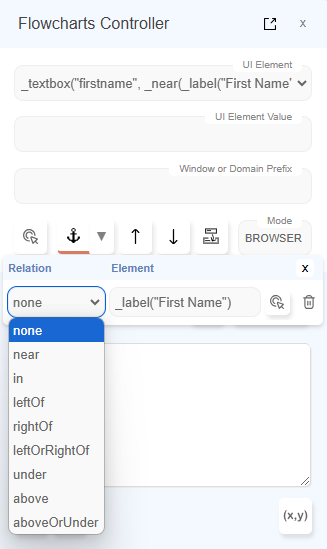
-
For each anchor element a specific relation API can be selected and offset can also be given if needed.
- If no relation API has been selected for an anchor element then it will not be used during identification.
-
CTRL + Hoverover the next element, it will generate an accessor with the selected anchor elements and there relation APIs.- If it fails to identify the element with given relations, then an error will be generated in the accessor field.
Use multiple Anchor elements:
Section titled “Use multiple Anchor elements:”Steps:
-
Identify the element with relation to an element.
- Example: Identify the ‘MP3 Player’ to be rightOf to ‘Cameras’.
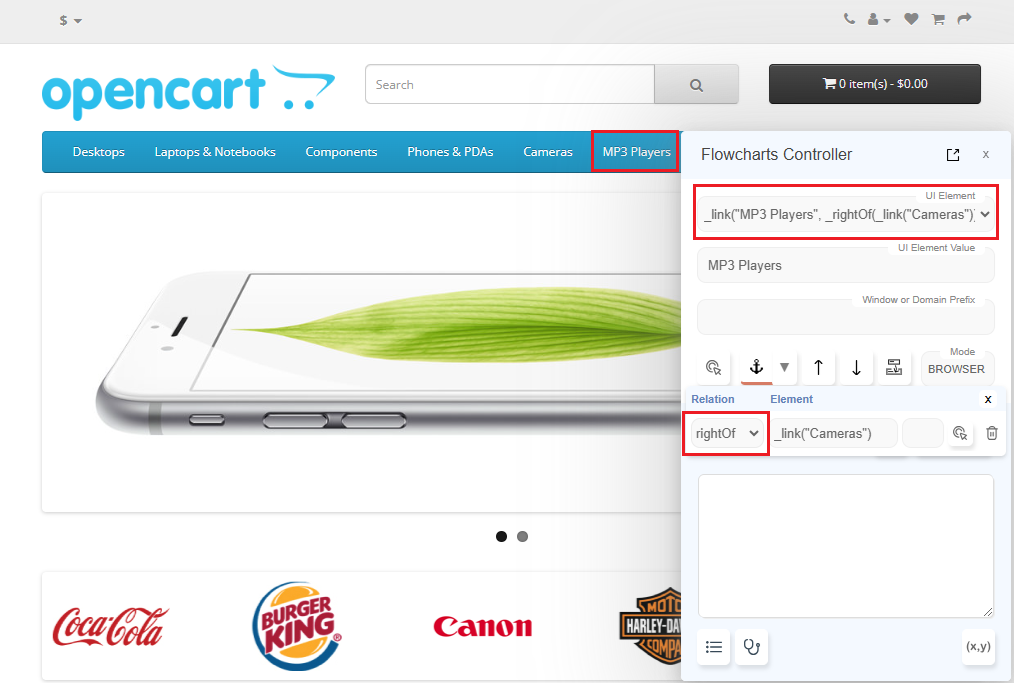
-
Now, identify the same element with relation to another element.
- Example: Identify the ‘MP3 player’ to be inside the ‘Nav Bar’.
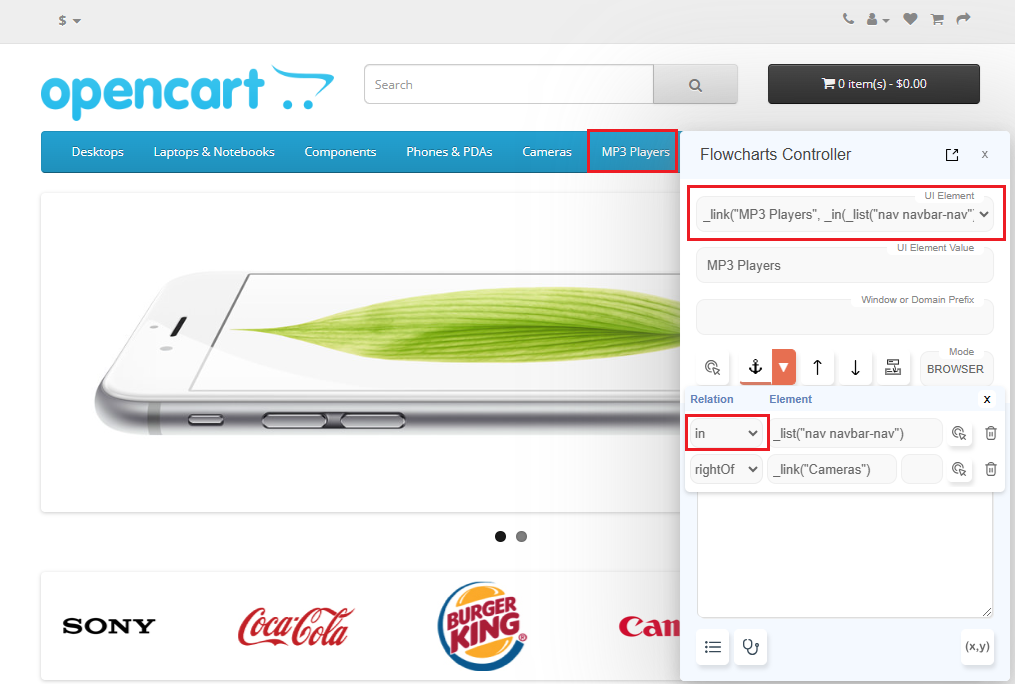
-
Similarly more layers of relative identification can be used.