

SAP GUI Automation - Getting Started
This section details how to test SAP GUI Applications. If you are not familiar with Sahi Pro Flowcharts, see Introduction to Sahi Pro Flowcharts To automate SAP GUI applications using Sahi Pro Classic, refer SAP GUI Automation - Getting Started.
Start SAP GUI Automation
Section titled “Start SAP GUI Automation”-
Scripting must be enabled in SAP GUI client.
-
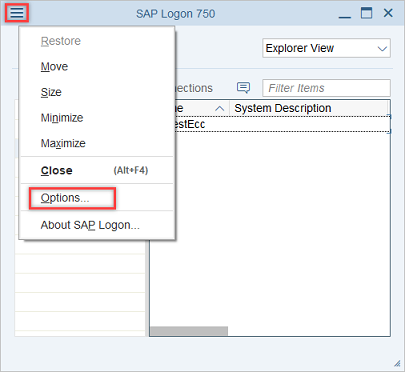
Open SAP GUI options from top right corner of SAP Logon pad.
-
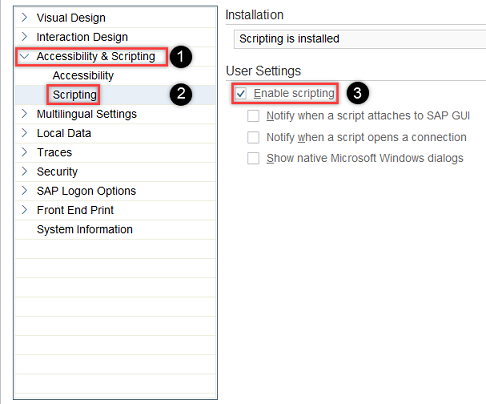
Go to Accessiblity & Scripting → Select Scripting.
-
Check the Enable scripting checkbox under User Settings.
-
Ensure that scripting is not disabled in the Registry for SAP GUI client as follows :
- On the Start menu, choose Run.
- In the Open box, enter
regedit.exe. - In the Registry Editor, check the value for following subkeys. If the value is set as
0, modify it as1to enable scripting. Ignore this if the subkeys are not present.
HKEY_LOCAL_MACHINE\SOFTWARE\SAP\SAPGUI Front\SAP Frontend Server\Security\UserScripting
HKEY_LOCAL_MACHINE\software\Wow6432Node\sap\SAPGUI Front\SAP Frontend Server\Scripting
-
-
Scripting must be enabled in SAP GUI server. Start RZ11 transaction and set the following profile parameters as applicable :-
-
Parameter
sapgui/user_scriptingmust be set as TRUE. -
Parameter
sapgui/user_scripting_disable_recordingmust be set as FALSE. If TRUE, recording will be prohibited. -
Parameter
sapgui/user_scripting_force_notificationmust be set as FALSE. If TRUE, SAP GUI server would notify for every scripting activity. -
Your SAP administrator may have set parameter
sapgui/user_scripting_per_useras TRUE to enable scripting only for specific users. If this parameter is set as TRUE, ensure that your SAP administrator has enabled scripting for you. -
Up to patch level 16 of SAP GUI for Windows 7.40 and patch level 3 of SAP GUI for Windows 7.50, parameter
sapgui/user_scripting_set_readonlymust be set as FALSE. If TRUE, a READ ONLY version of SAP GUI Scripting is activated.
-
-
Start Sahi Pro Dashboard
-
Ensure
SAP Automation is enabled.Disable SAP Automationlink must be visible on Sahi dashbord from the Processes settings. “Sahi SAP agent started!” message appears on Sahi Pro console.Feb 19, 2020 2:48:30 PM net.sf.sahi.test.ProcessHelper executeINFO: cmd /C D:\Sahi_Pro\sap\bin\SahiSAP.exe -port=9999 > D:\Sahi_Pro\sap\SAP_log.txt>>>> Sahi SAP agent started!Feb 19, 2020 2:48:40 PM net.sf.sahi.test.ProcessHelper$PIDGatherer runINFO: PIDs: [8668]; 10491 ms -
Ensure that in userdata.properties,
sahi.sap.saplogon.execpathspecifies the correct path for SAP logon pad.
Launch SAP Application from Flowcharts and Element Identification
Section titled “Launch SAP Application from Flowcharts and Element Identification”-
On the Flowcharts window, click on the dropdown arrow next to Launch and then select
Launcher Settings.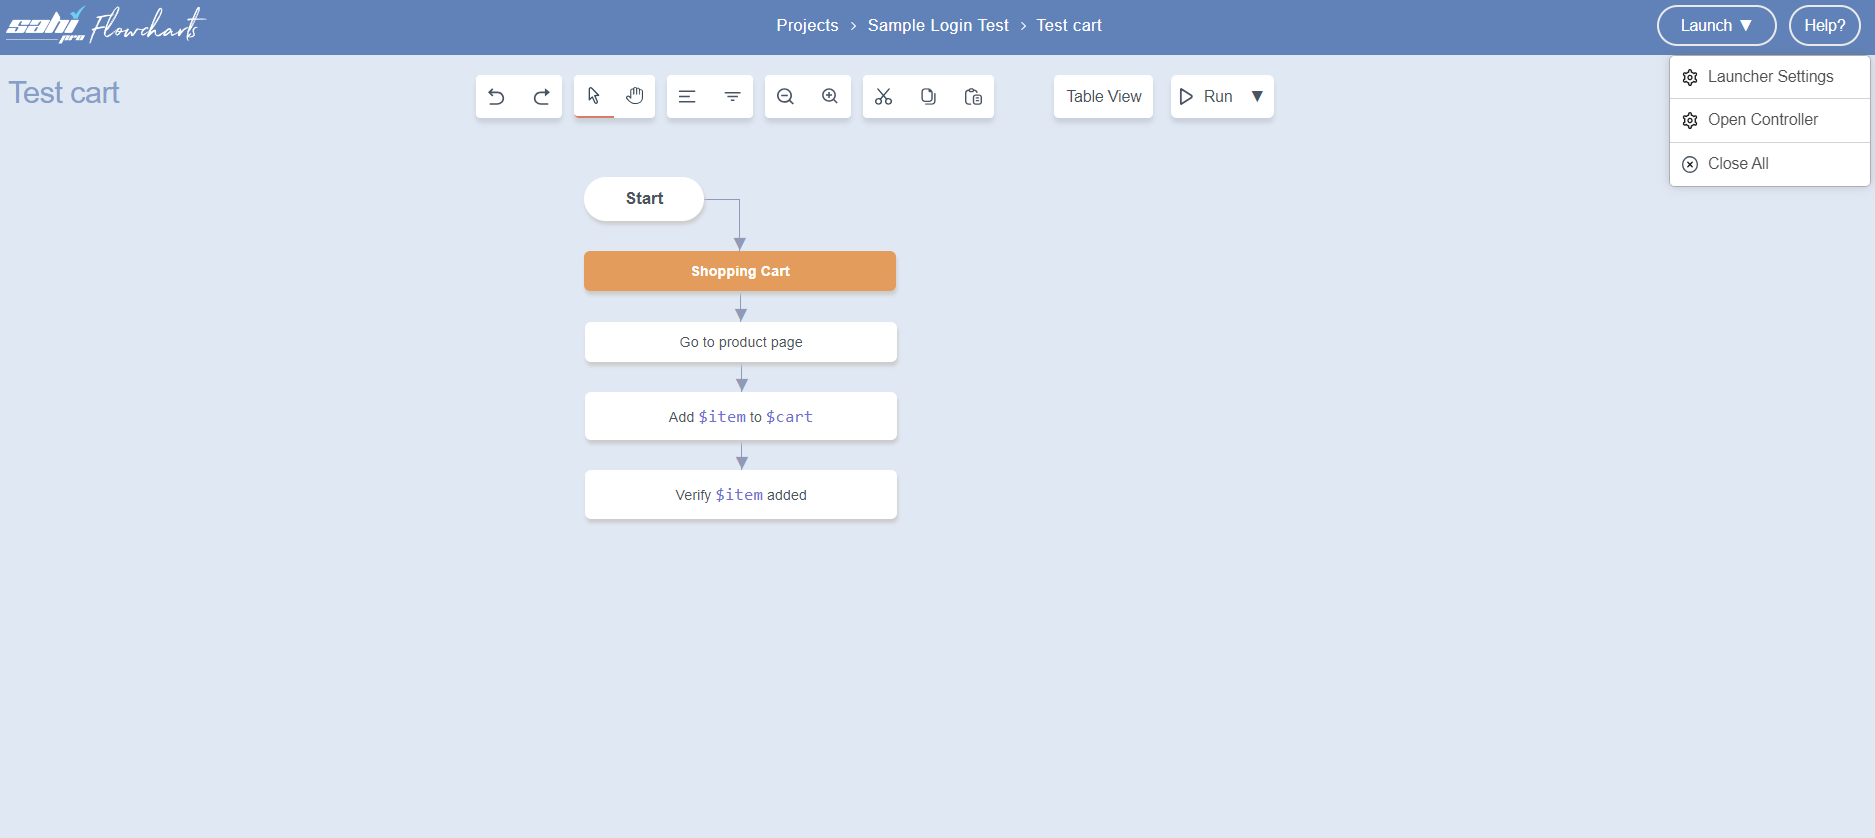
-
Launcher Settingsdialog opens.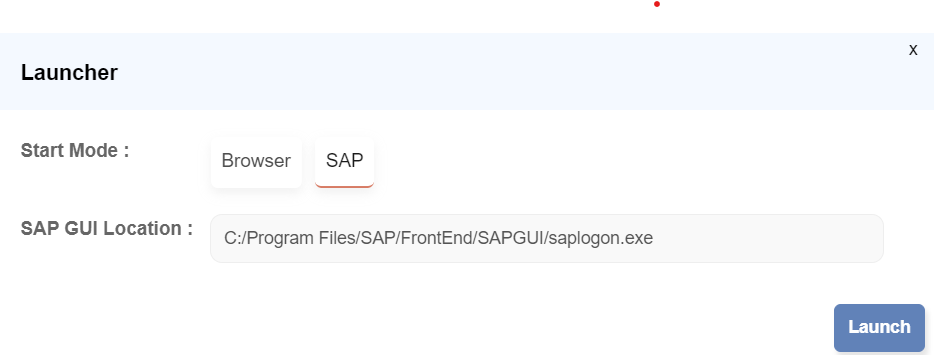
Description of the image labeling:
- Select the Mode: SAP
- Type or paste the absolute Application path (The Application for which you are making this automated flowchart).
-
Click on Launch to launch the Application.
-
On the Flowcharts window, click on the dropdown arrow next to Launch and then select
Open Controller. You can now start identifying/automating. Like normal Sahi Pro Flowcharts for web pages, you can use CTRL-Hover to identify various elements on the SAP GUI application. -
The Controller can be used to interact with the SAP GUI application. User can Identify, Click, Set, Assert, choose Other Actions on the SAP GUI application.
Automating a Keyword
Section titled “Automating a Keyword”This is similar to automating a Sahi Pro Flowcharts keyword for normal browser testing.- To automate a Keyword, click on a node from the Sahi Pro Flowcharts page, click on the Automate, click on Start Record button, Actions done on the SAP GUI client application are recorded automatically.
-
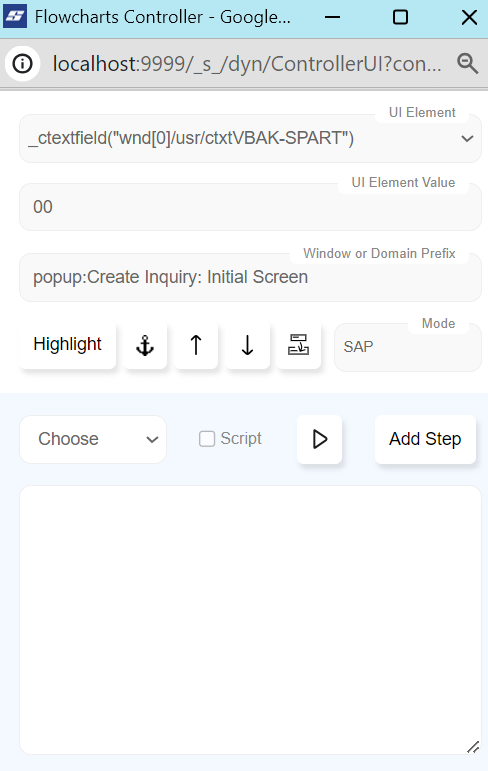
Steps can also be recorded from the Flowcharts Controller.
-
A. You can use Click, Set, Assert, choose ‘Other Actions’ to perform an action on the Windows Desktop Application.
B. You will need to record these steps explicitly by clicking on ‘Add Step’.
Playback
Section titled “Playback”-
On the
Automatedialog click onRunbutton.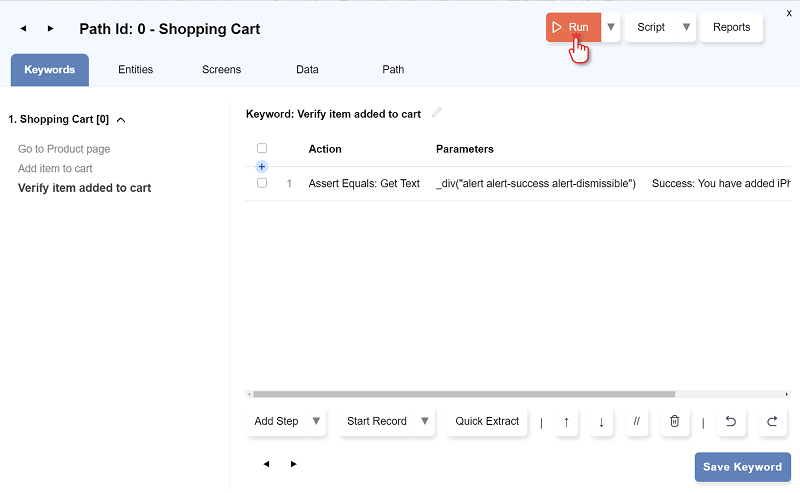
-
The
Run Settingsdialog opens. Select the ModeSAPand clickRUN.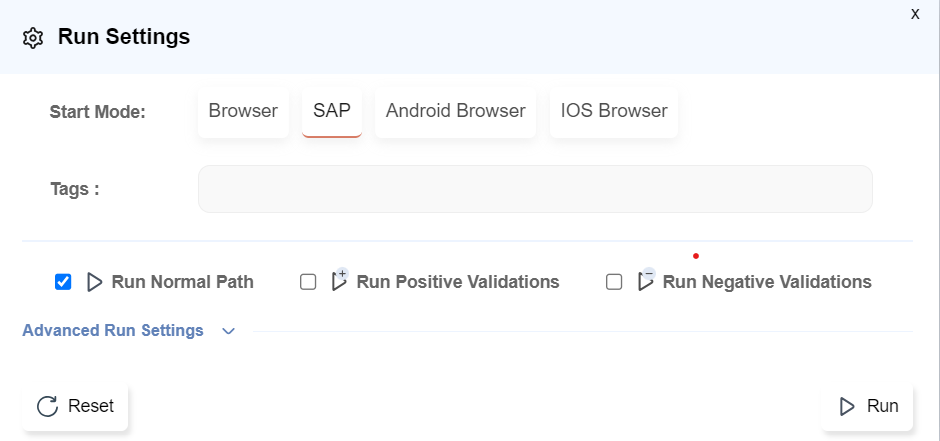
View Report
Section titled “View Report”-
Click on the
Reportsbutton..
-
The Report opens in a new browser tab.
