

Organize Automation Artifacts using Quick Extract
For maintainable automation, we need to organize UI Element identifiers, the data values being passed etc. meaningfully. Quick Extract extracts UI Elements and data values and stores them with the relevant Entity Attribute.
-
In the
User Registrationflowchart, click onEnter $user detailsand click onAutomate. -
Click on
Quick Extractbutton at the bottom of theAutomatedialog.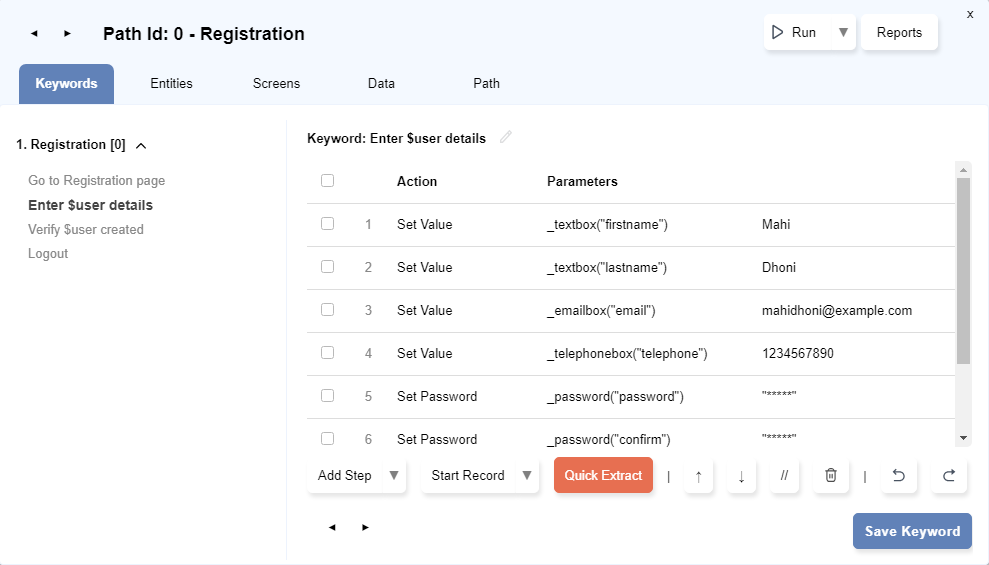
-
Quick Extract Alldialog will open. You will see a list of all UI Elements and data that we have used in the recorded steps.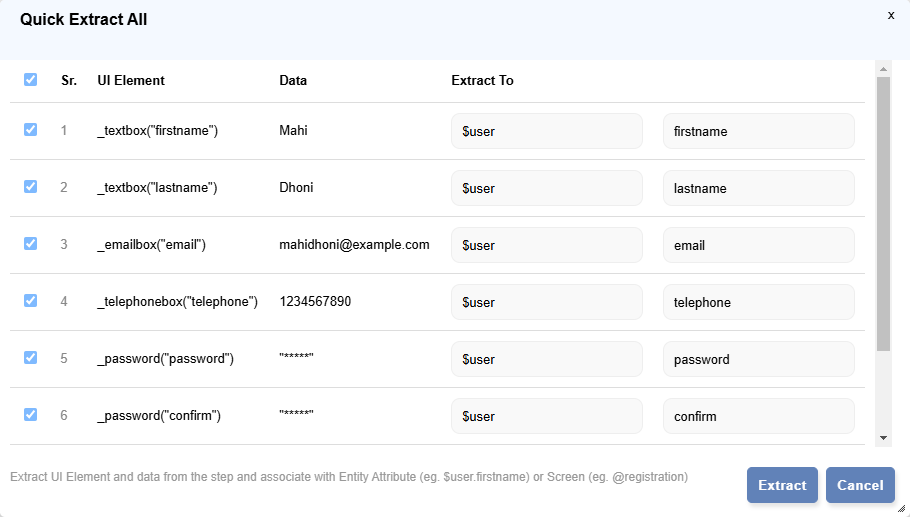
You will notice that Entity and attribute names are auto-suggested based on UI Element under ‘Extract To’ column. Optionally, you can change the auto-suggested attribute name. To exclude extracting any UI Element and its data, untick the checkbox for this UI Element row.
Now, click on
Extractbutton. -
Click on
Save Keywordbutton. -
Observe the changes in
Automatedialog afterQuick Extract.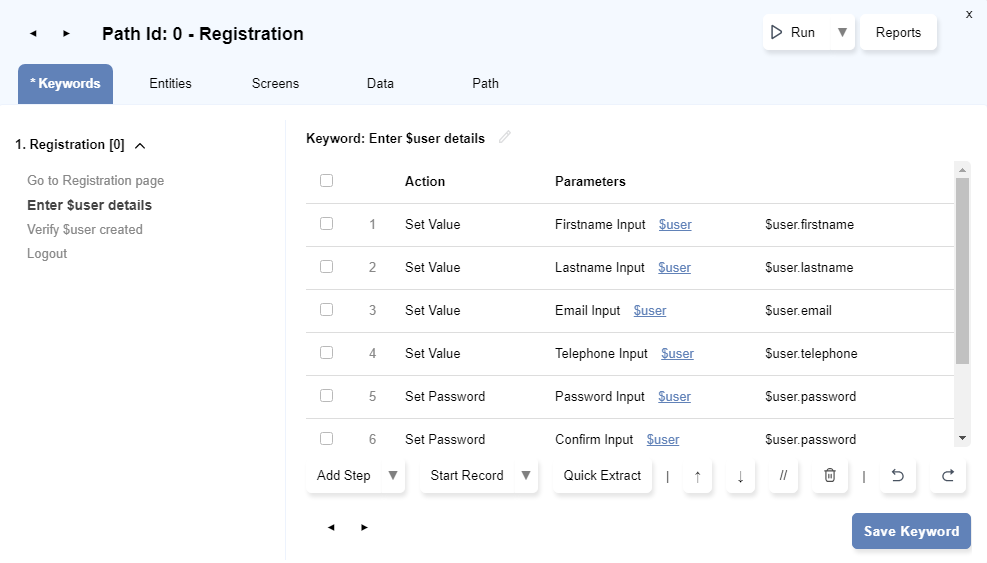
Clicking on $user link will open the Entities tab. Under the $user entity, we can now see the various attributes we just extracted, along with their UI Elements.
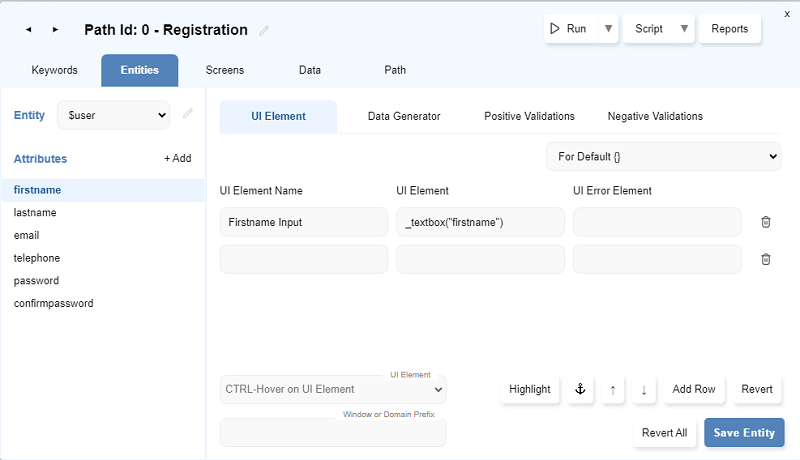
The $user entity and its attributes are also available on the Add Step dialog’s Entity/Screen tab.
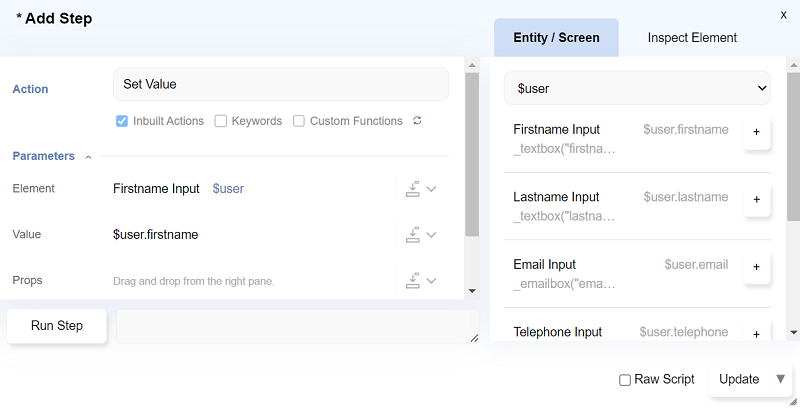
Quick Extract Using Edit Step dialog
Section titled “Quick Extract Using Edit Step dialog”In a similar way, we can extract UI Element and data using the Edit Step dialog.
-
Double click on a Step from Keyword.
-
Click on
Quick Extract To.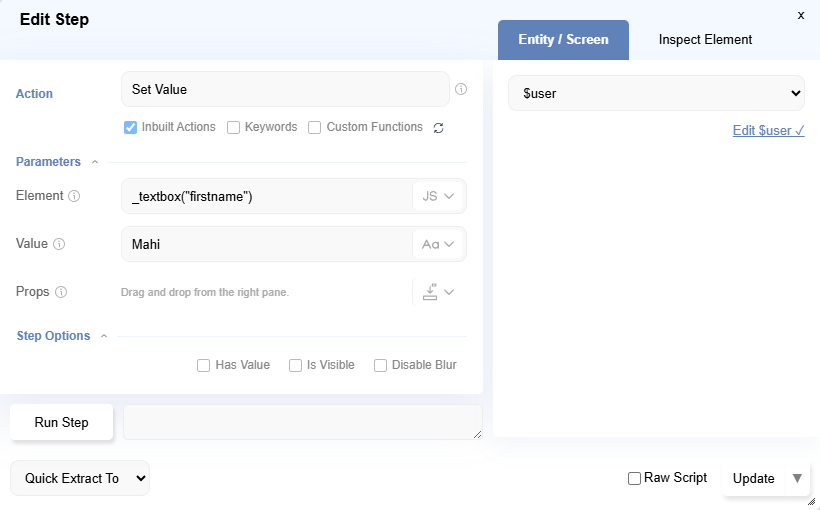
-
Select
$userfromQuick Extract Todropdown. It will show prompt for Attribute name with auto-suggested name based on UI Element.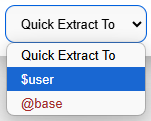
-
Click
OKbutton which shown in prompt. -
Observe the changes in Edit Step dialog after Quick Extract.
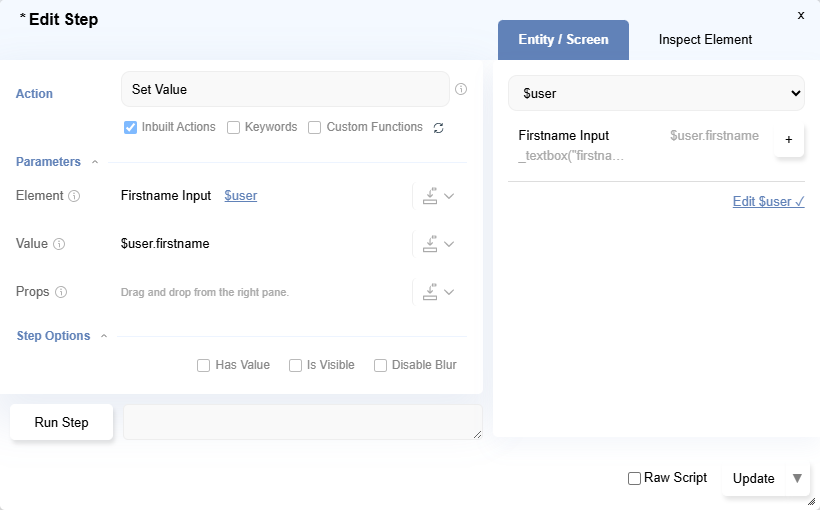
-
Click on
Updatebutton to Save changes.