

Version Control and Collaboration
When working on any big software project, we need version control of automation artifacts. Version Control allows individuals to work independently with their own copy of files/artifacts and prevents overwriting or clobbering another person's work. It also helps us associate specific artifacts with specific versions of the application under test. We recommend using Git for version control.
Flowcharts on the Filesystem
Section titled “Flowcharts on the Filesystem”- When we create flowcharts, all the information about the flowchart project is stored as plain text (json or csv) files on the file system.
The path to the files is<sahipro>/userdata/scripts/flowchartsdata/<project_name>. - You can open the
flowchartsdatafolder from the Flowcharts UI by clicking on the folder icon on the Projects page. - You can also click on the
Scripts Foldericon on the Dashboard and then navigate toflowchartsdatafolder. - We recommend adding the entire userdata folder to your version control system (VCS) since it contains all configurations, script files and other user specific data.
Files and folders which need to be excluded are already added in a .gitignore file.
If you are using any other VCS, adapt from the .gitignore file accordingly.
Merge Conflict in Flowcharts
Section titled “Merge Conflict in Flowcharts”Merge conflicts may arise when two users have changed the same content in an artifact. They can also occur when one user deletes an artifact while another user is modifying it.
Identifying Merge Conflict
Section titled “Identifying Merge Conflict”Following are ways to identify a merge conflict:
-
From Project List Page:
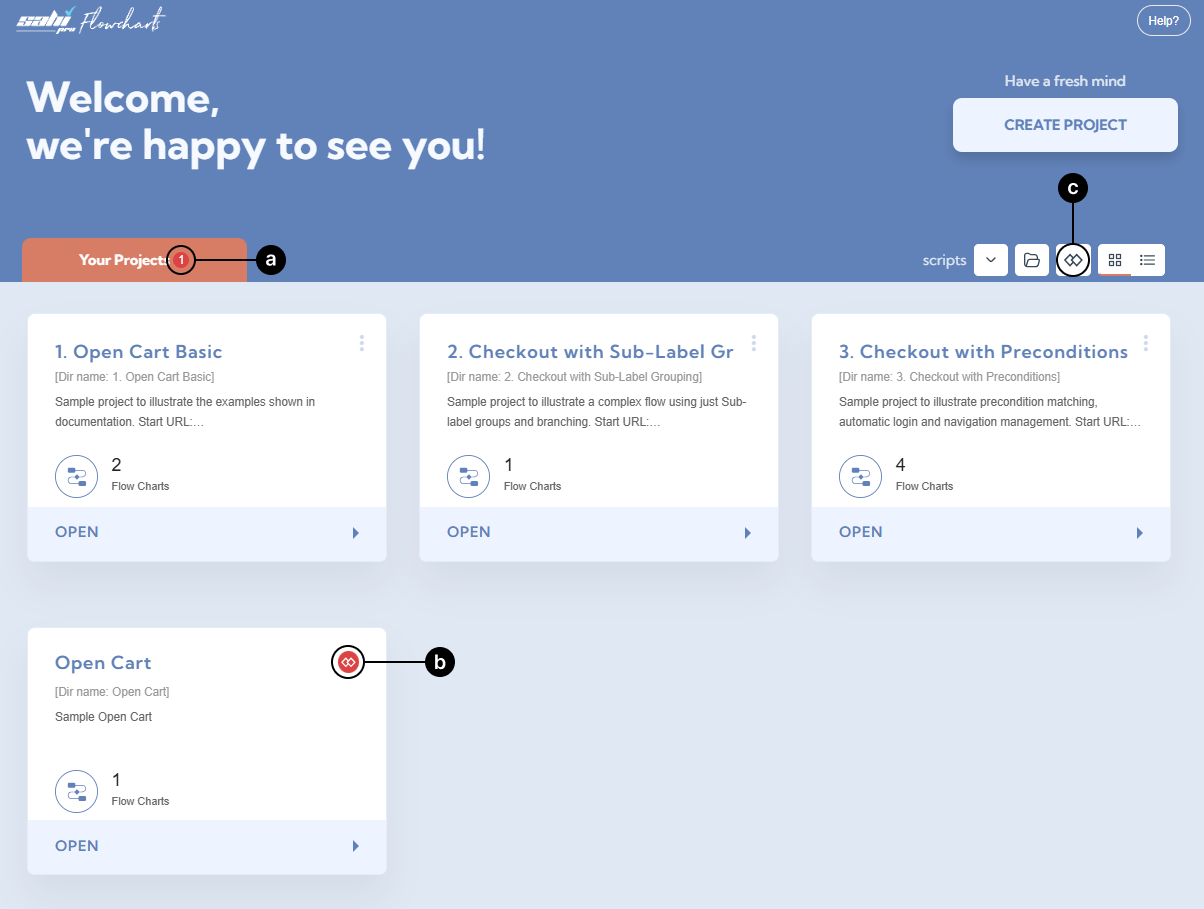
On the Project List page, merge conflicts can be identified by checking for the following indicators:
- Number of projects that have merge conflicts.
- Specific project that has merge conflicts.
- Show only projects that have merge conflicts.
These indicators are highlighted in the below image.
-
From Project Details Page:
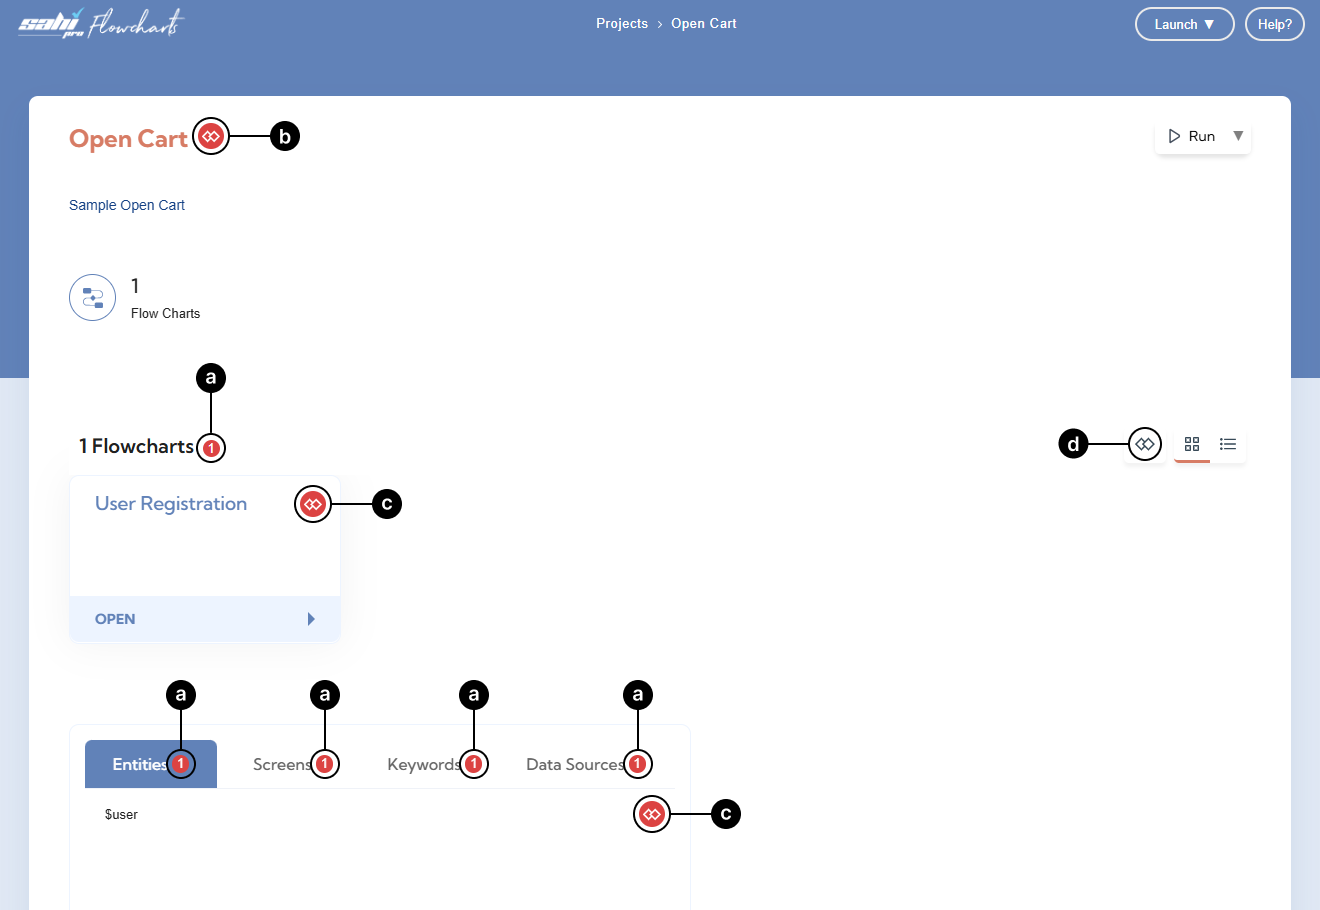
On a Project Details page, merge conflicts can be identified by checking for the following indicators:
- Number of specific artifacts those have merge conflict.
- Project level merge conflict. (for flowchart/ddcsv tags and execution order, filters)
- Particular artifact that has merge conflict.
- Show only artifacts that have merge conflicts.
These indicators are highlighted in the below image.
-
From Flowchart Page:
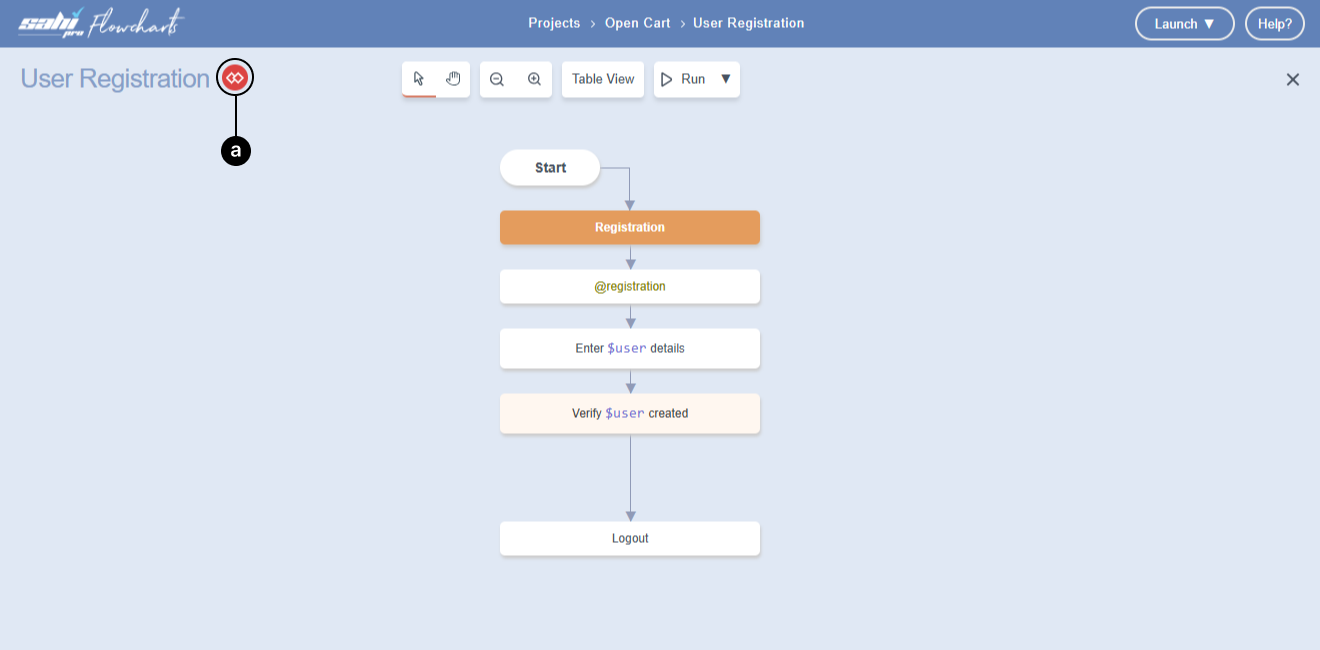
On a Flowchart page, merge conflicts can be identified by checking for the following indicators:
- Particular flowchart that has a merge conflict.
These indicators are highlighted in the below image.
-
From Automate Dialog:
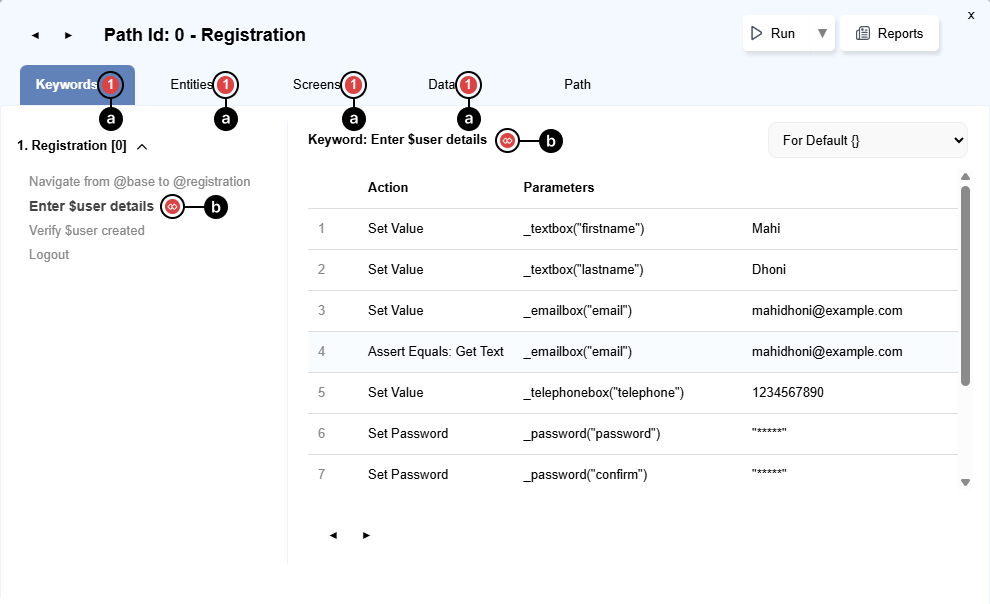
On an Automate dialog, merge conflicts can be identified by checking for the following indicators:
- Number of specific artifacts those have merge conflict.
- Particular artifact that has a merge conflict.
These indicators are highlighted in the below image.
Resolving Merge Conflict
Section titled “Resolving Merge Conflict”The artifacts in Sahi Pro Flowcharts inherently follow a noticeable hierarchical structure. Each Project consists of one or multiple flowcharts. Every Flowchart will have reference to multiple entities, screens, etc. Consequently, in Diff-Merge UI, if there is a conflict for an artifact, conflicts would also exist for for the references of this artifact.
Lets say, there is a conflict for an Entity $user. Consequently, there may be a conflict inside Keyword ‘Login $user’ where this Entity $user is referred. In such a case, it would be linear to resolve the conflict in the Entity before resolving conflicts in the Keyword.
Conforming to this, it is recommended to resolve merge conflict in the following order:
- Project
- Flowchart
- Entity
- Screen
- Keyword
- DataSet
Below we have examples to resolve merge conflicts at the Flowchart level:
-
Open the flowchart that has merge conflicts. Click on Merge Conflict icon
 near flowchart name to open Diff & Merge UI. This Diff & Merge UI shows a comparison between the
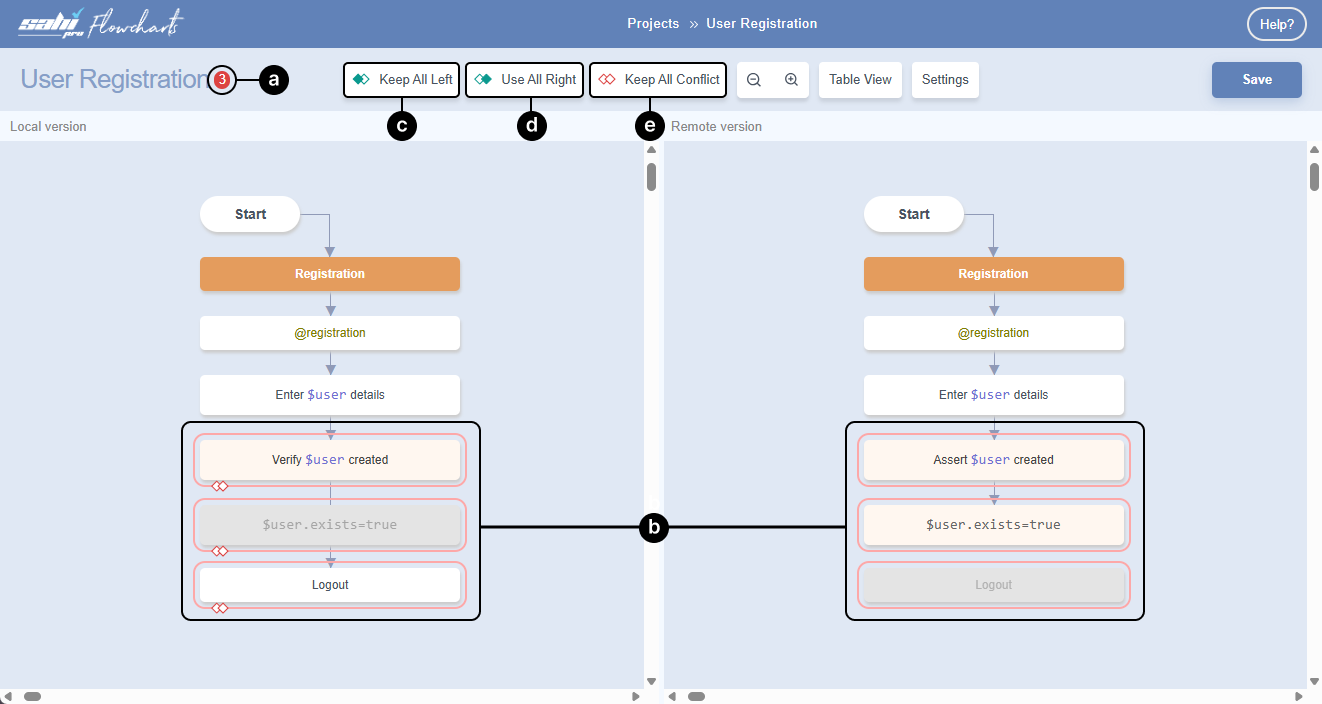
LocalandRemoteHead version of the flowchart. Merge conflicts information can be identified by checking for following indicators:- The Total number of merge conflicts.
- The Different types of merge conflict changes
- The
Keep All Leftoption provides a quick way to resolve conflicts by prioritizing changes from the left side. However, it’s essential to use this option judiciously and carefully review potential data loss. - The
Use All Rightoption provides a quick way to resolve conflicts by prioritizing changes from the right side. However, it’s essential to use this option judiciously and carefully review potential data loss. - The
Keep All Conflictoption provides a quick way to revert all resolved changes, effectively moving the merge back to a conflicted state.
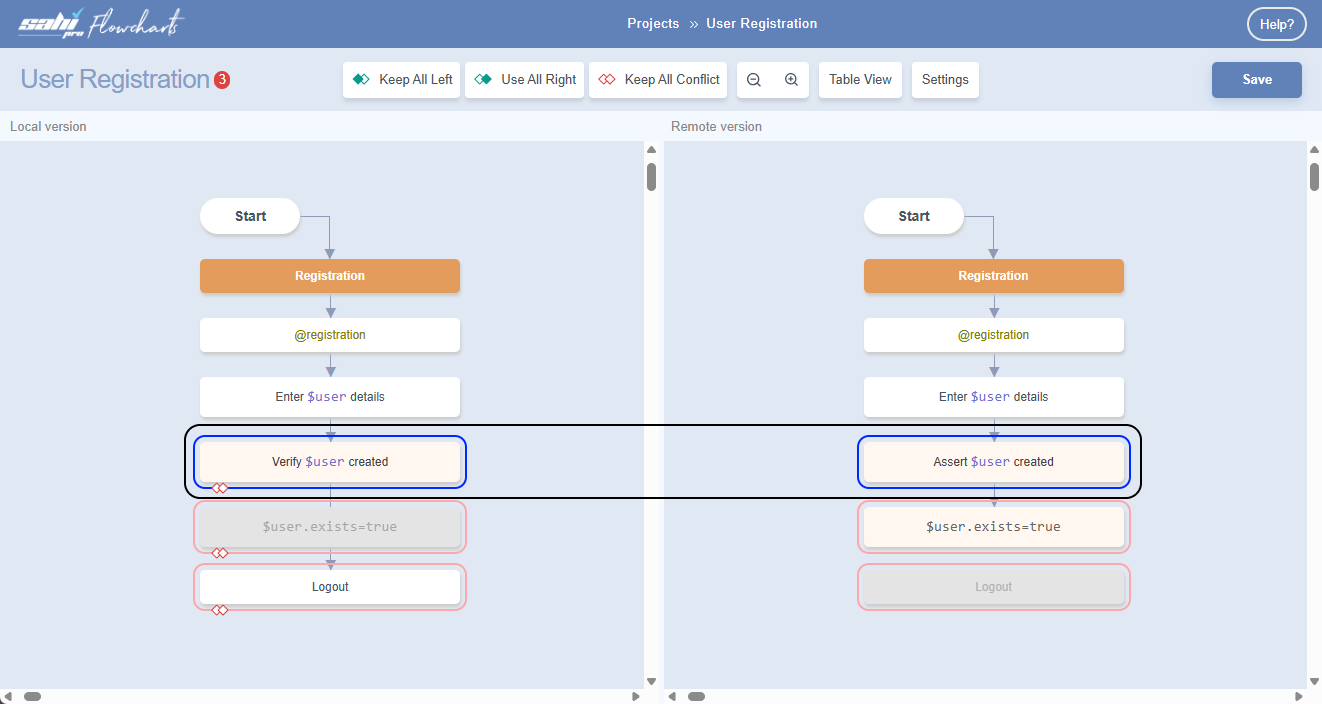
Hovering the mouse over a specific change on one side will highlight the respective change on the other side.
-
By default, changes from the Local version will be chosen. To choose a specific version, hover over the specific change on the left side. When you hover the
Diff Menuwill be visible. Select the required option from theDiff Menu.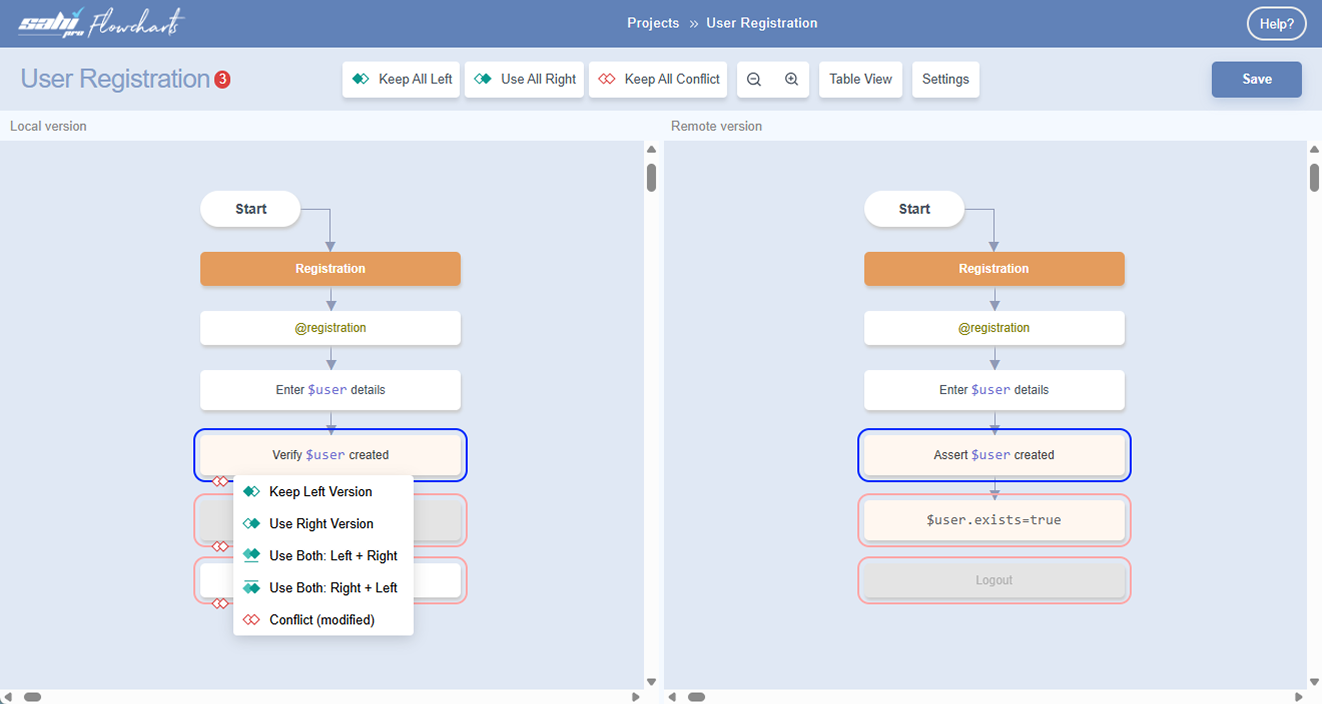
-
Once a conflict is resolved, the
conflict iconassociated with that conflict will change to the selected resolved state icon.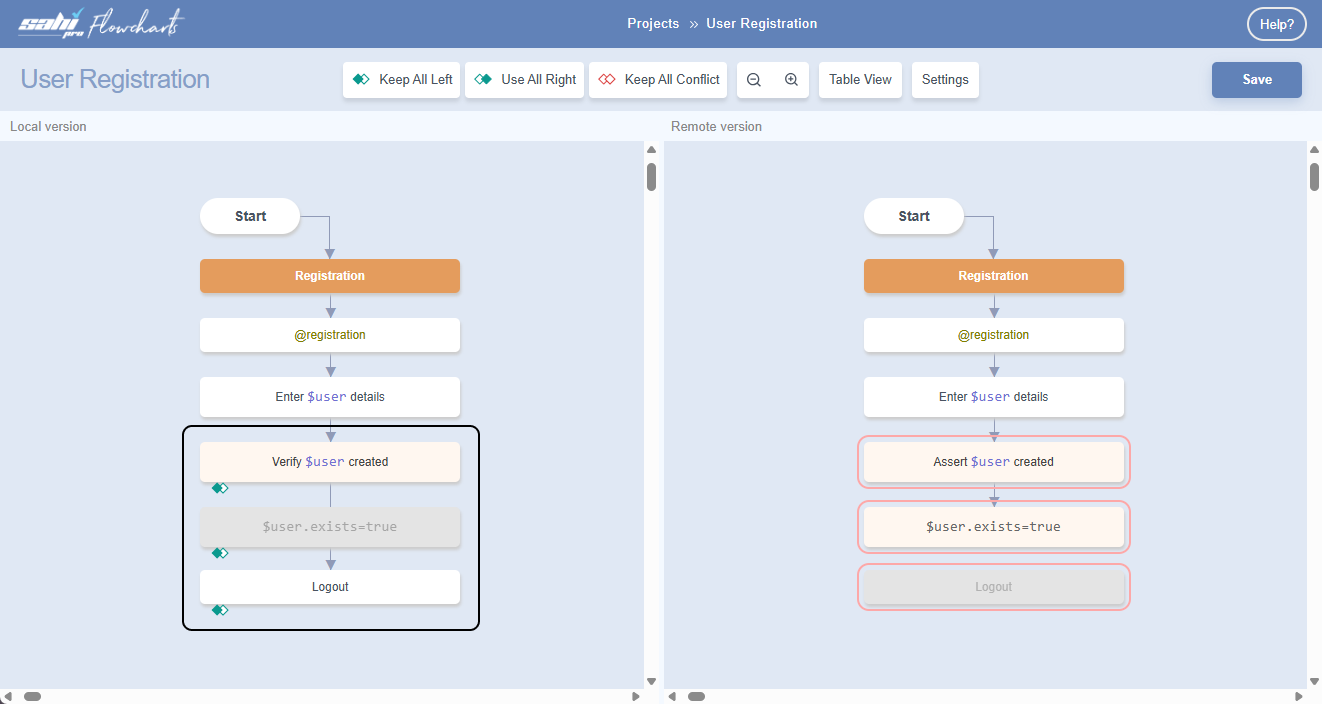
A Merge conflict can have five states:
-
Conflict state
-
Keep Left Version: Keep the left side change, ignore the right side change.

-
Use Right Version: Keep the right side change, ignore the left side change.
-
Use Both: Left + Right: Keep changes from both sides in order of Left side changes first then Right side changes.
-
Use Both Right + Left: Keep changes from both sides in order of Right side changes first then Left side changes.

-
-
Once all merge conflicts are solved, click on
Savebutton to save the changes to file system. -
Optionally, you can also compare the saved changes with the Local or Remote Head version. To do this comparison, refresh the flowchart page and click on
Compare Withbutton: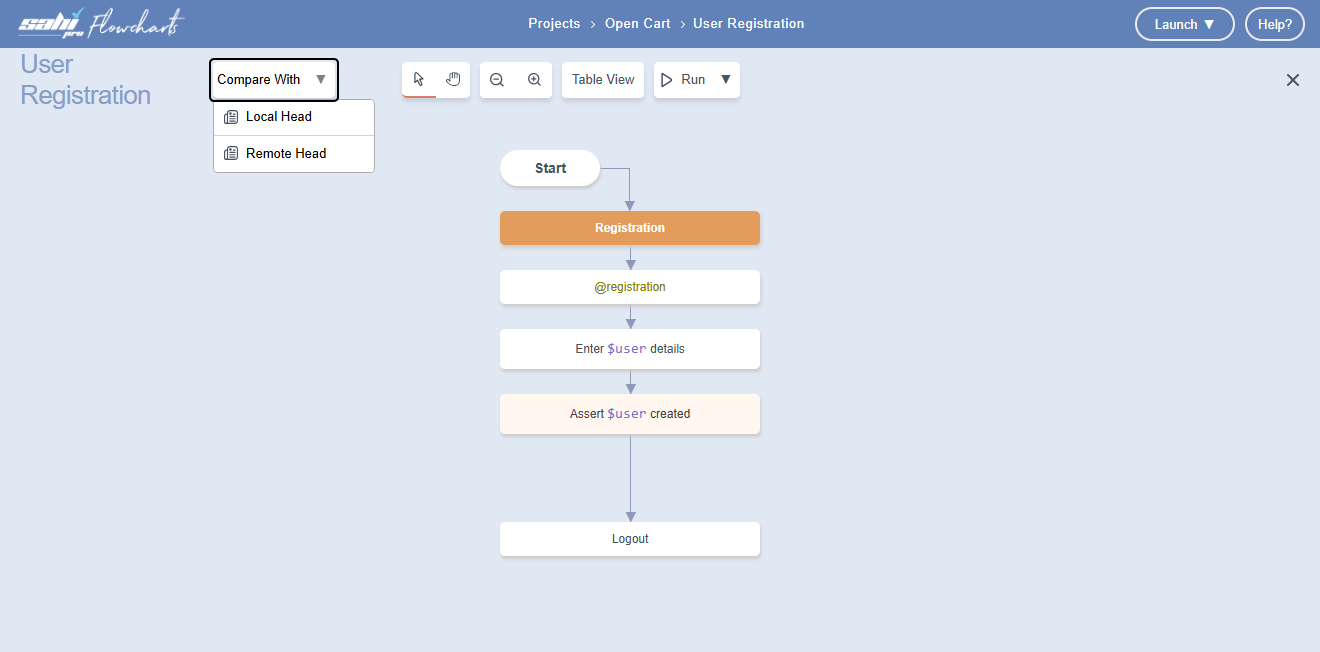
-
To compare with the Local Head version, click on
Local Headunder theCompare Withdropdown. This will show the comparison between the Current system version and the Local Head version.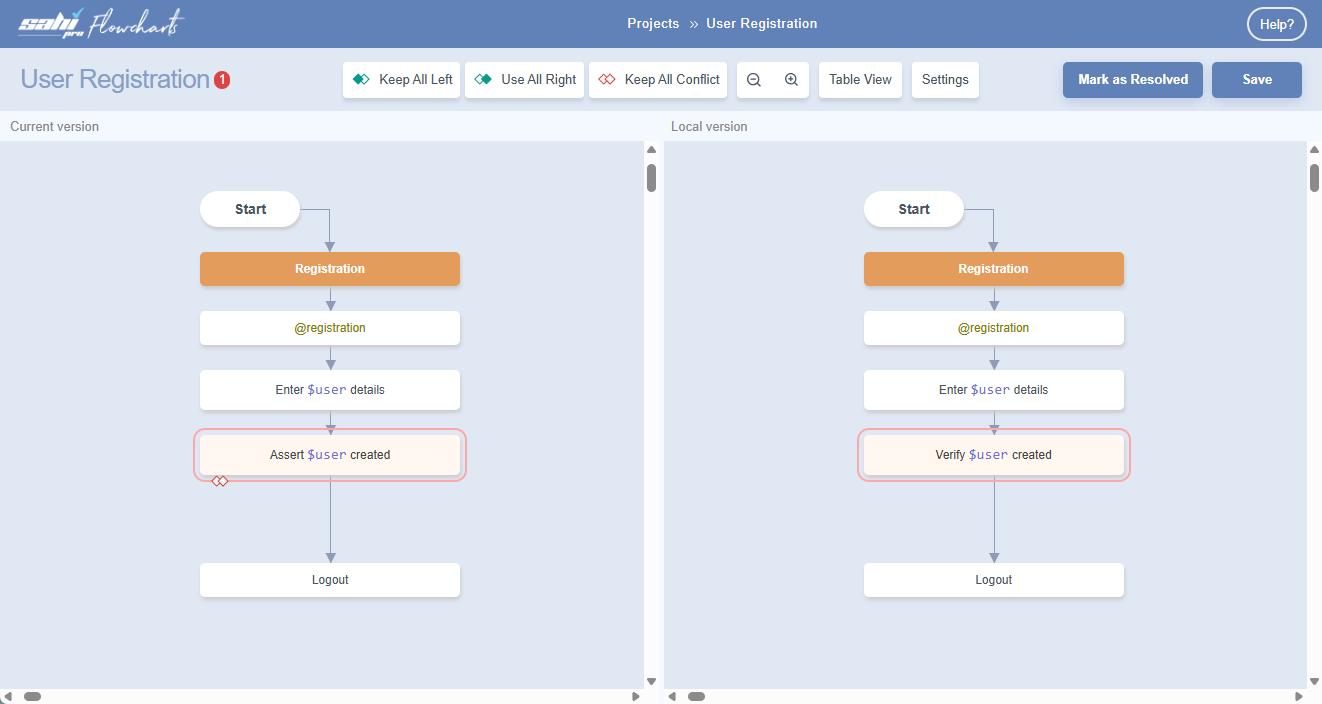
-
To compare with the Remote Head version, click on
Remote Headunder theCompare Withdropdown. This will show the comparison between the Current system version and the Remote Head version.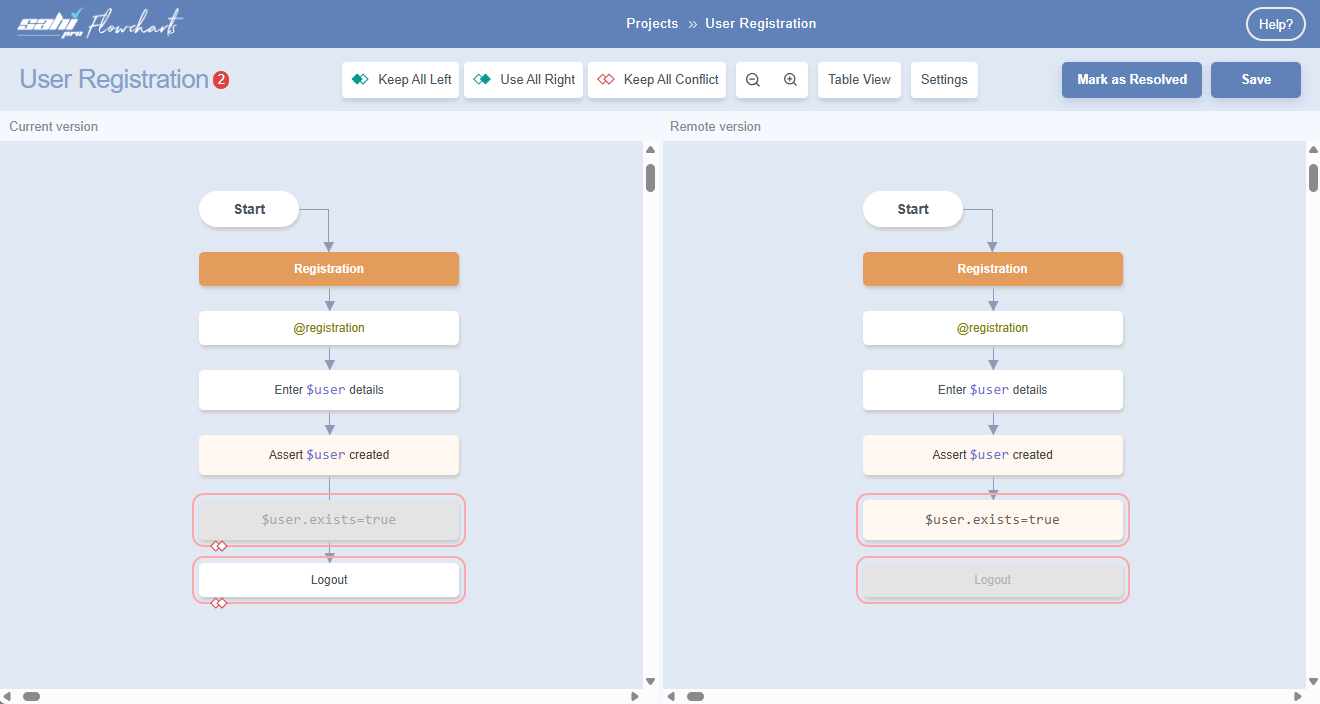
-
Click on
Savebutton to save the changes to file system. -
After solving all the merge conflicts, click on
Mark as Resolvedbutton.
-
-
In your
Gitclient application, commit the changed files.