

Manage External JAR Files and Configure Nodes
Add or delete external JAR files and Sahi Pro support JAR files, and sync them to the nodes of distributed suite runs.
Keyword code sometimes needs a Java library, such as a database driver, and Sahi Pro support may send you a JAR file with a fix. Add them on the External JARs page, then copy them to the other machines that run your tests.
On the Dashboard, click All Settings › Sahi Pro Settings, then Configuration › External JARs.
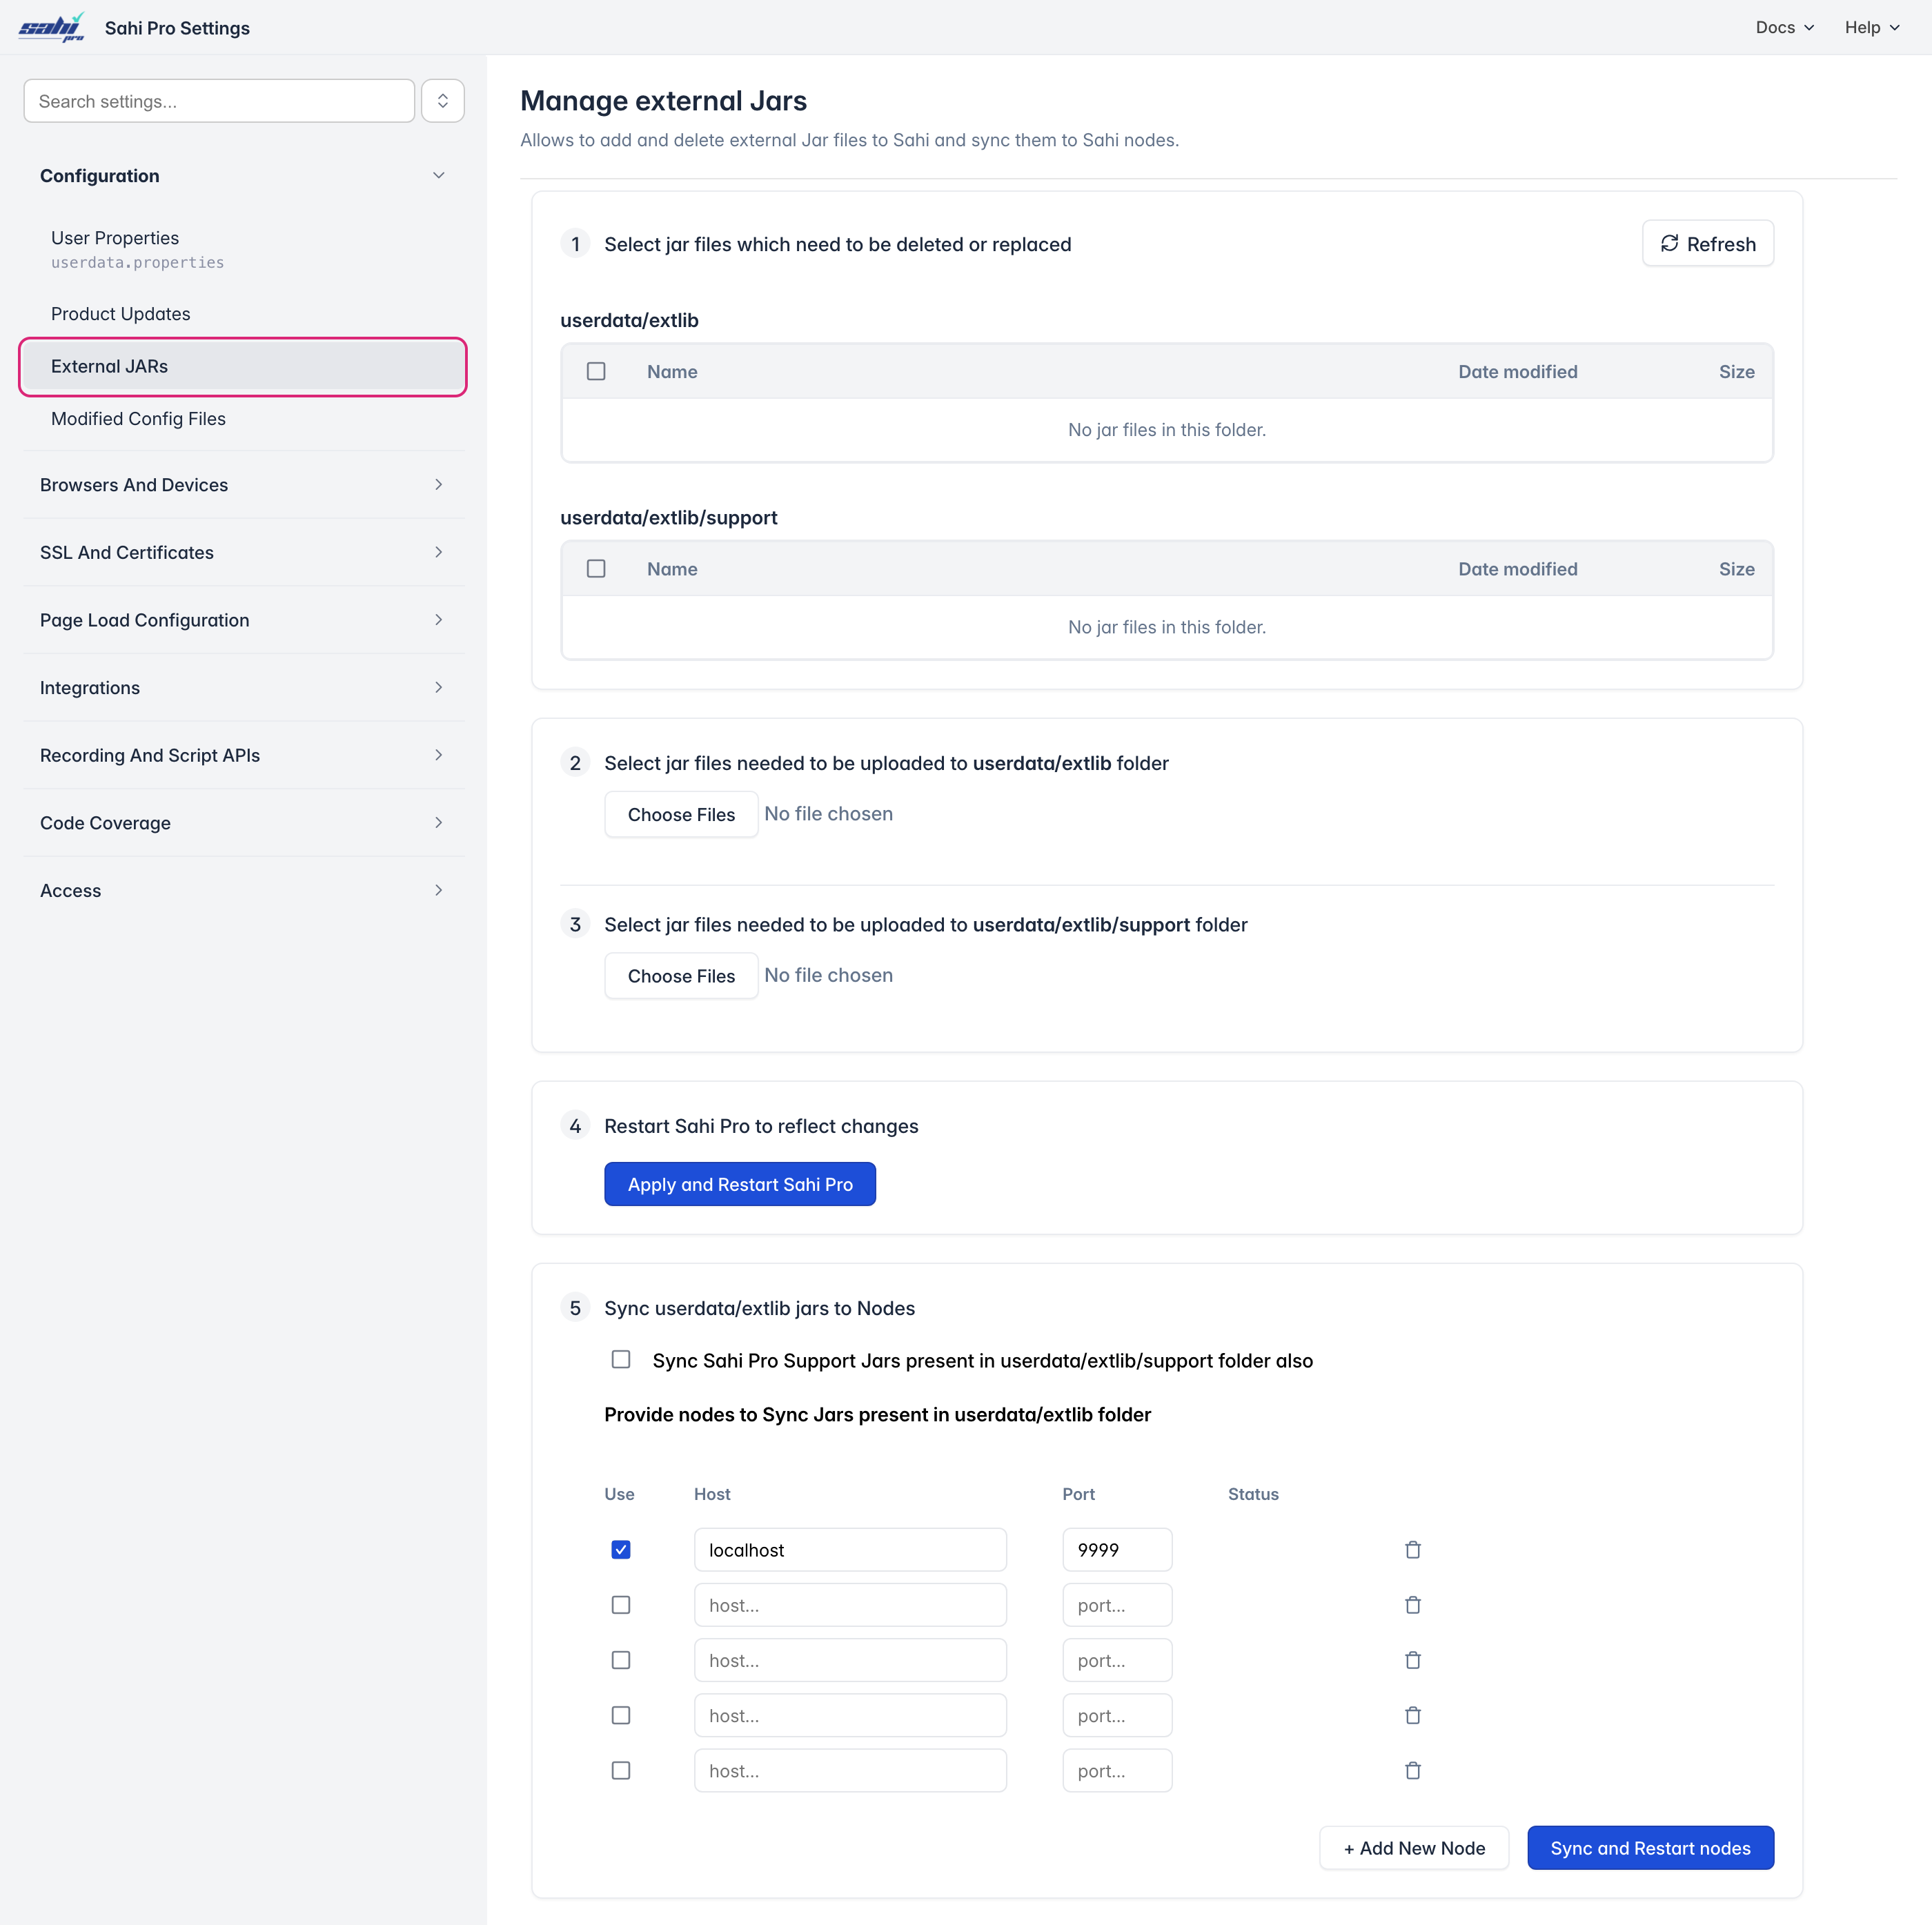
Add or Delete JAR Files
Section titled “Add or Delete JAR Files”There are two folders:
- userdata/extlib: JAR files your tests need, such as a database driver or a library your keyword code calls.
- userdata/extlib/support: JAR files from Sahi Pro support for changes made for your team.
- To delete or replace JAR files, tick them in the list.
- To add JAR files to
userdata/extlib, click Choose Files under step 2. - To add JAR files to
userdata/extlib/support, click Choose Files under step 3. - Click Apply and Restart Sahi Pro. Changes take effect only after the restart.
Sync JAR Files to Nodes
Section titled “Sync JAR Files to Nodes”In distributed suite runs, every node needs the same JAR files. Step 5 copies them for you:
- Under Provide nodes to Sync Jars present in userdata/extlib folder, enter each node’s Host and Port, and tick Use. Add New Node adds a row.
- To copy the support JAR files too, tick Sync Sahi Pro Support Jars present in userdata/extlib/support folder also.
- Click Sync and Restart nodes. Sahi Pro copies the files and restarts each node, so the changes take effect.
Status shows each node’s progress: a tick when the sync and restart succeed, a cross when they fail. Hover over the cross to see why.