

Create Your First Test Scenario
Create a project, a scenario file, a test case and keywords, then record, run and edit your first test in Sahi Pro.
In Sahi Pro, a test case is made of keywords, and each keyword holds its steps. You record each keyword’s steps once, then reuse the keyword in other test cases.
This is how Sahi Pro is built to work, called Business-Driven Test Automation (BDTA). You first describe the test in business terms, as keywords, and then automate each keyword. You can write the keywords before the application is even ready. On this page, you add all the keywords first, then record their steps.
On this page, you build a test for Sahi’s sample application at https://sahitest.com/demo/training/login.htm. The test logs in, adds books to the cart, checks the total, and logs out.
Create a Project
Section titled “Create a Project”A project keeps a team’s tests together. Sahi Pro comes with a default project, scripts, which holds example tests you can refer to later.
- On the Dashboard, click Test Editor to open the No-Code Test Editor.
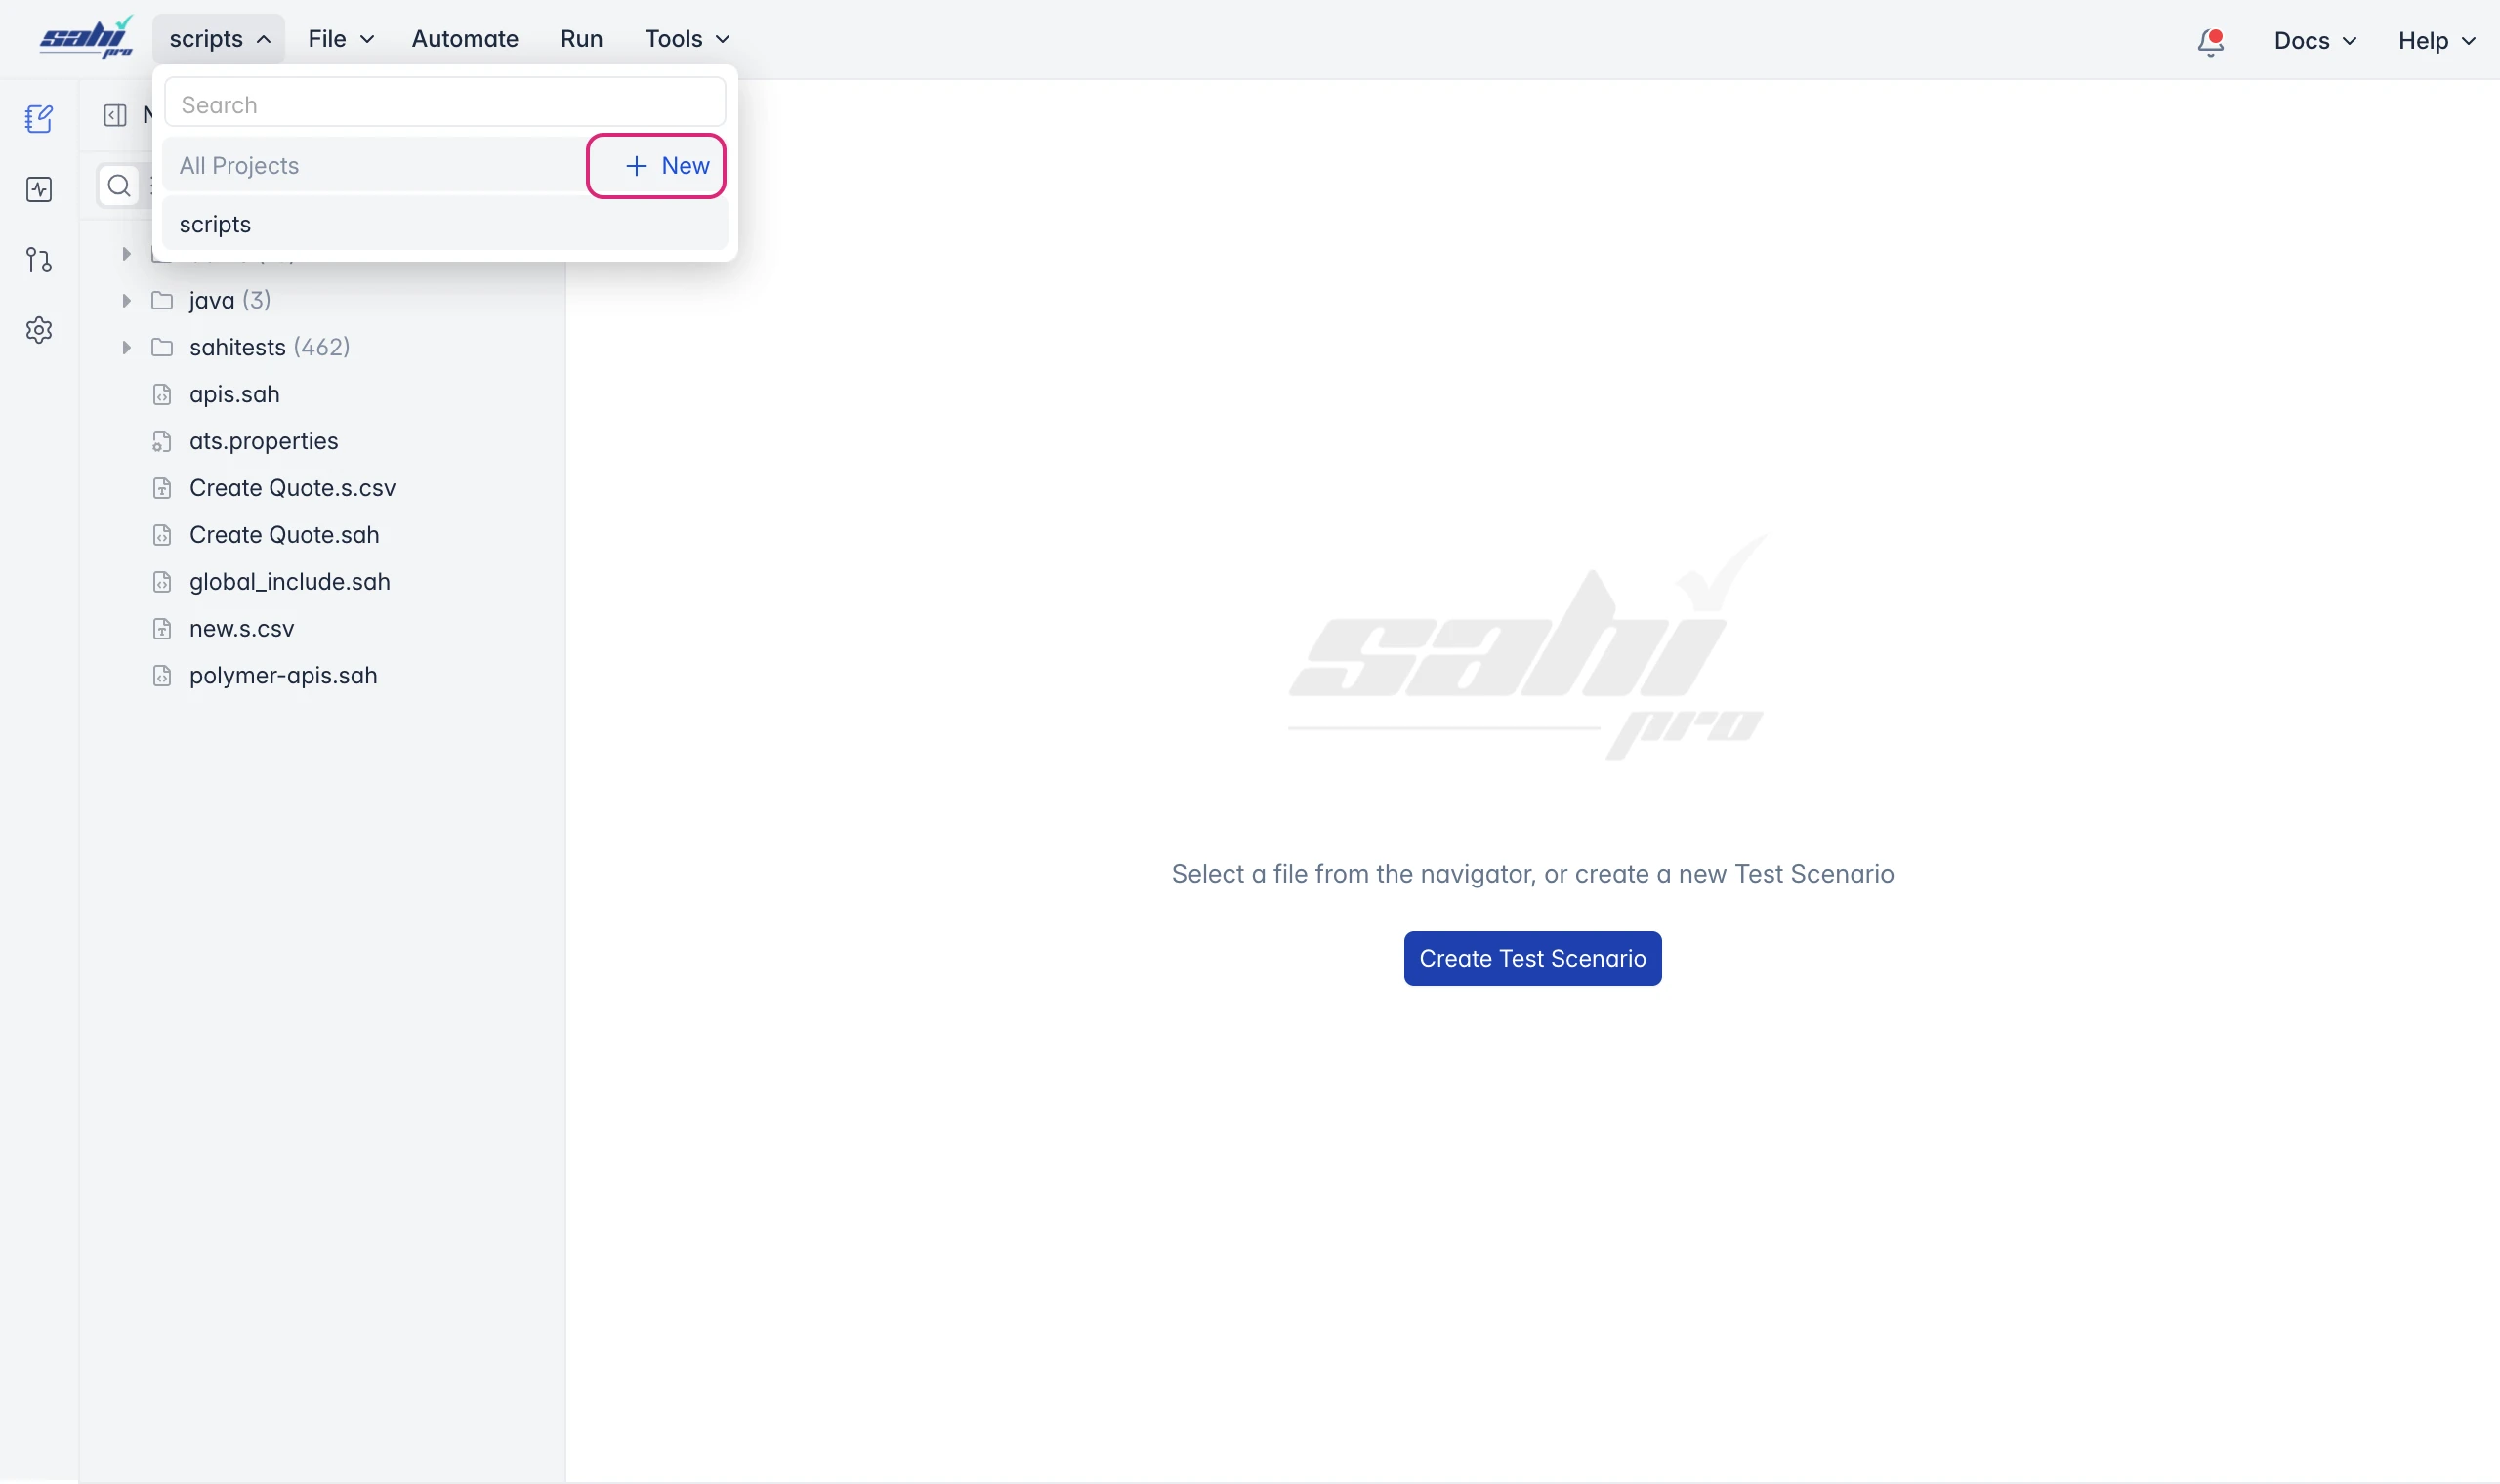
- Click the project name (
scripts) at the top left, then click New. - Name the project
sahi_trainingand click Create.
Create a Scenario File
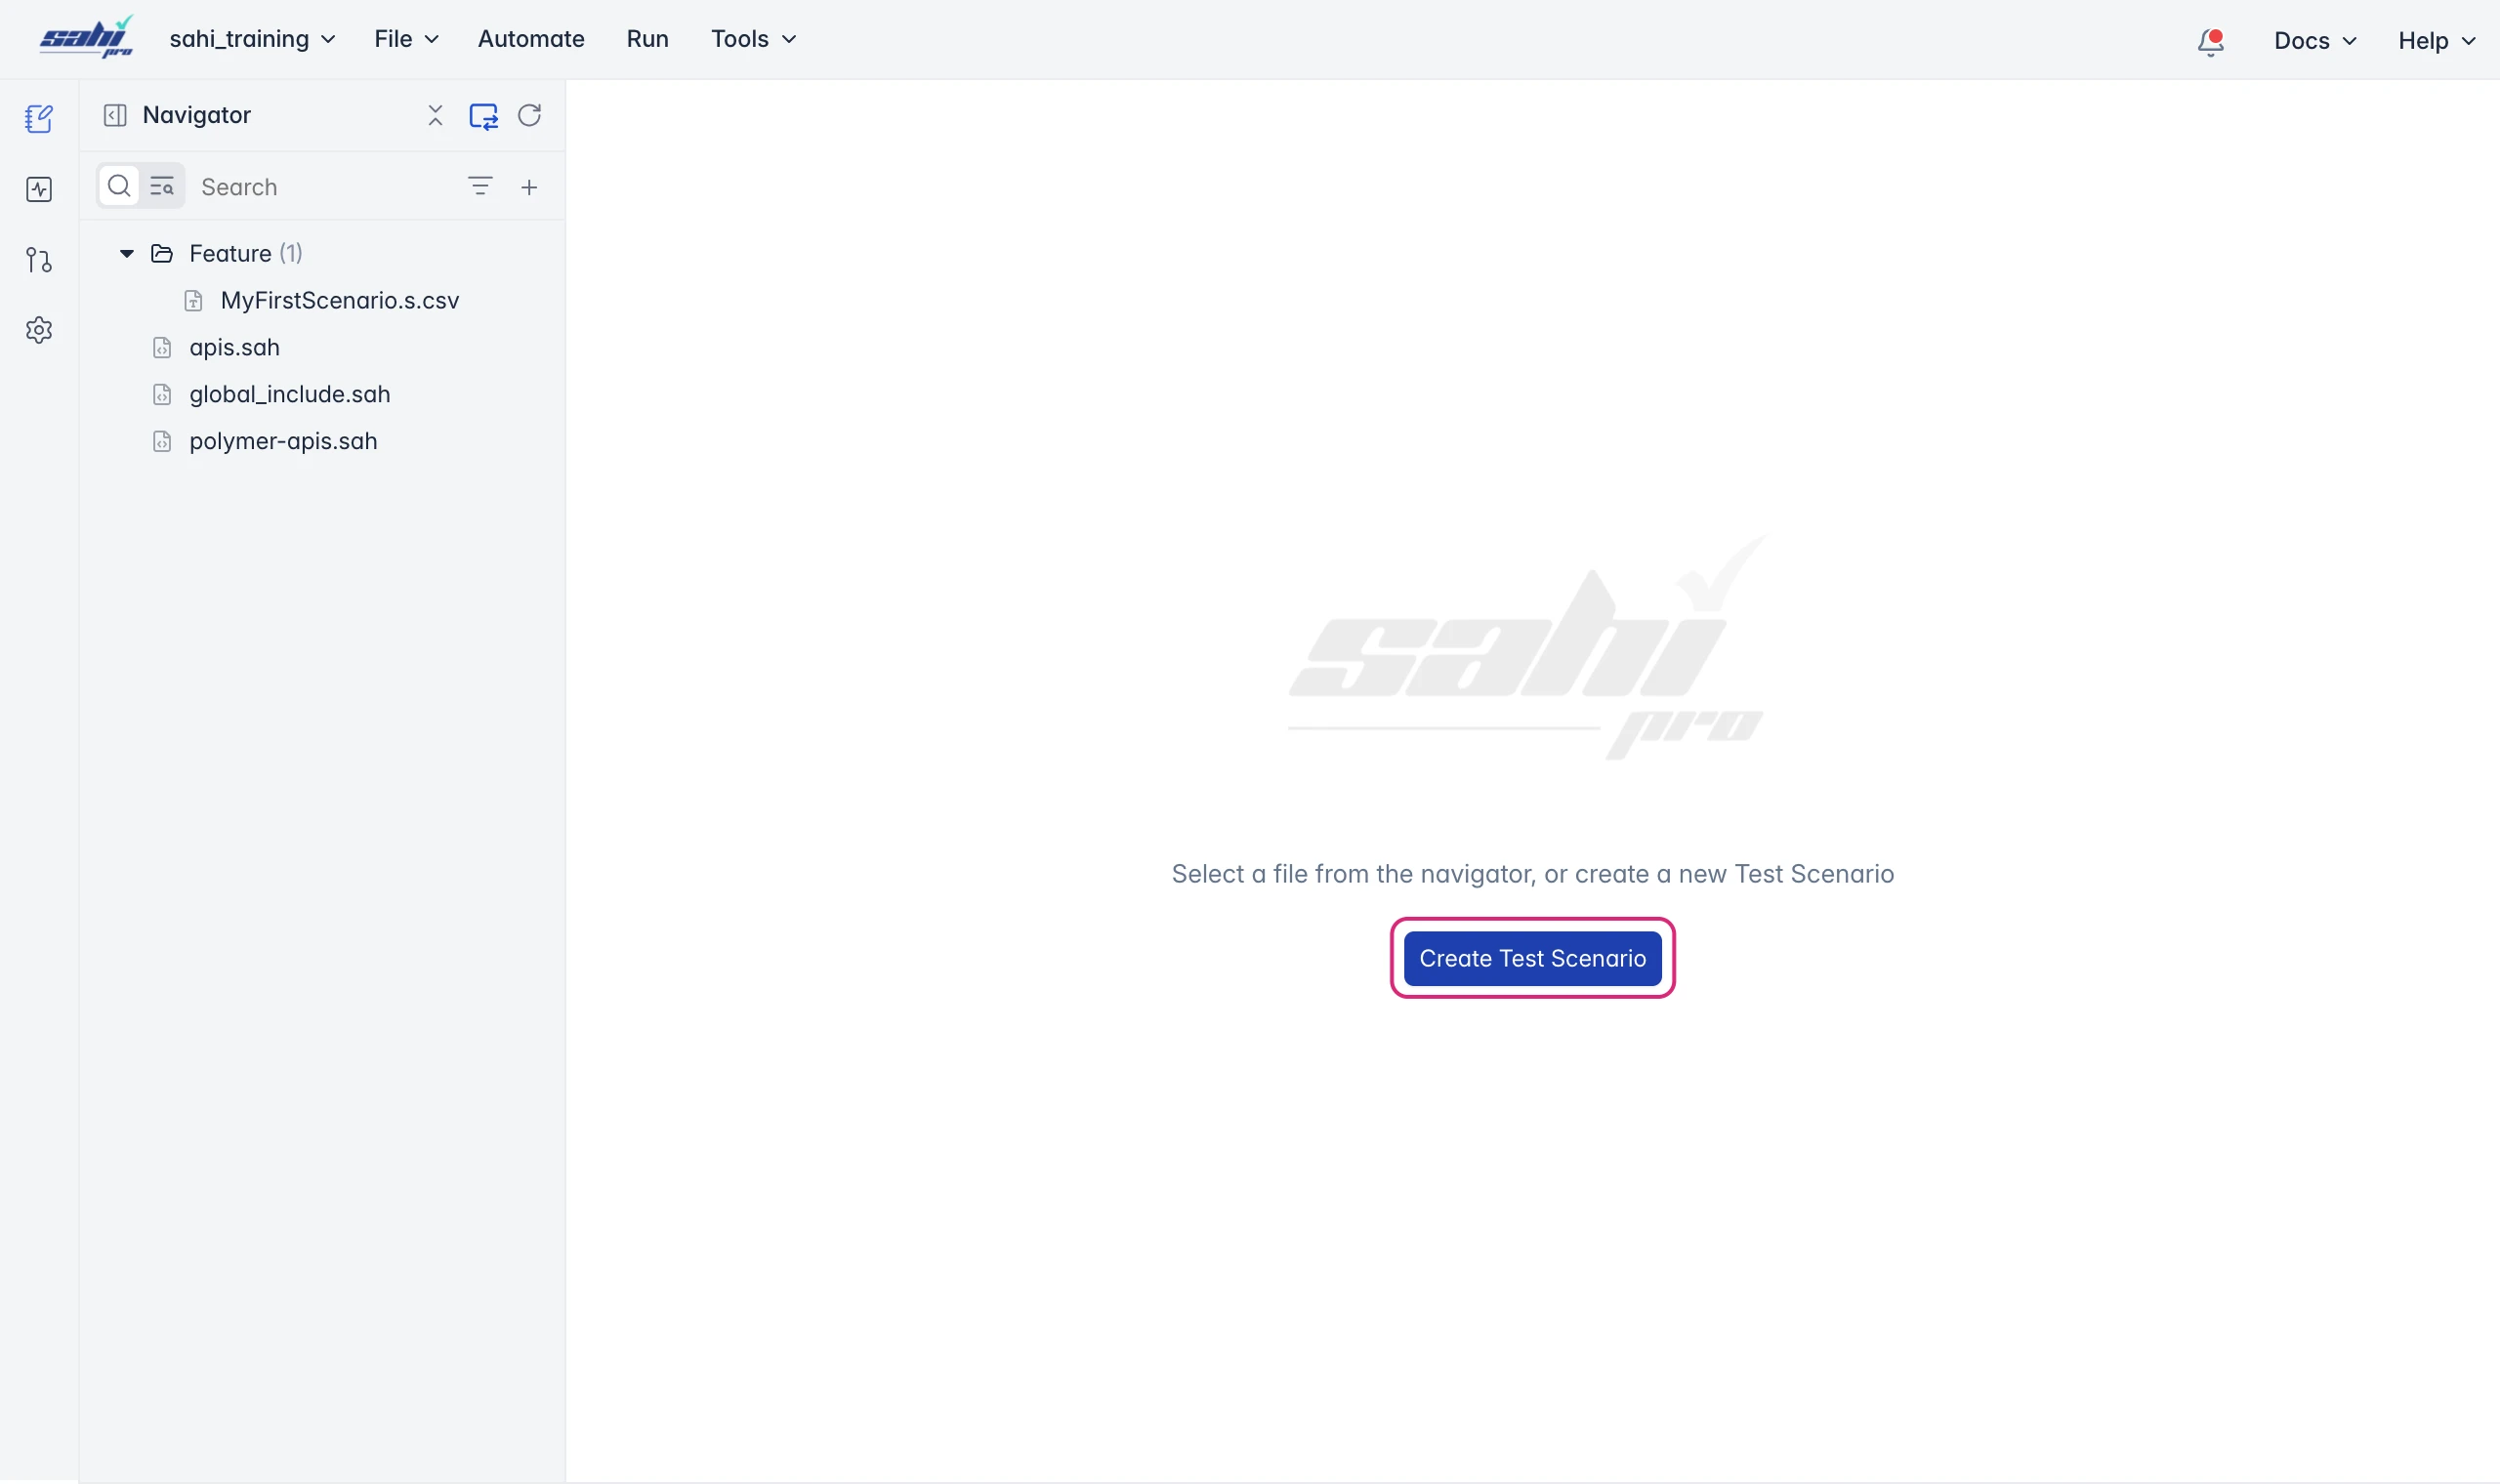
Section titled “Create a Scenario File”A scenario file (.s.csv) holds test cases. A new project comes with a sample one, MyFirstScenario.s.csv, in its Feature directory. To create your own:
- Click Create Test Scenario, or click File > New > Scenario File.
- Name it
booksand click Create.
Add a Test Case
Section titled “Add a Test Case”A new scenario file starts with a test case named Default Test Case. You can rename it, or add your own:
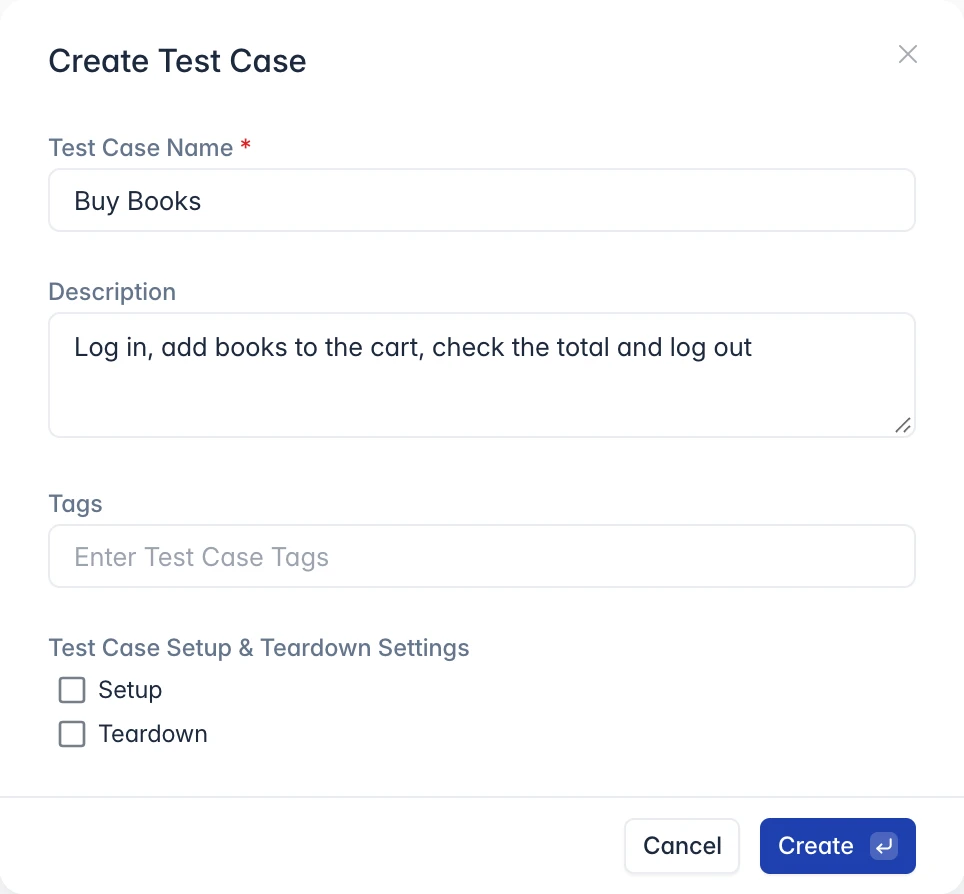
- Click Add Test Case.
- In the Create Test Case dialog, name it
Buy Books, add a description such asLog in, add books to the cart, check the total and log out, and click Create.
Add Keywords
Section titled “Add Keywords”The test case needs three keywords: one to log in, one to add books, and one to log out.
- Under the test case, click Add Keyword, type
Login, and press Enter. A new keyword field opens below it. - Type
Add Booksand press Enter, thenLogoutand press Enter. Press Esc to close the empty field. - Select Login. Sahi Pro asks you to confirm the keyword file path, where the keyword’s steps are kept. Keep the suggested file,
books.sah, and click Confirm.
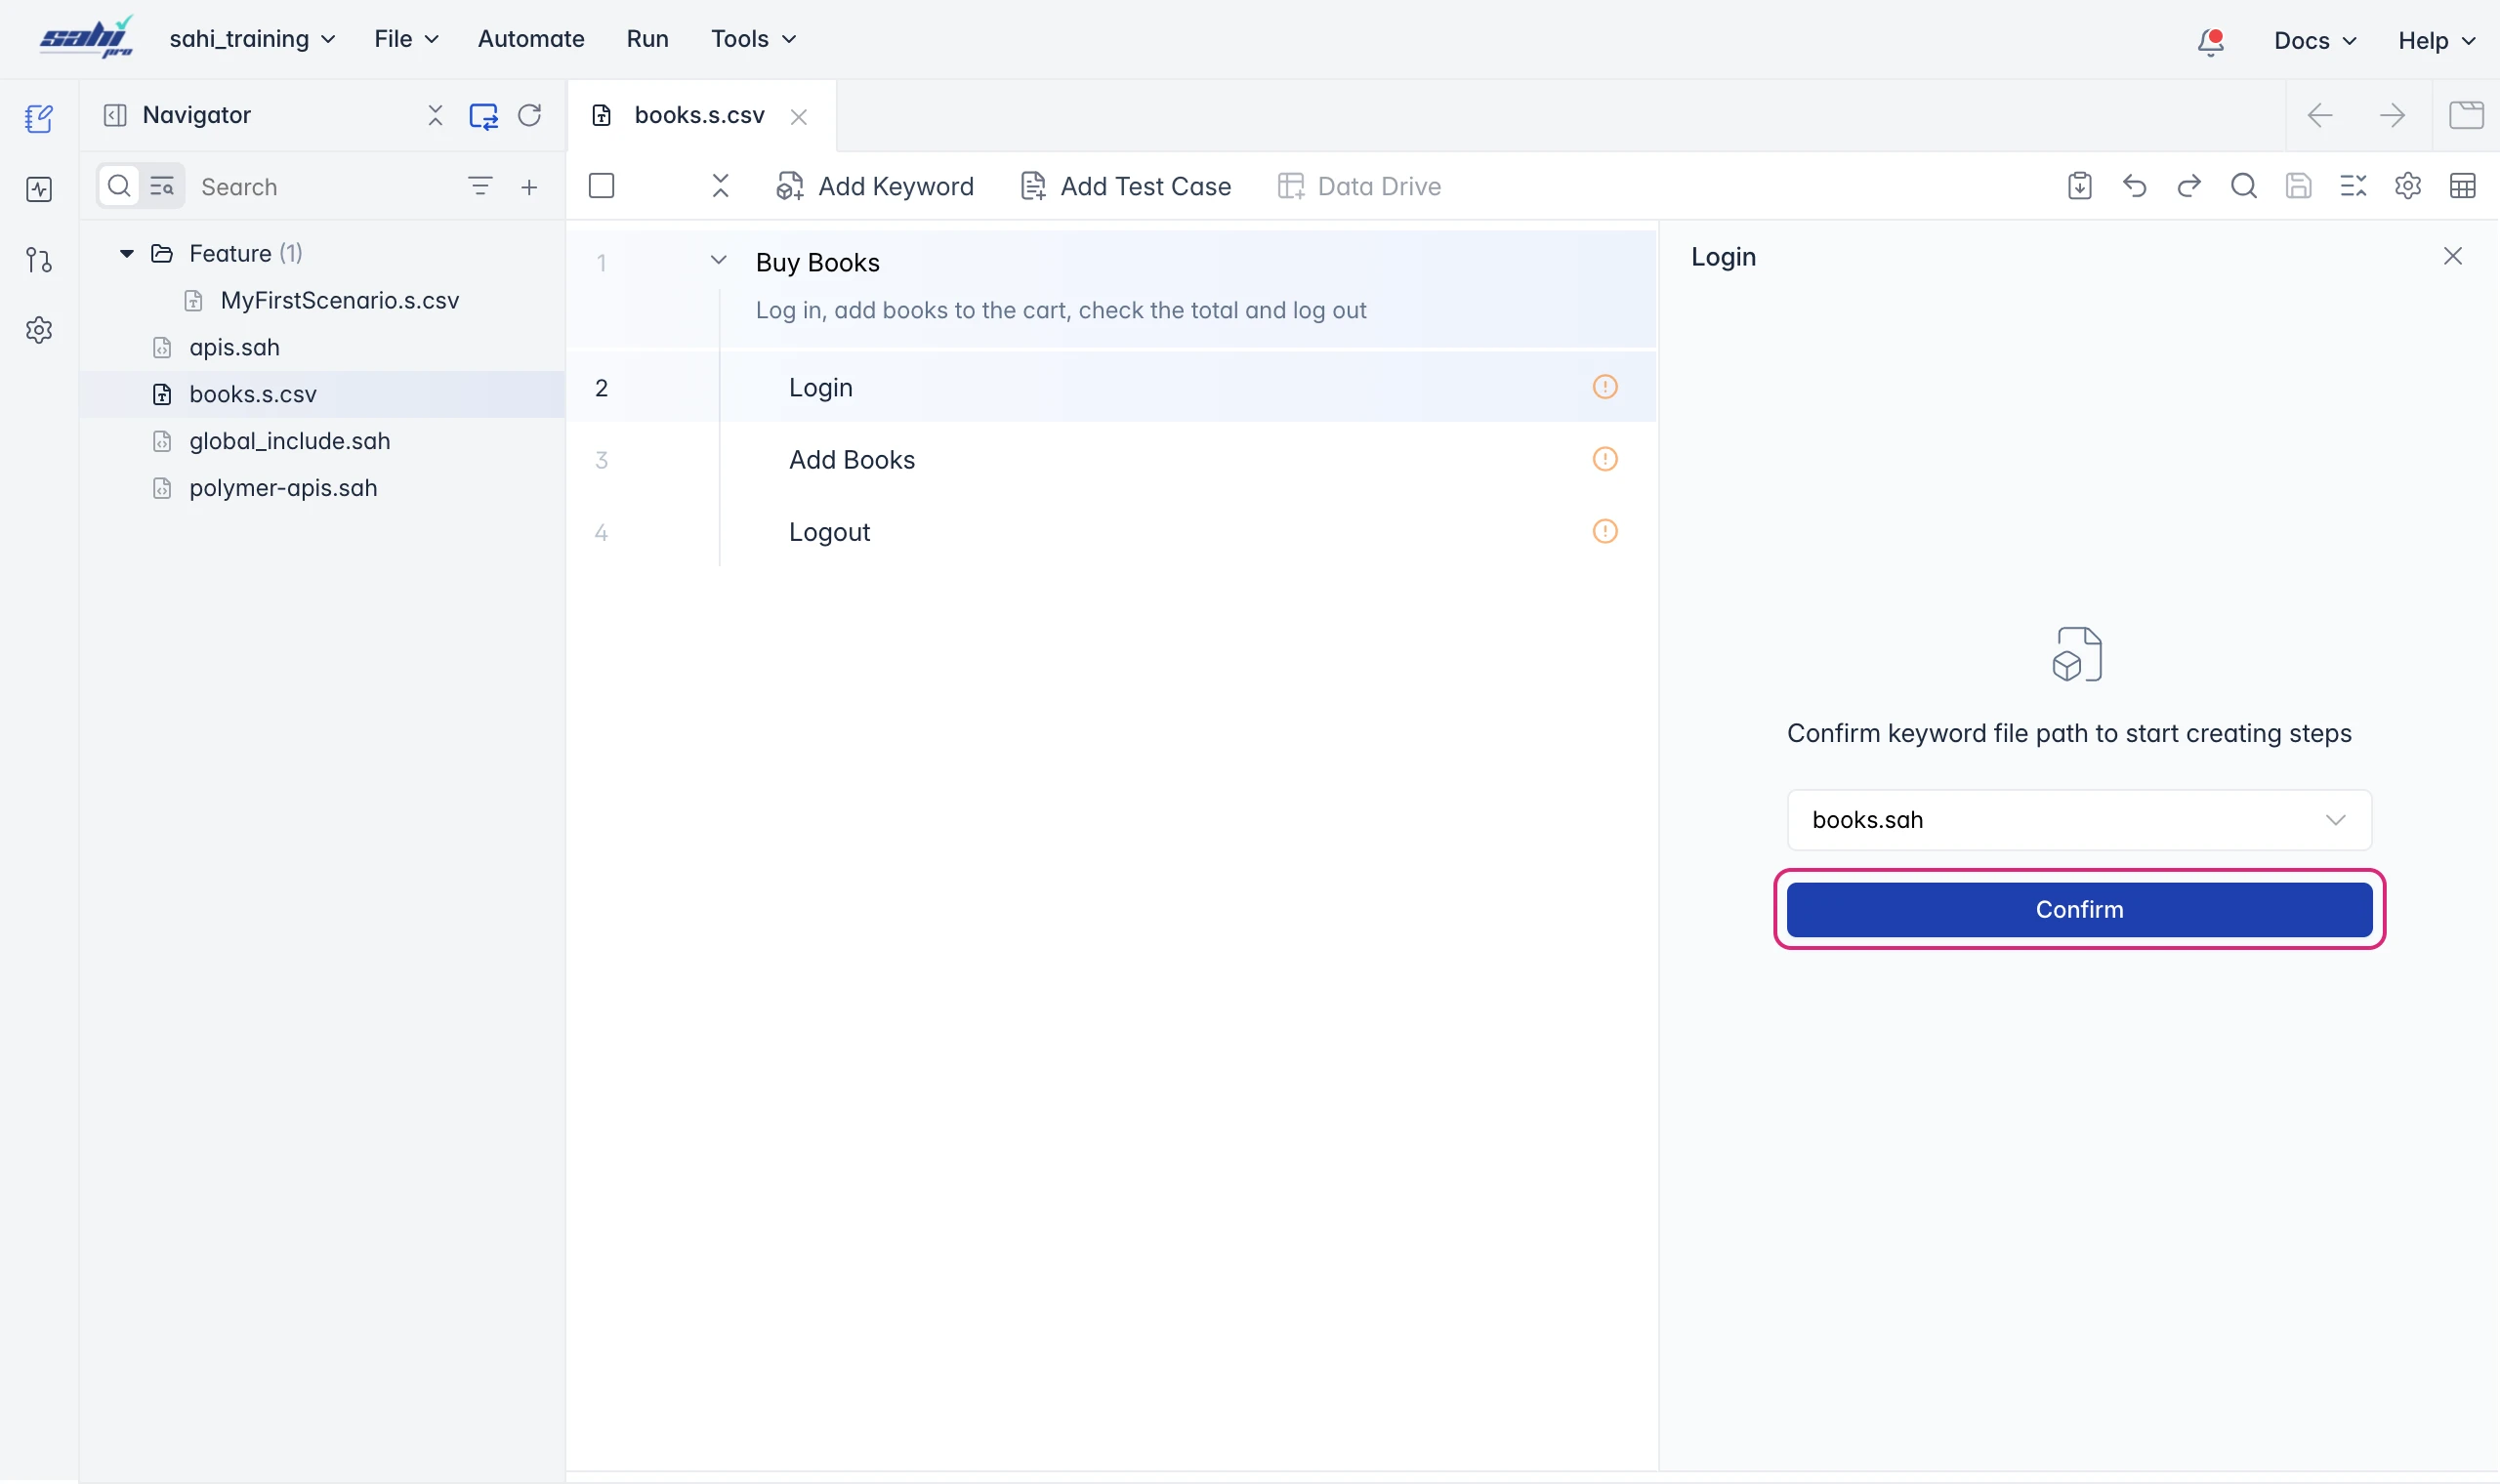
The keywords have no steps yet. You record them in the Controller.
Record the First Keyword
Section titled “Record the First Keyword”-
With Login selected, click Automate.
-
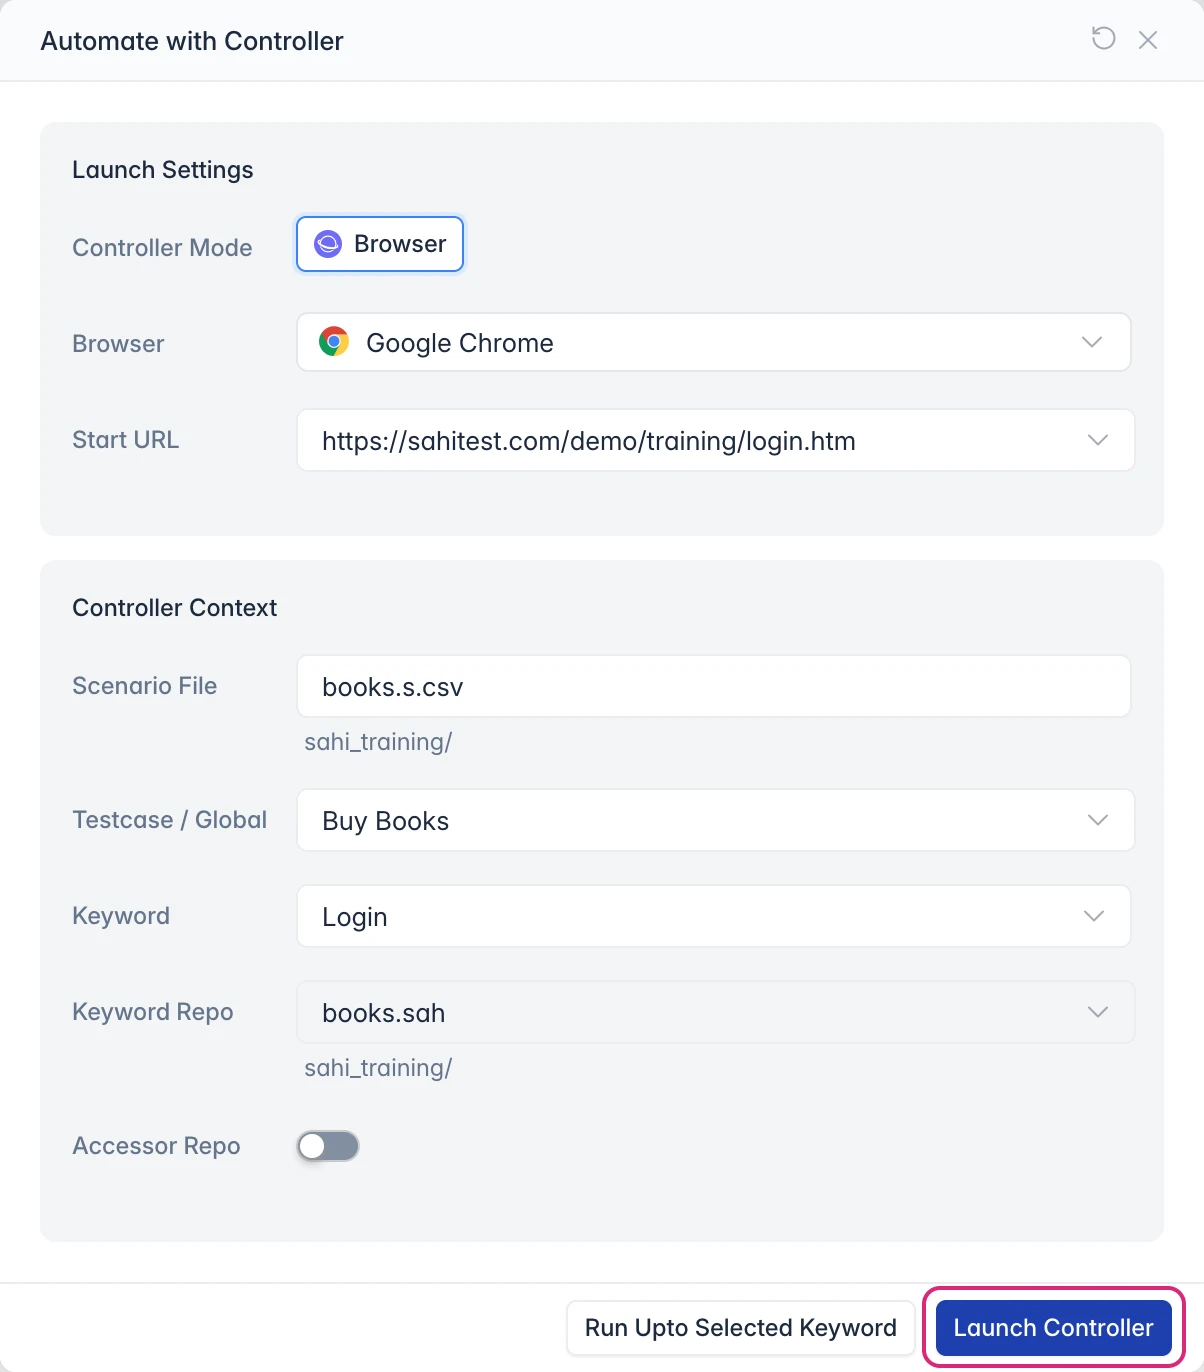
In the Automate with Controller dialog, choose the browser and set Start URL to
https://sahitest.com/demo/training/login.htm. Check that Testcase / Global showsBuy Booksand Keyword showsLogin. -
Click Launch Controller. The browser opens at the start URL, and the Controller opens on the Login keyword.
-
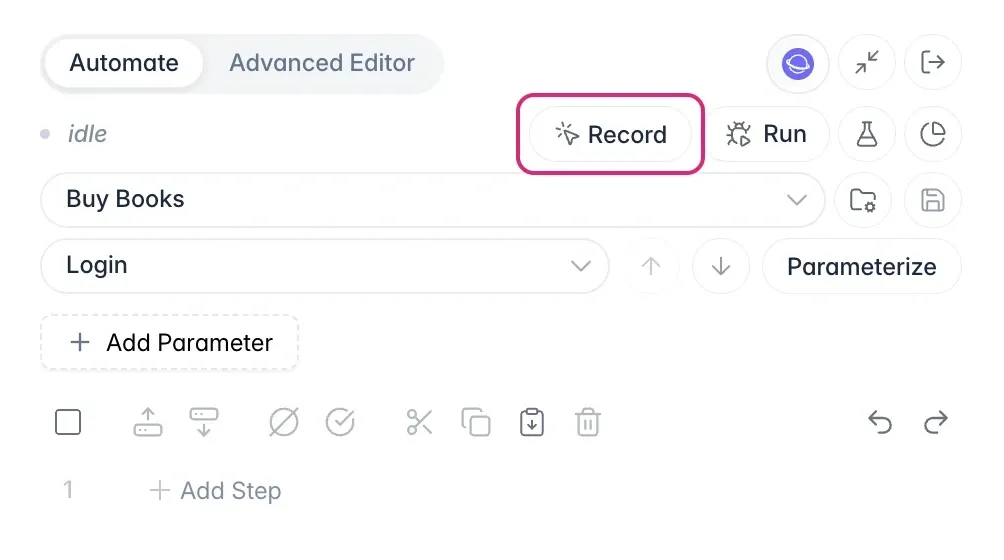
In the Controller, click Record. The status changes from idle to Recording.
-
In the browser, enter the username
testand the passwordsecret, and click Login.
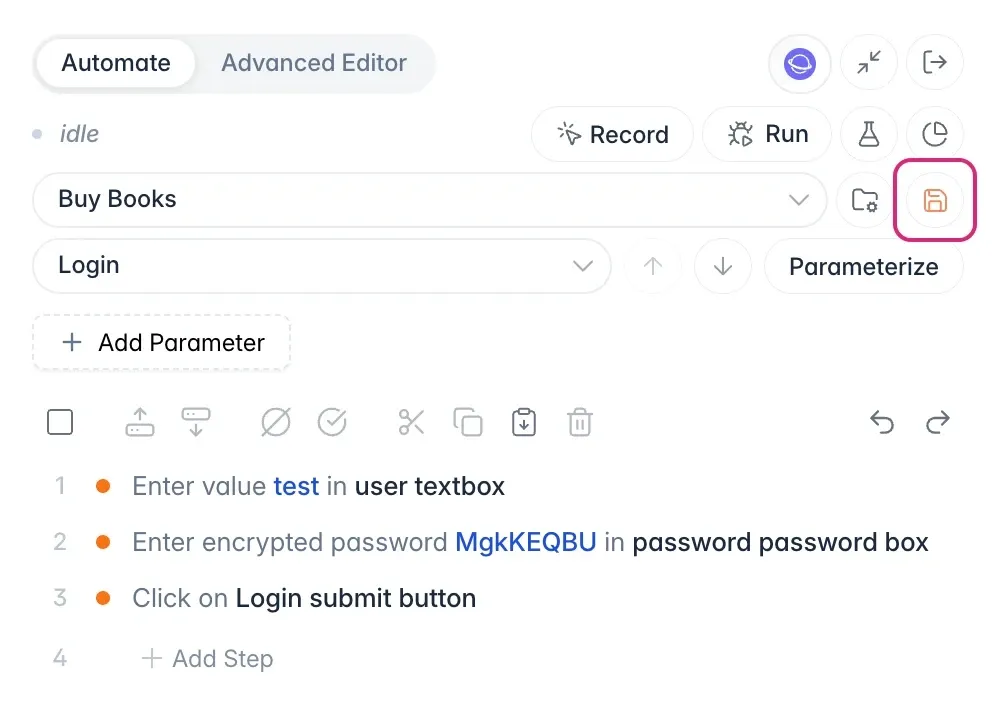
Each action you take in the browser appears as a step in the Controller.
Steps that aren’t saved yet have an orange dot, and the Save icon next to the test case turns orange. Click Save.
Add an Assertion While Recording
Section titled “Add an Assertion While Recording”A test checks that the application behaves as expected. In Sahi Pro, these checks are assertions, and you can add them while you record.
-
In the Controller, choose the Add Books keyword.
-
In the browser, enter the quantities
2,3and1for Core Java, Ruby for Rails and Python Cookbook, and click Add. The cart shows the books and the total, 1550. -
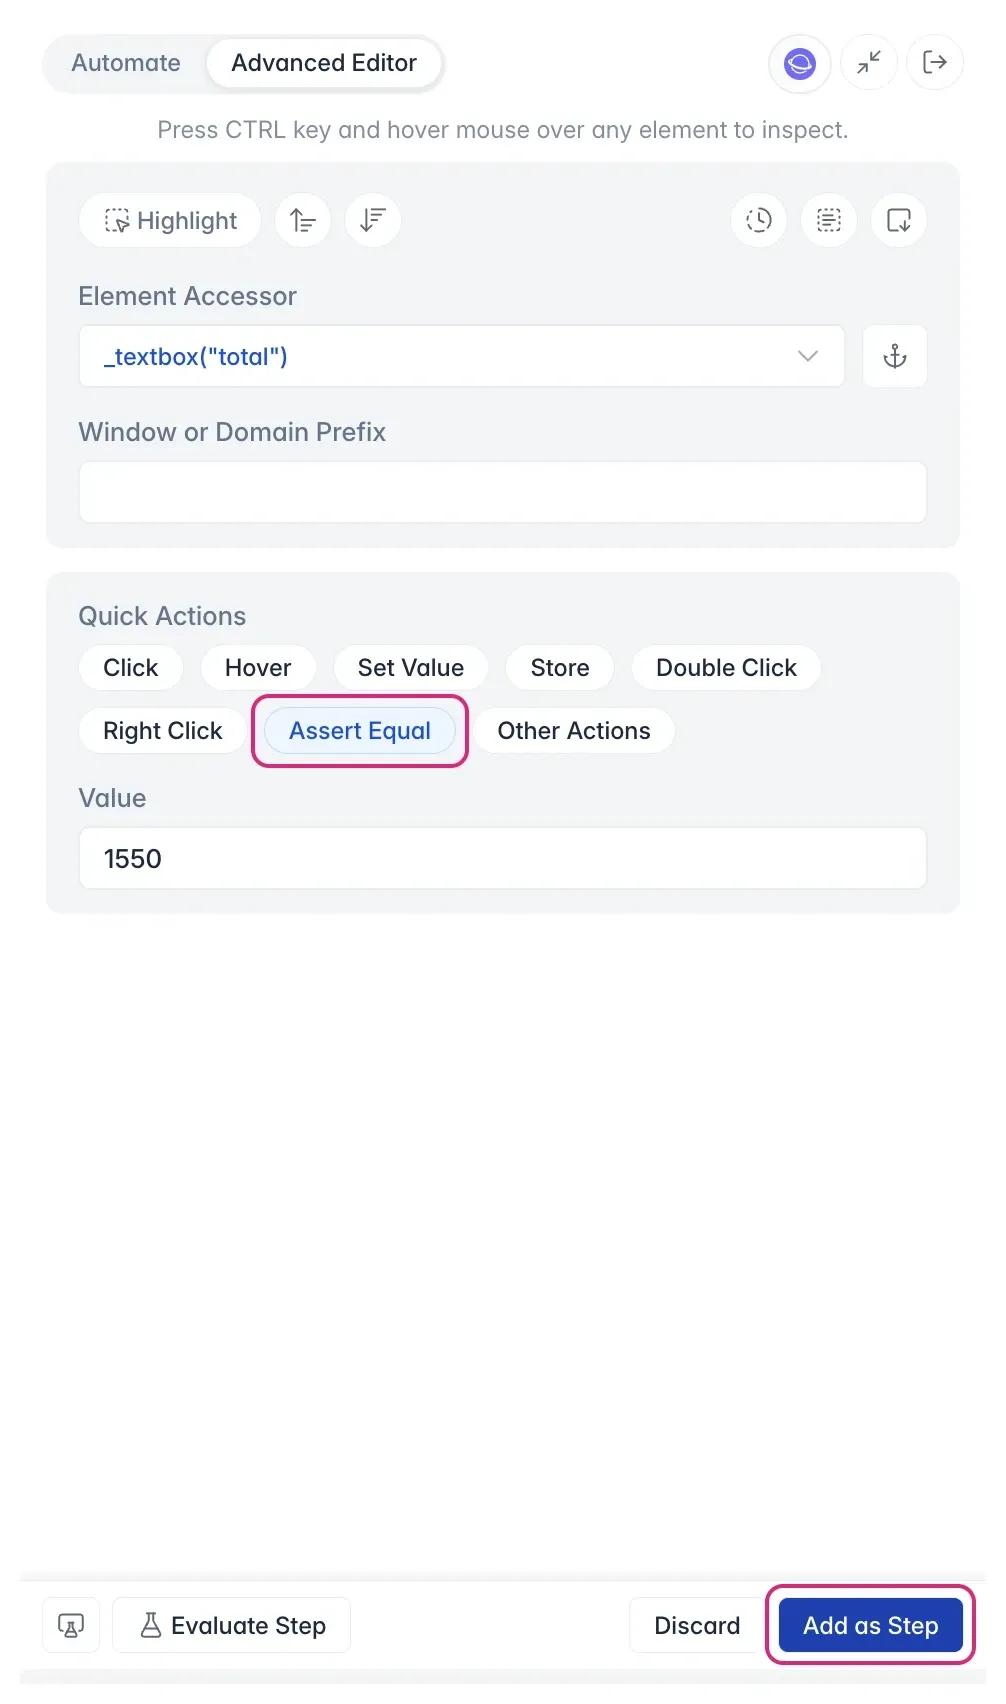
To check the total, open the Controller’s Advanced Editor tab.
-
Hold Ctrl (⌘ on Mac) and hover over the total field in the browser. The Controller fills in Element Accessor.
-
Under Quick Actions, choose Assert Equal. Set Value to
1550. -
Click Evaluate Step to check that the assertion passes, then click Add as Step.
Record the Other Keywords
Section titled “Record the Other Keywords”- In the Controller, choose the Logout keyword.
- In the browser, click Logout.
- Click Stop Recording, then click Save.
All three keywords now have their steps.
Run the Test Case from the Controller
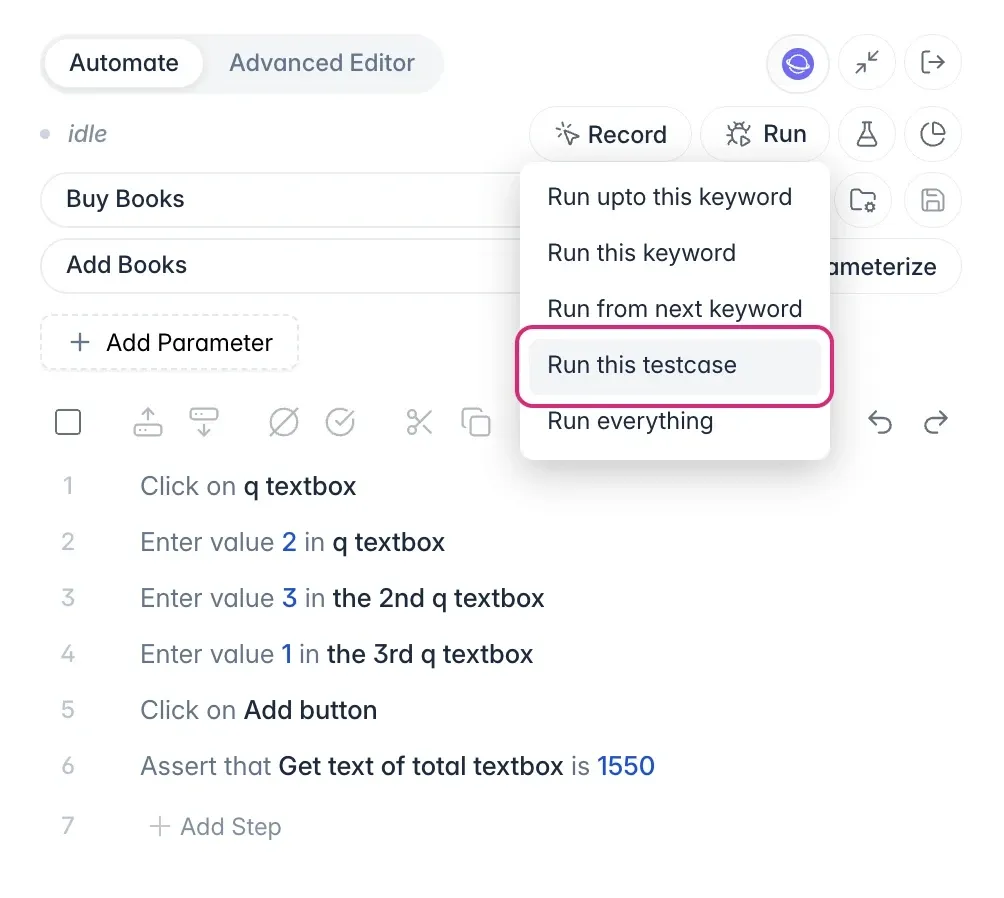
Section titled “Run the Test Case from the Controller”In the Controller, hover over Run and choose Run this testcase. Sahi Pro runs the whole Buy Books test case, keyword by keyword, and shows each step’s result.
The Run menu has other options too, such as running only the current keyword, or running up to it.
View the Report
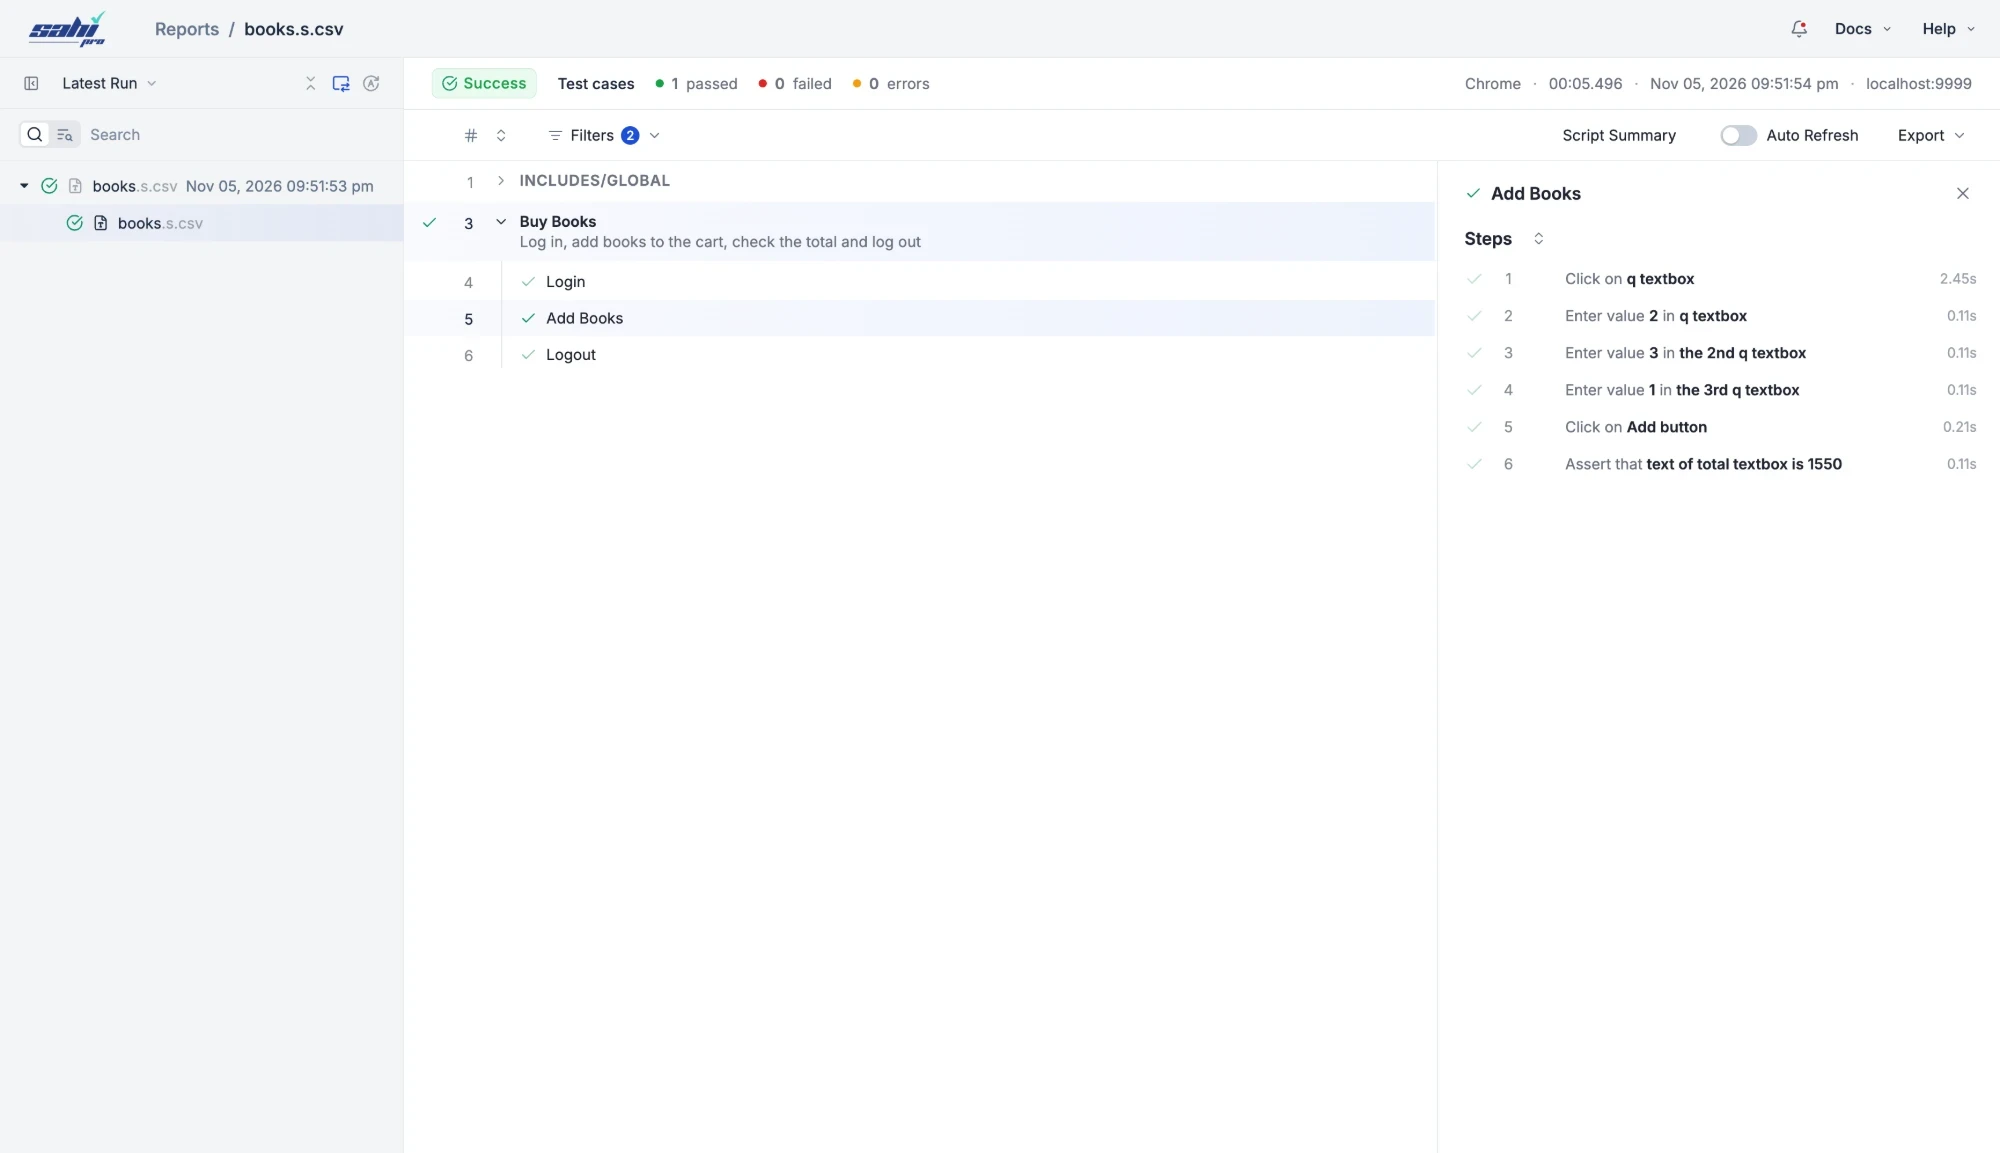
Section titled “View the Report”Every test run creates a report. When the run finishes, click Reports, the second icon from the left in the Controller’s bottom bar. The report shows each keyword and step, and the result of your assertion.
You can also open Reports from the left bar of the No-Code Test Editor, where the latest test runs are listed first.
Edit Keyword Steps in the Controller
Section titled “Edit Keyword Steps in the Controller”You can change a keyword’s steps without recording it again.
- In the Controller, choose the keyword.
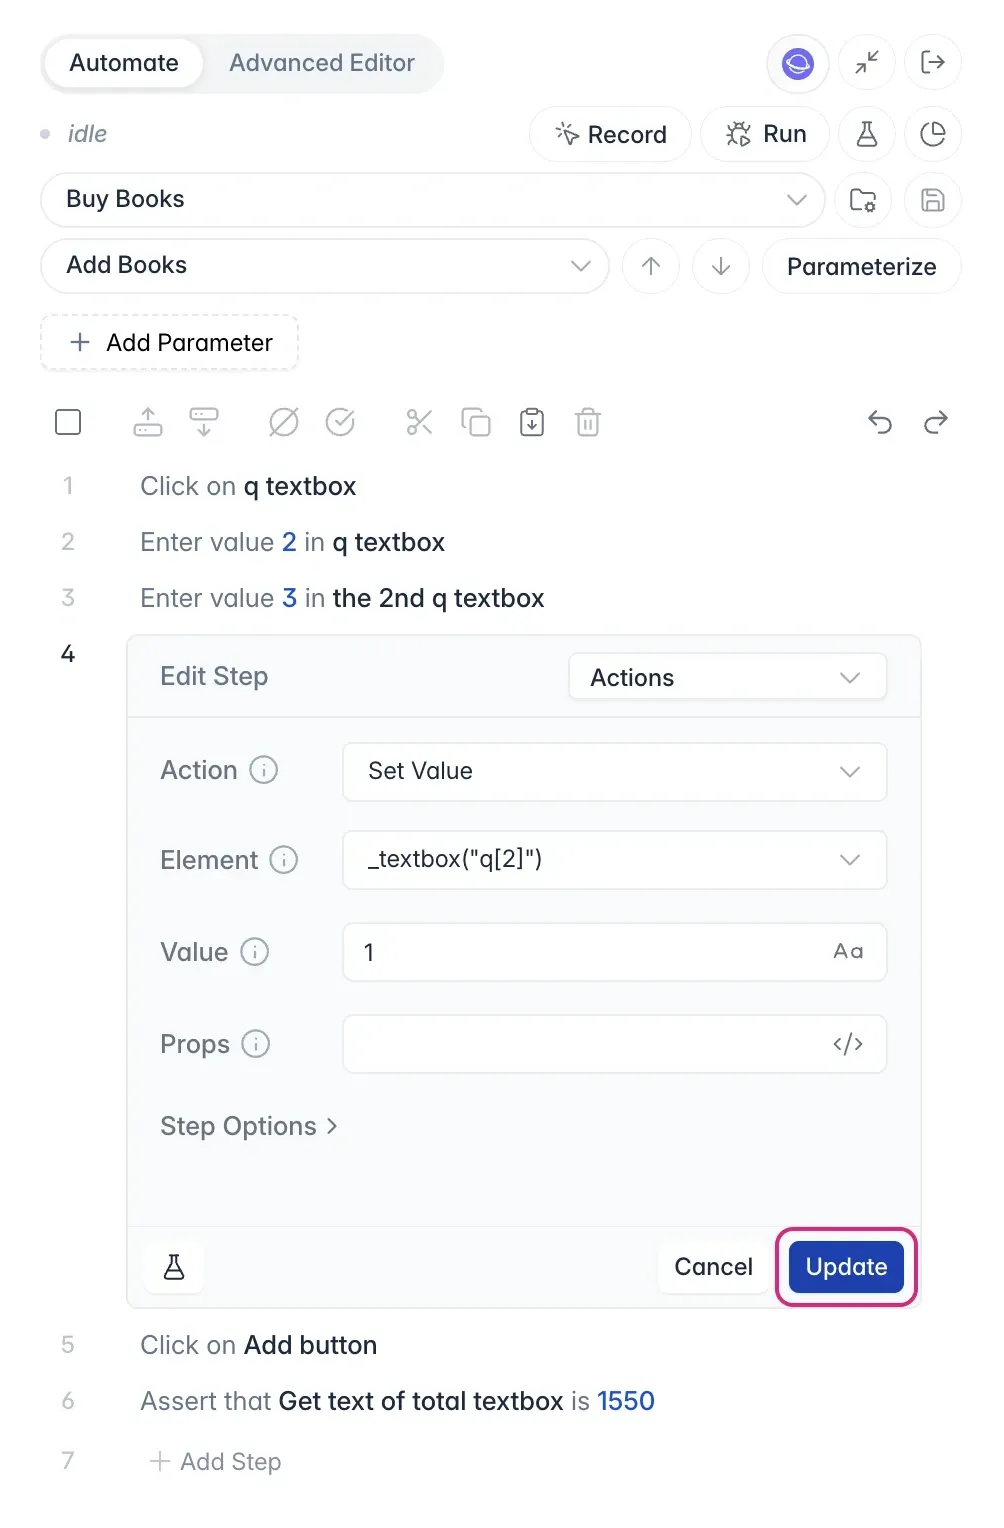
- Click a step. It opens as Edit Step, where you can change its Action, Element and Value.
- Click Update.
- To move, copy, disable or delete steps, use the toolbar above the steps. To add one, click Add Step.
- Click Save.
Saved changes go to the keyword’s .sah file, so every test case that uses the keyword gets them.
Add More Test Cases
Section titled “Add More Test Cases”A scenario file can hold many test cases, and they can reuse the same keywords.
- In the No-Code Test Editor, click Add Test Case and name it, for example,
Buy One Book. - Add the keywords
Login,Add BooksandLogout, picking them from the list as you type.
You can run one test case, or the whole scenario file.