

Visual Assist Automation - Getting Started
Find and act on elements by how they look on screen, using image recognition and OCR with the Visual Assist Engine.
Some elements can’t be found from the application’s code: a button that’s only an image, a chart drawn on a canvas, or text inside a picture. Sahi Pro’s usual accessors read the code, so they can’t see these. Visual Assist finds them by how they look on screen instead, either by a picture you capture (image recognition) or by their text (optical character recognition, OCR).
Visual Assist works with web applications and, with the matching engine, with desktop and mobile applications.
Before You Start
Section titled “Before You Start”Install the Visual Assist Engine. See Install Engines.
Open the Controller
Section titled “Open the Controller”- In the No-Code Test Editor, select the keyword and click Automate.
- In the Automate with Controller dialog, choose the Controller Mode for your application, such as Browser, Desktop, Java, SAP, Android or iOS, and fill in where it starts.
- Click Launch Controller.
For more ways to open it, see Open the Controller.
Turn On Visual Assist
Section titled “Turn On Visual Assist”- In the Controller, open the Advanced Editor tab.
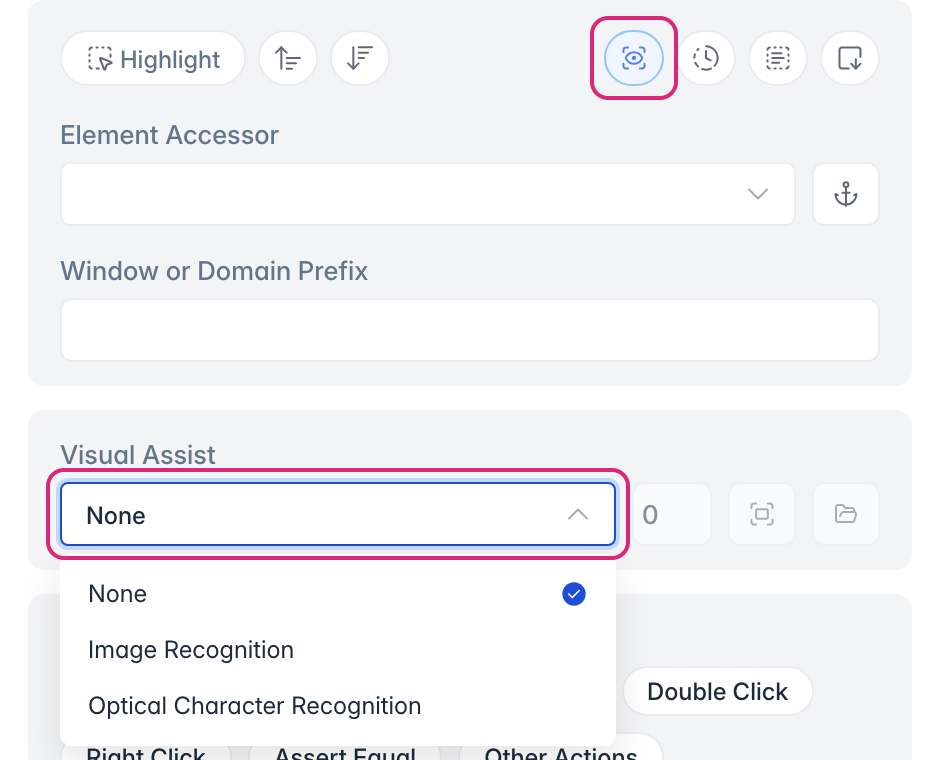
- Click Visual Assist, the first of the four icons at the top right. The Visual Assist panel appears.
- Choose Image Recognition to find an element by its picture, or Optical Character Recognition to find it by its text.
Capture an Image
Section titled “Capture an Image”To use an element that has no code behind it, such as a logo or an icon in a desktop application, capture a picture of it first. Sahi Pro then looks for that picture on the screen.
-
Choose Image Recognition.
-
If the element only shows after you do something, such as opening a menu, set a delay in seconds in the box next to the list. It gives you time to bring the right window to the front.
-
Click Capture an image to identify, and select the area of the screen with the element.

-
Name the image. To keep it in a folder, choose one under Image Directory, or type a new folder in front of the name, such as
Logos/CompanyLogo. -
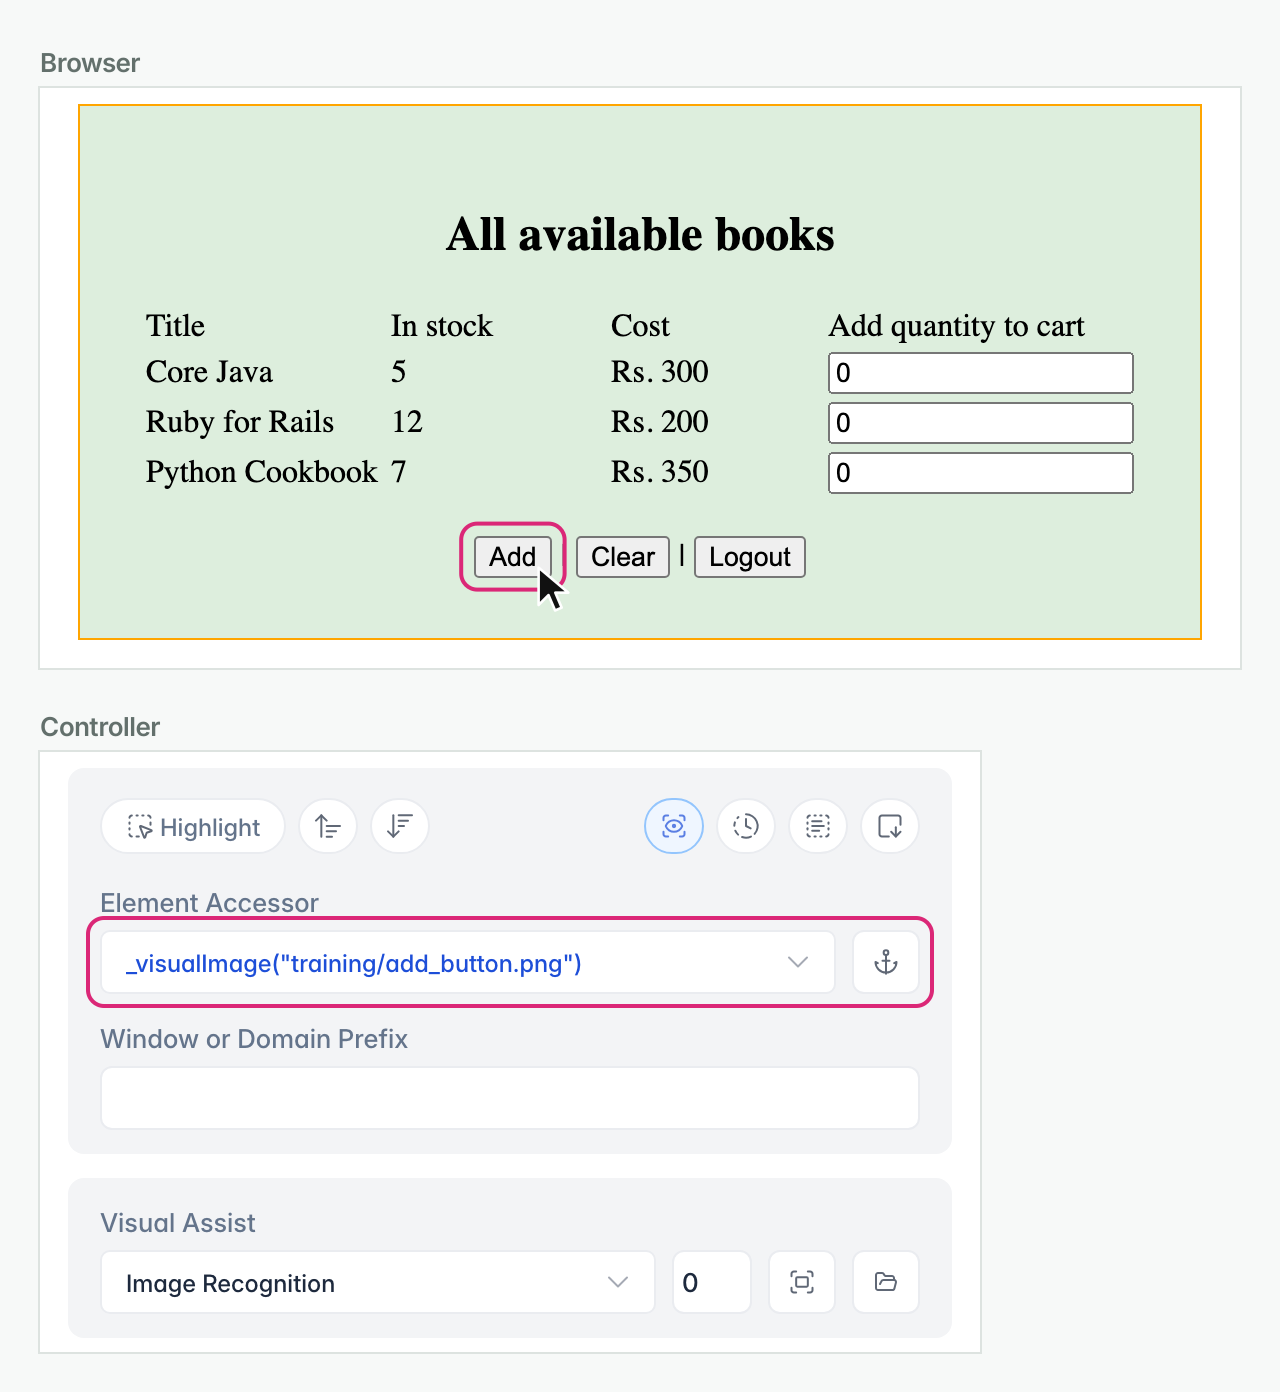
Element Accessor shows the accessor for the image, which uses _visualImage.
To see the images you’ve captured, click Open the images directory, next to the capture button.
Read Text with OCR
Section titled “Read Text with OCR”Text inside an image or a canvas isn’t in the code either, so Sahi Pro can’t read it the usual way. OCR reads it from the screen.
- Choose Optical Character Recognition.
- Set a delay if you need one, as for an image.
- Click Capture an image to identify, and select the area with the text.
- Element Accessor shows the accessor for the text, which uses _visualText.
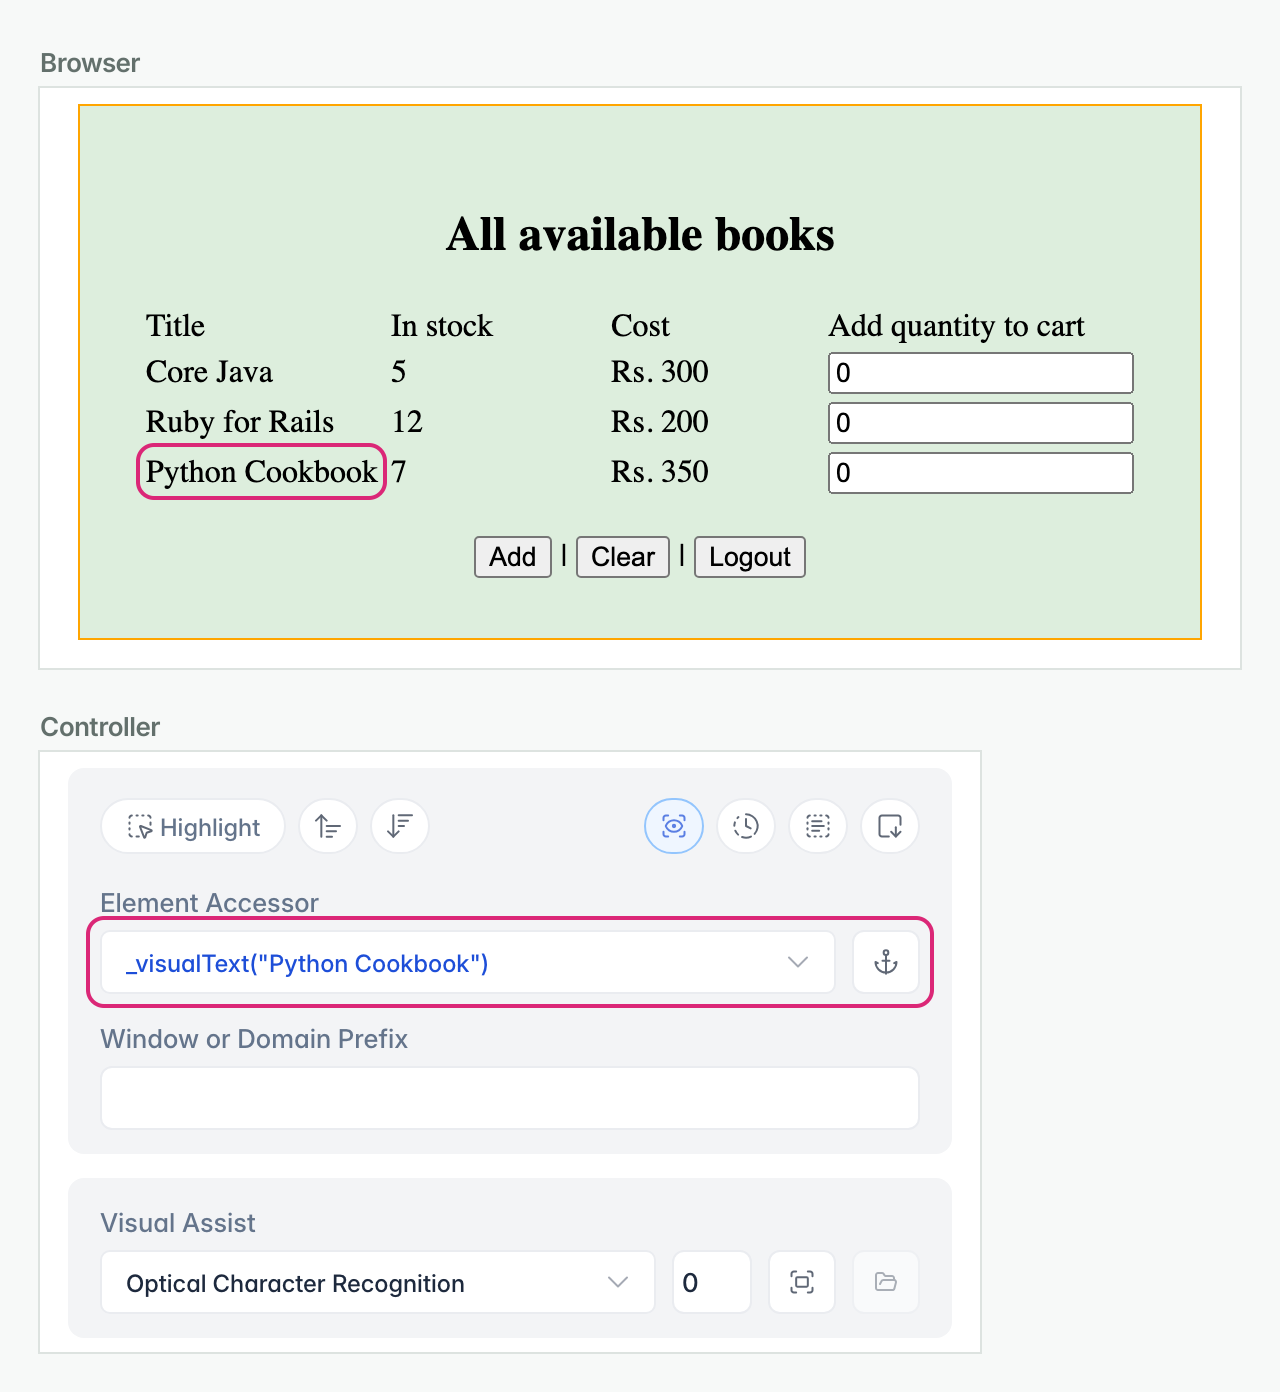
Identify an Image or Text on the Screen
Section titled “Identify an Image or Text on the Screen”Once an image is captured, or for text on the screen, you can identify it the usual way:
- Choose Image Recognition or Optical Character Recognition.
- Hold Ctrl (⌘ on Mac) and hover over the image or the text. Element Accessor shows its accessor.
Add the Step
Section titled “Add the Step”Add a step for the element as for any other: choose a Quick Action, try it with Evaluate Step, then click Add as Step and Save. See Identify an Element and Add a Step.
Sahi Pro acts on a Visual Assist element the way a user would, with real mouse and keyboard events. See Native Events.
To try a Visual Assist accessor on its own, use the Evaluator.
View a Captured Image
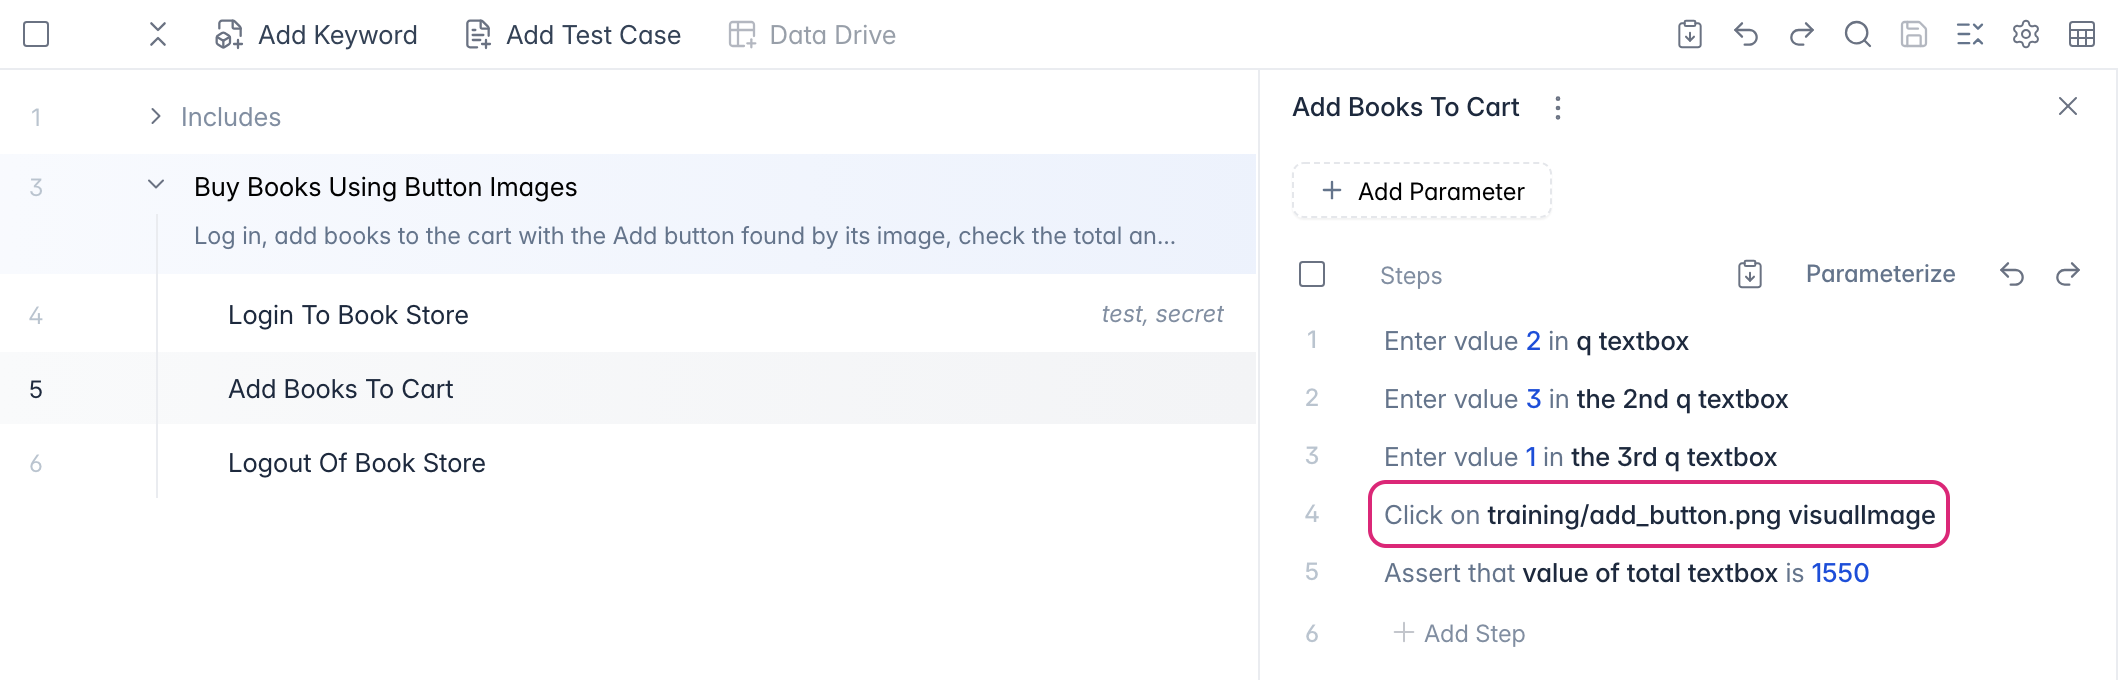
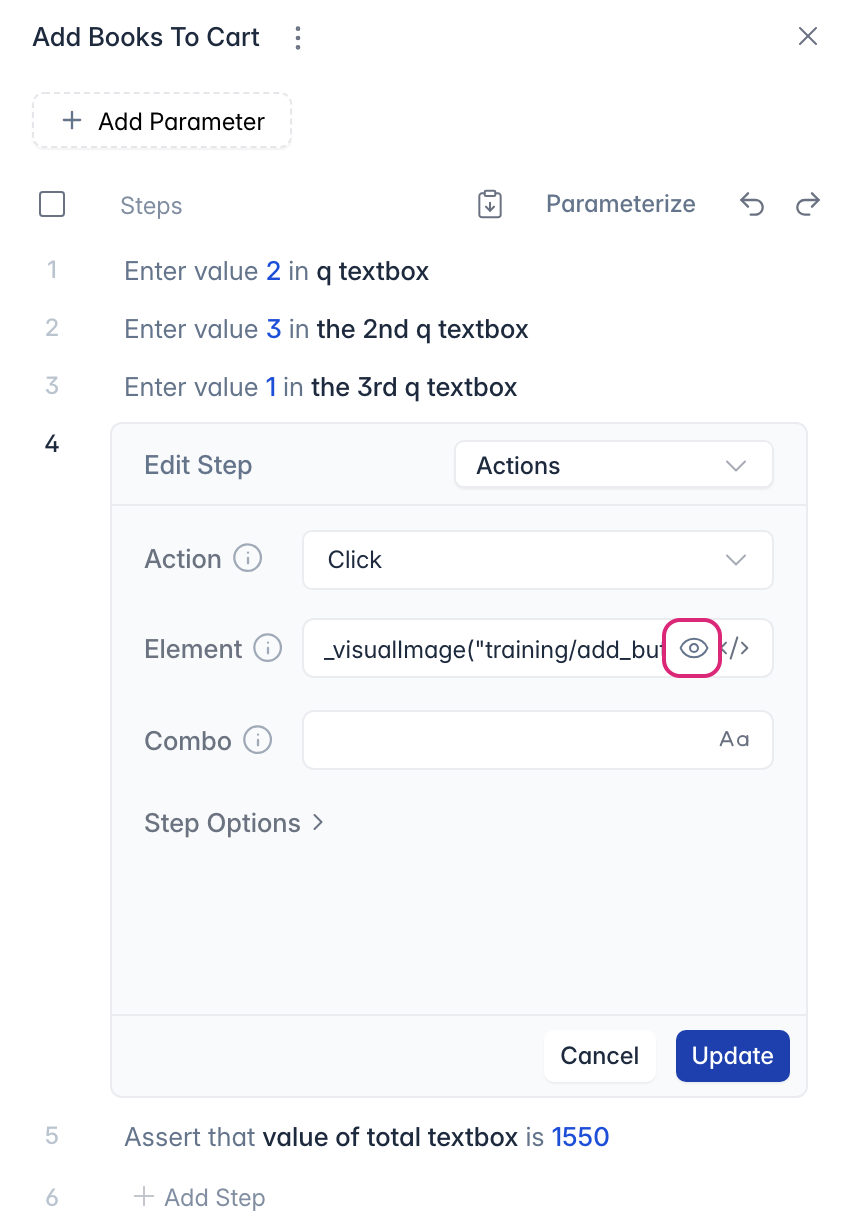
Section titled “View a Captured Image”A Visual Assist step names its image only by a file path, such as training/add_button.png. When a test has several such steps, the path alone doesn’t tell you which button or icon each one clicks. Open the image from the step to see it:
-
In the No-Code Test Editor, open the scenario file and select the keyword. Its steps show on the right, and a Visual Assist step reads like Click on training/add_button.png visualImage.
-
Double-click the step to edit it, then click View Image (the eye icon) in the Element box.
-
The Visual Assist Image Viewer shows the image, its path and its width and height. Open Parent Folder opens the directory it’s saved in, the
snipsdirectory of your project.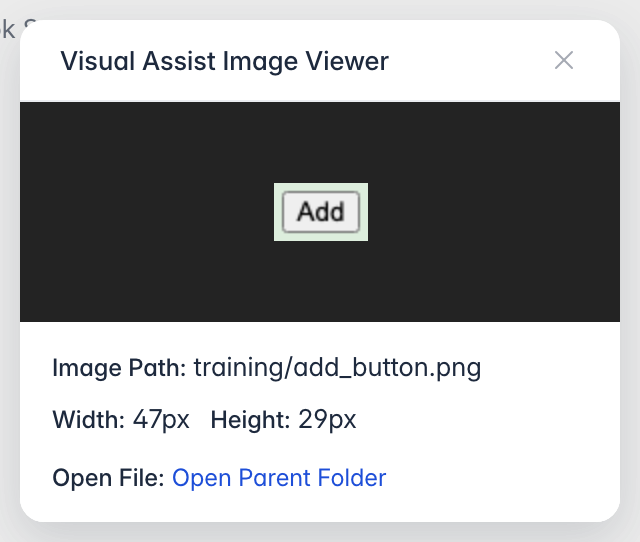
Close the viewer and click Cancel to leave the step unchanged.
Run the Test
Section titled “Run the Test”Run it from the Controller, as described in Run Tests via Controller, or from the Editor, as described in Run Tests from the Editor.
Visual Assist Functions
Section titled “Visual Assist Functions”For every Visual Assist function, see Visual Assist Accessor Functions and Visual Assist Functions.