

Test Data Files
Keep test data in groups in a .csv test data file, edit it as a sheet, and attach it to a test case or keyword with Data Drive.
A test case that runs with one set of values only checks one case. To check the same flow with many sets of data, such as several orders, put the values in a test data file. Sahi Pro then runs the test case once for each row.
A test data file is a .csv file that keeps its rows in groups, so one file can hold several sets of data, such as everyday orders and bulk orders.
Create a Test Data File
Section titled “Create a Test Data File”-
Choose File > New > Test Data, or click + in the Navigator and choose Test Data.
-
Enter the Test Data File Name, such as
book_orders, and click Create. The file is created in the project, shown under File Location.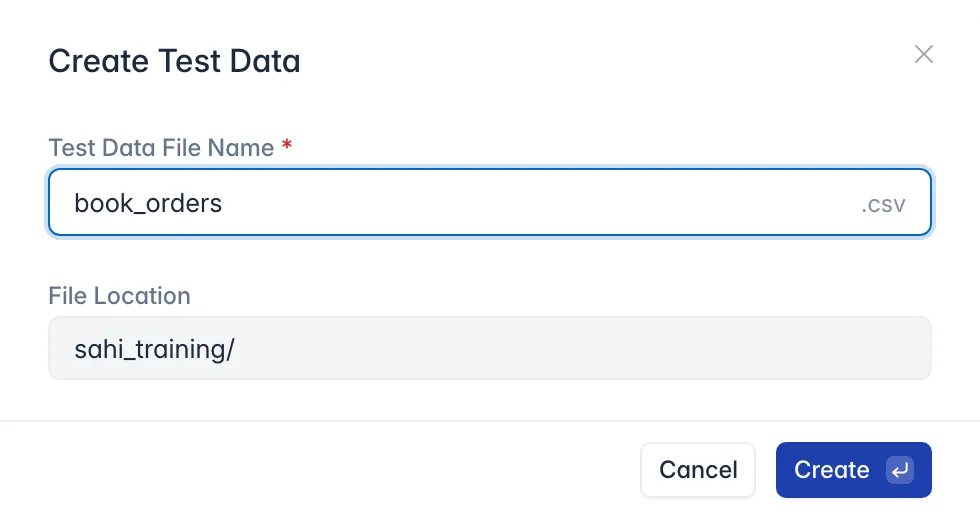
-
The file opens as a sheet. Enter each group:
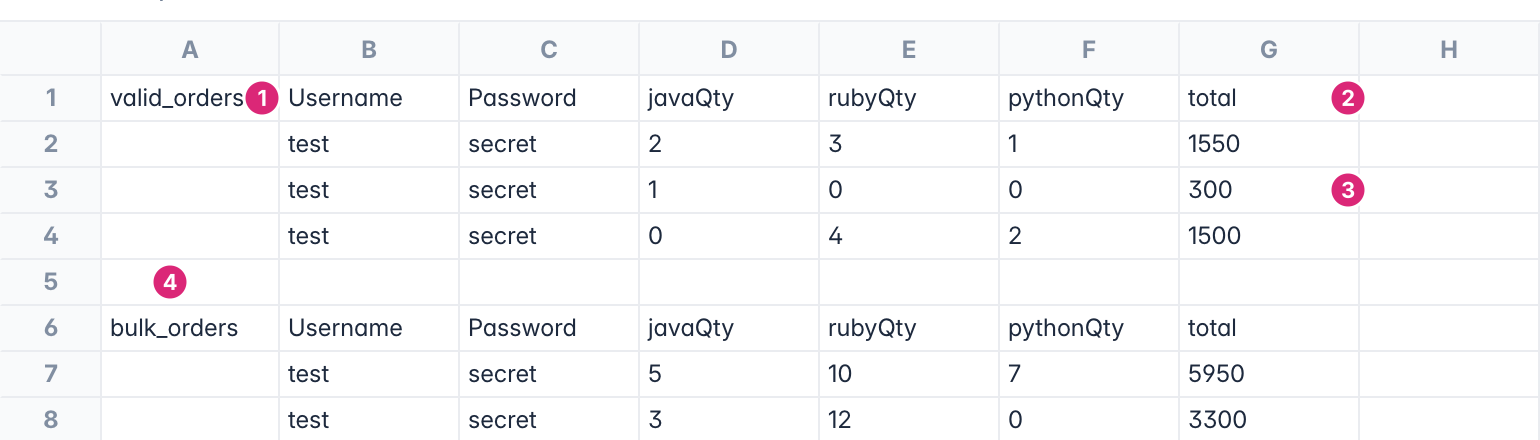
- Group name, in the first column of the group’s first row, such as
valid_orders. - Column names, in the same row. Name each column after the parameter it fills, without the
$, such asUsernamefor$Username. - Rows, one for each run, with the first column left empty.
- A blank row before the next group, such as
bulk_orders.
- Group name, in the first column of the group’s first row, such as
-
Save with Ctrl + S (⌘ + S on Mac).
The toolbar above the sheet has:

- Find and Replace: finds and replaces values in the sheet.
- Save File: saves the file. It’s available once you’ve made a change.
- More options: Keyboard Shortcuts (Shift + F10) lists the sheet’s shortcuts.
- Script Information: shows the file’s path.
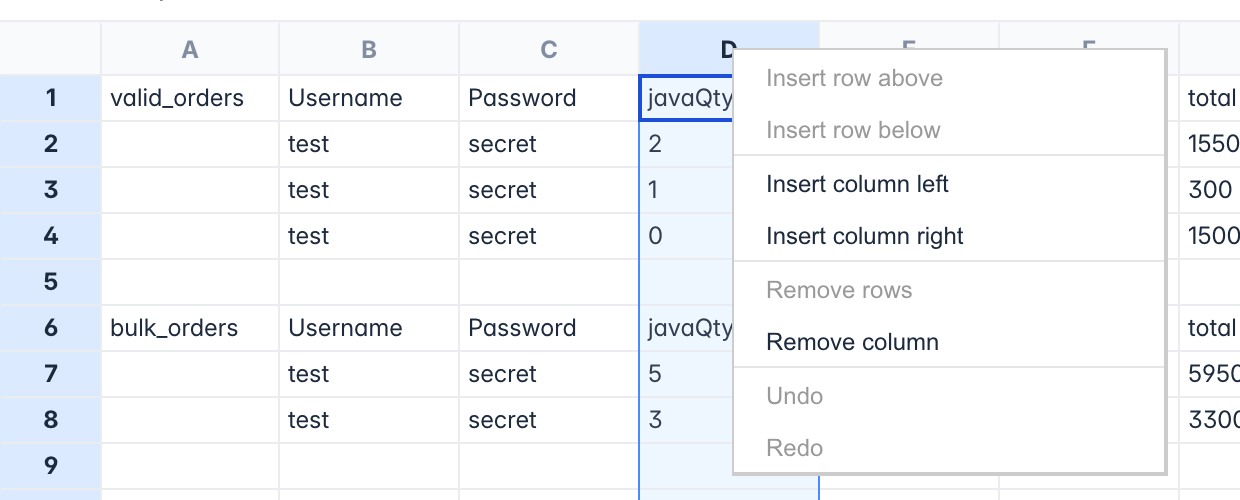
Right-click a column letter to insert a column to its left or right, or remove the column:
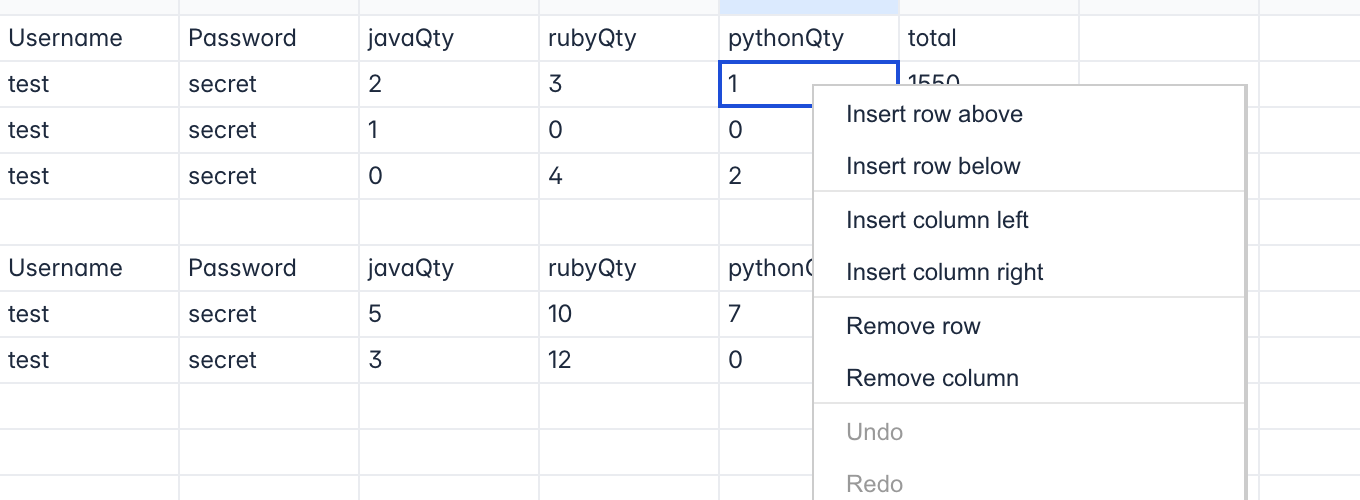
Right-click a cell, or a row number, to insert a row above or below it, insert a column to its left or right, or remove its row or column. Undo and Redo undo and redo your last changes.
Attach It to a Test Case
Section titled “Attach It to a Test Case”- In the No-Code Test Editor, tick the test case that should loop through the data, and click Data Drive. To loop through only one keyword, tick that keyword instead.
- Choose Existing File and pick the Test Data File.
- Choose the Group Name. + beside it adds a new group to the file.
- Under Column Name, the columns that match the test case’s parameters are ticked. Check that each parameter has a column.
- Click Confirm.
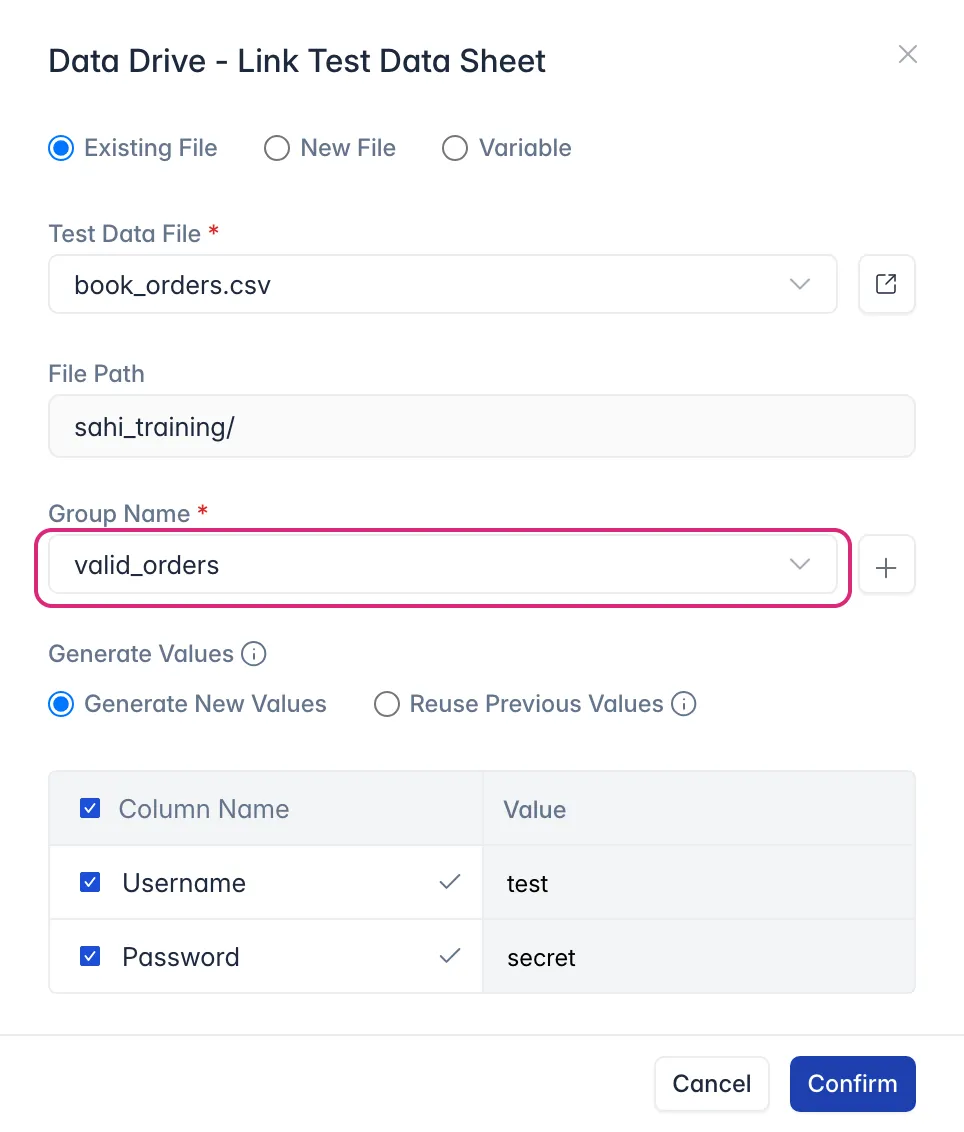
When you run the test case, it runs once for each row of the group, and the report shows a result for each row. New File in the same dialog creates a test data file and its group without leaving the test case. Generate Values applies only to cells with a data generator: Reuse Previous Values lets a verification keyword check the values an earlier keyword created. For a walkthrough, see Loop Through a Test Data File.