


Create Virtual Machines with AWS Cloud Formation
abstract
AWS Cloud Formation helps creating virtual machines (EC2 Instances - Windows) with minimal effort. Sahi provides custom Cloud Formation template inorder to launch the EC2 Instances fully loaded with
Sahi Pro Runner installed and running.
Follow the below Steps to launch Cloud Formation stack with desired EC2 Instances.
Prerequisites
A valid AWS accountSteps
- Login to the account and navigate to 'CloudFormation' page under 'Management & Governance' in 'Services' drop down
- Click 'Create Stack'(With new resources) button
- Select 'Template is ready' option in 'Prerequisite - Prepare template' box
- Select 'Upload a template file' option in 'Specify template' box
- Click here to download Cloud formation template
- Upload the downloaded CloudFormation template and click 'Next'
- Provide a valid Stack name and fill the below 'Parameters'
- AMIId: Provide the Amazon Machine Image Id with which all instance will be launched. Default AMIId is of 'Microsoft Windows Server 2019 Base'
- CidrIp: Provide IP Address as CIDR notation to which 9999 and RDP ports should open. Default is open to everyone
- KeyName: Select a valid Key Pair from the drop down to get access to the instance
- MasterInstanceType: EC2 Instance type for Master machine. Default is 't3.large'
- MasterName: Specified name will come under 'Name' tag for master machine. Default is Sahi Master
- Password: Password for user 'Administrator' for all the machines
- SahiLicenseKey: Product key for accessing Sahi license from License Server
- NodeInstanceCount: Count of Node EC2 instances to be created(must be between 1 and 5)
- NodeInstanceType: EC2 Instance type for Node machine. Default is 't3.medium'
- NodeName: Specified name will come under 'Name' tag for node machines. Default is Sahi Node
- Password: Specify valid windows Password to set for all machines. You have to provide this password if you are connecting to any machines through RDP
- SahiDownloadURL: Specify valid download url of Sahi Pro Runner. Eg: https://resources.sahipro.com/installers/install_sahi_pro_runner_v900_xxxxxx.jar
- SahiLicenseKey: Specify valid Sahi Runner license key to run Sahi instances (Don't change any value for UserDataScripts, UserDataScripts1, UserDataScripts2, UserDataScripts3)
- SubnetId: Id of the subnet where the instance to be launched
- VPCId: Id of the VPC to which the Security Group is to be created
- Click Next. Add more Tags if required
- Click Next. Click Create Stack
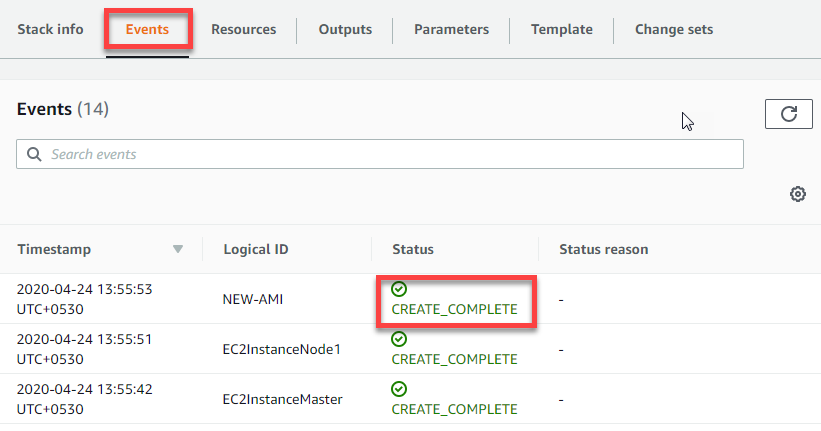
- Check the 'Events' tab to verfiy the stack creation is successful. After successful creation, wait for 10-15 mins for instance to be ready for use
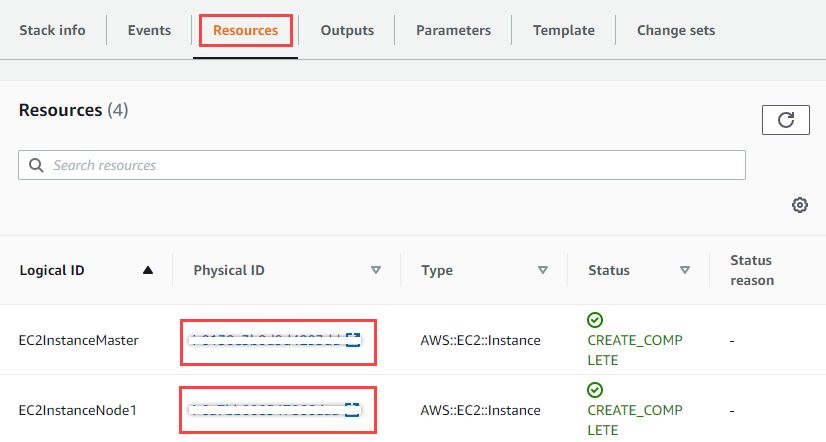
- Navigate to 'Resources' tab. Click on Physical ID for EC2InstanceMaster and it will take you to EC2 instances page with Master machine details
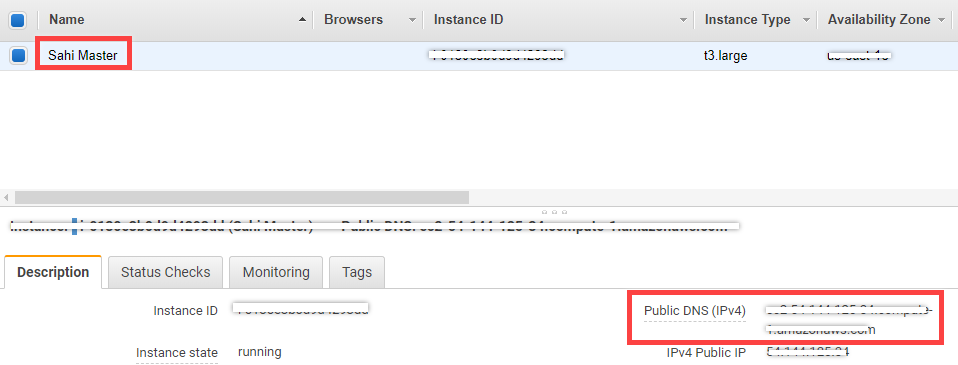
- Copy the 'Public DNS (IPv4)' from the 'Description' tab and paste it on 'Configure Nodes' in Sahi 'Playback Properties'
- Go back to 'Resources' tab in Cloud Formation page and click on Physical ID for EC2InstanceNode and repeat the above step to copy Public DNS to Sahi 'Playback Properties'
- Repeat the above step if you have more nodes
infoIf you connecting to any of the machines through RDP, please double click on 'Close.bat' present in desktop to close the RDP connection