Sahi Controller
abstract
The Sahi Controller allows you to interact with Sahi and easily experiment and debug on the browser.
Record Tab

Record tab for Sahi Pro.
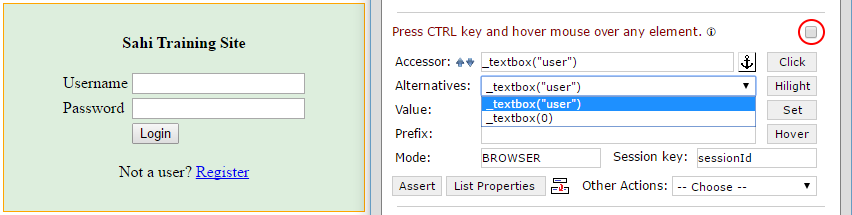
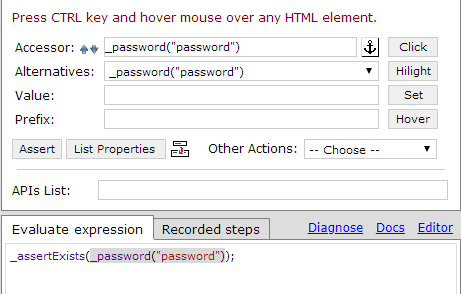
Identify Elements
To identify an element, press the CTRL key and hover over any elementModes available in Sahi Pro for recording or identification:
infoNote: To enable the identification for Windows applications,
Controller Information:
- Start Desktop automation. Refer here.
- Check the highlighted checkbox.
Accessor:shows the Sahi accessor for that elementAlternatives:shows all alternative accessors for that elementValue:shows the value of the current element. Mostly this is the input text or the visible text.Prefix:Populates the prefix as needed when working with popup windows and multiple domains. Eg. on a popup window, this may be populated with_popup("New Window")Mode:shows mode of application for which element is recording or identifying (not present in Sahi Pro).
Action Buttons
These buttons perform various actions on the element and also show the generated script in the "Evaluate Expression" box. These are used to quickly work with elements during debugging/script generation.Clickclicks on the identified element. Invokes the_clickAPI.Hilighthighlights the identified element (shows a red 1 pixel border briefly). Invokes the_highlightAPI.Setsets the value in "Value:" field on the identified element. Invokes the_setValueAPI.Hoverdoes a mouse over on the element. Invokes the_mouseOverAPI.List Propertieslists all the properties of the element (name value pairs) in the Evaluate Expression results box.Other Actionslists actions like Double Click, Right Click etc.
Assertions
Assertions are used to verify that the behaviour of the system is as expected. To add assertions using Sahi,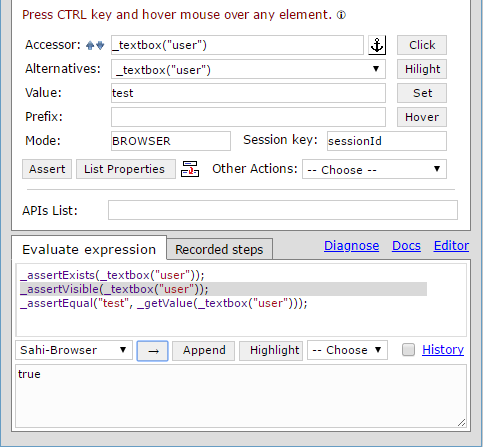
- CTRL-Hover on the element to identify it and then click on
Assertbutton - A few possible assertions for that element will be populated in the
Evaluate Expressionbox - Select mode for evaluate application of which it identified
- Click on "→" to test the assertions.
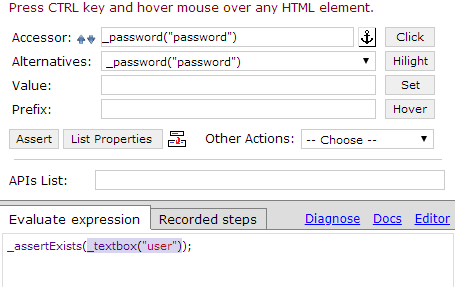
Evaluate Expression
Evaluate Expression box is used to evaluate snippets of Sahi code. It helps while identifying elements or while debugging.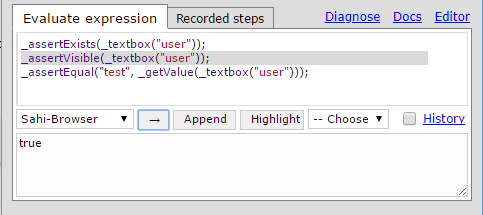
Set mode for evaluateSelect appropriate application mode before evaluate the expression. JS is used to evaluate java script expression.→Put a valid Sahi expression in the Evaluate Expression box and click on "→". The result will be seen in the bottom box.Append to ScriptWhile recording, selecting and clicking onAppend to Scriptwill append the steps to the currently recording script. This is mainly used for manually append any step from Evaluate Expression to the currently recording script.HighlightCan be used on selected text to highlights the element (shows a red 1 pixel border briefly). Invokes the_highlightAPI.Drop downLists some actions like Click, Get Value etc.
info
Note: Selecting some text and pressing "→" will only evaluate the selected text. User may evaluate more than one statement at a time.
Use . to get attributes
Adding a dot (.) after the accessor in the accessor field, shows all the properties of the accessor.
Further typing narrows down the list of properties.
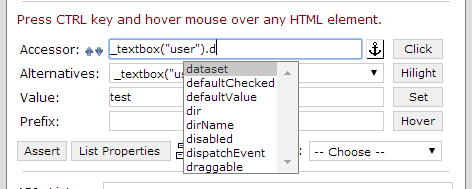 Clicking on an option (say, disabled) or typing
 .disabled directly in the accessor field and pressing Enter
will populate the value in the "Value:" box. (In this case, .disabled is false)
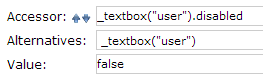 Clicking on
 Assert will create an assertion for just that property.
Up and Down arrows
Up arrow near the Accessor field helps identify the parent element. The Down arrow goes back to the previously identified child element.
Anchor button
Suppose we need to identify the third textbox in the UI below.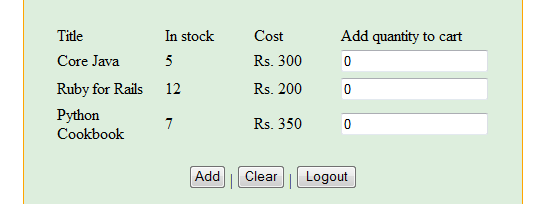 If we hover over the third textbox, it is identified as _textbox("q[2]")
Instead, we first CTRL-Hover over Python Cookbook; the accessor field shows:
If we hover over the third textbox, it is identified as _textbox("q[2]")
Instead, we first CTRL-Hover over Python Cookbook; the accessor field shows:
 Then we click the Anchor button:
 Now if we CTRL-Hover the textbox, we see the Accessor now resolves the textbox in relation with Python Cookbook.

Directly copy the Accessor to Evaluate Expression
You can directly copy the accessor to the Evaluate Expression box by clicking on this button.
- Select the text range you want to replace in the Evaluate Expression.
- Click on the copy to Evaluate Expression button:
- The Evaluate Expression now looks like this:
Smart Dropdown for Evaluate Expression
Sometimes, you may want to use a Sahi API on only a part of the expression in the Evaluate Expression box.- Select the part you want to test.
- Click on the dropdown, as shown in the figure.
- Select the API you want to use.
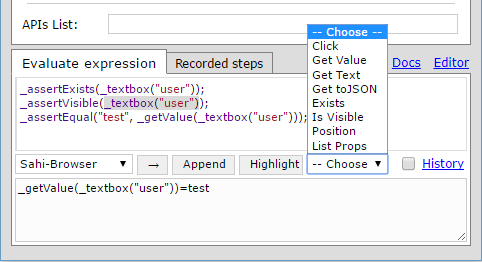
- As you can see in the lower box of Evaluate Expression, the API has been used and shown over there.
APIs List Box
Suppose you want to access an API, but are not sure about the parameters required in it. You can use the APIs List box in such a case.- Start typing the API you would like to use.
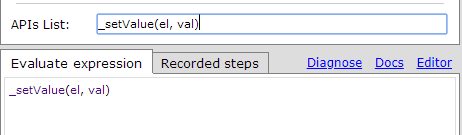
- As you start typing the API, a dropdown would appear. Select the API and press the Return Key.
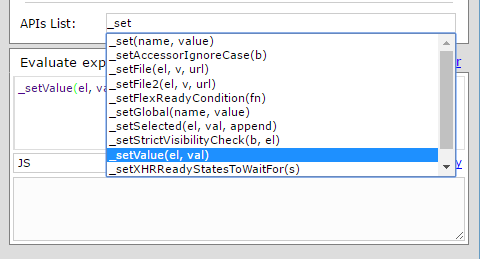
- The API, along with its parameters would get appended to the Evaluate Expression box
Retrieve Coordinates of a Point
To get the coordinates of an element, you can use the checkbox shown in the figure.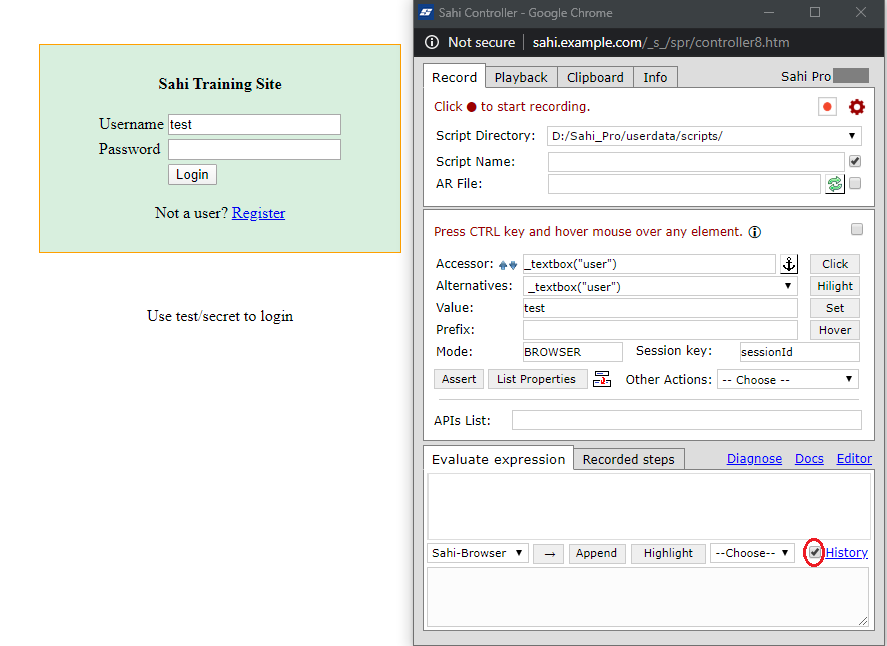 When checked, it displays the clientX and clientY of the point on screen where CTRL+SHIFT+mouseover event takes place.
History of Evaluate Expression
You can use this option to see recent statements used in the Evaluate Expression box.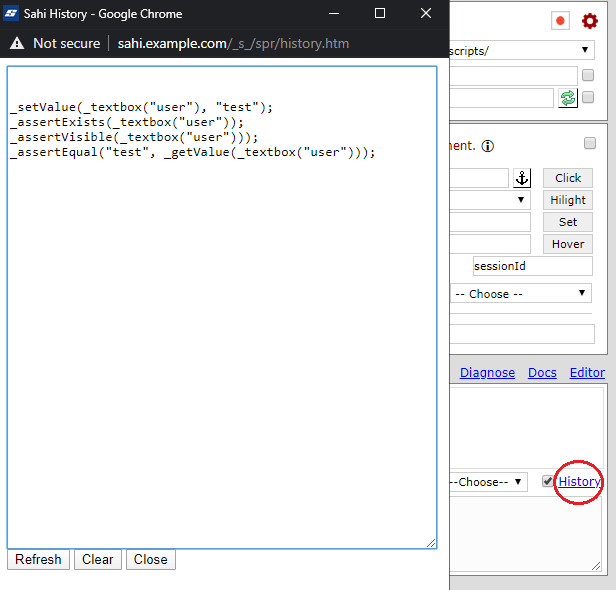
Record a Script

-
If
Script Namefield is not visible, click on theSettings button to show or hide file paths.
-
If needed, select the Scripts Directory to use in the
Script Directorydropdown. -
Set the name of the script in the
Script Namefield. Note: if no extension for the script file is provided,.sahis taken as the default extension. -
Click the 'Record'
 button to start recording.
-
Once done, click on 'Stop Recording'
 button to stop recording.
info
Note: Check the checkbox to enable recording or identification for Windows.

info
The scripts directory can be changed by changing the following in
sahi_pro/userdata/config/userdata.properties:
#Relative paths are relative to userdata dir. Separate directories with semi-colon
scripts.dir=scripts;D:\my_custom_folder\
Record with Accessor Repository
Accessor Repository (AR) is a central place to keep all Acessors (object identifiers). When an element changes, its identifier can be changed in a single place and it will reflect in all scripts. In Sahi, AR is implemented as a simple Sahi script with a_AR.sah suffix. Accessors are stored in simple variables.
-
If you want to use an Accessor Repository file while recording, you need to check the "Enable Accessor Repository" checkbox.
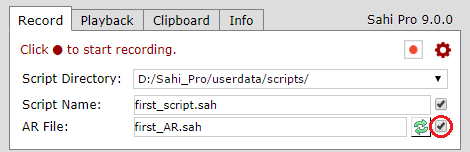
- On selecting the checkbox, another text field will appear where you need to specify the relative or absolute path to the Accessor Repository file.
- Now if you press the 'Record' button, Sahi will record using Accessor Repository.
- Once a Accessor Repository file is chosen, an element will always be identified first by its AR entry, even when not in recording mode. This prevents the same element from being identified in multiple ways in different scripts.
- When elements have been smartly identified using Relational APIs like _near or _under once, newer recordings on those pages will simply use the AR entry, so other users do not need to worry about doing it again or wrongfully using a different identification mechanism.
-
There is also provision to modify existing AR entries.
dangerAccesor repository keys must always be in the format $_ALL_IN_CAPS. If this is not followed, the scripts will still work fine, but the values will not come up properly in Script Editor's context panel.
Record Documentation
Sahi can store screen shots along with recorded steps to act as simple documentation. To record in documentation mode, check the "Enable Screenshot. Used for Documentation" checkbox before clicking "Record".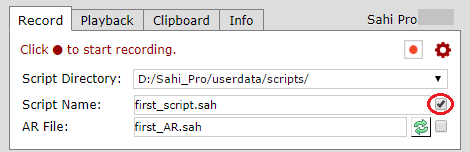 Read more on Sahi as a Documentation Tool
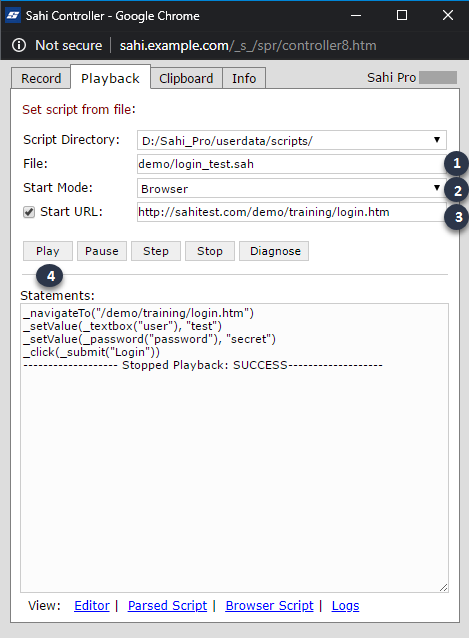
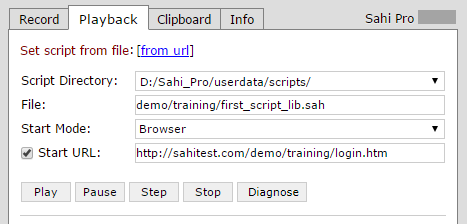
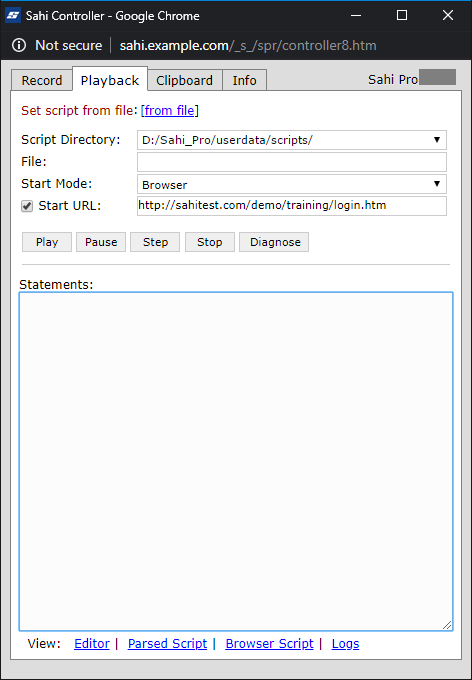
Playback Tab
With page refresh
 If not already open, open the Sahi Controller (ALT-DblClick on the page).
- Enter the script name
first_script.sahin the 'File:' field (with the help of the autocompletion feature). - Select appropriate
Start Modeto run a script.infoNote:Start Modeis only avilable when Sahi Pro Desktop Add-on is installed.Desktop Browsermode is used to run a script which runs on desktop browser only.Windowsmode is used to run a script which runs on windows for desktop only.Genericmode is used to run a script when _setMode already defined in the script.
- Enter the Start URL as 'http://sahi.co.in/demo/training/'. For your own scripts, if you had started recording from http://www.google.co.in, use that URL.
- Click 'Play'.
infoNote: that the Controller can be closed at any time, without disrupting playback.
Without page refresh
In order to retain some information on the webpage that you need before playing back the script, you can uncheck the checkbox on the left of the label "Start URL". Unchecking the checkbox will run the script on the current page without refreshing it.View logs
On the Controller, go to Playback tab and click on "Logs" link at the bottom right. It will open a window with the results in HTML.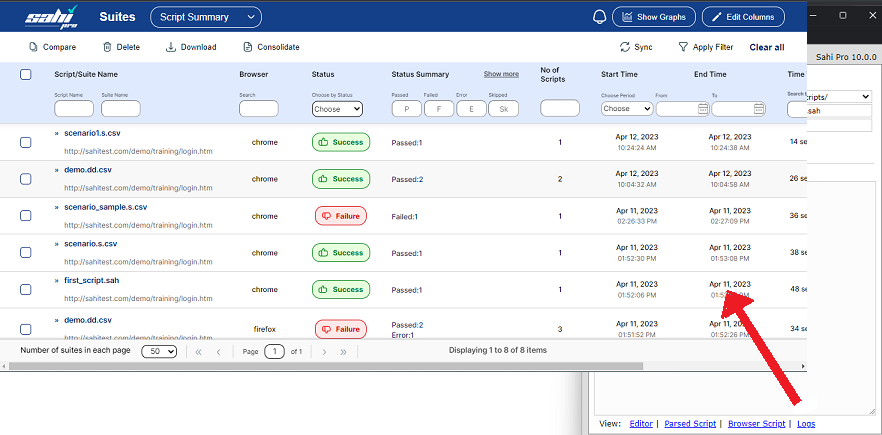 Click on any script to view specific logs.
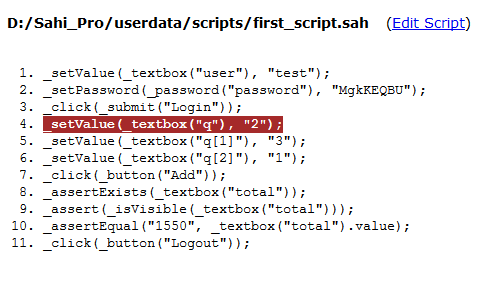
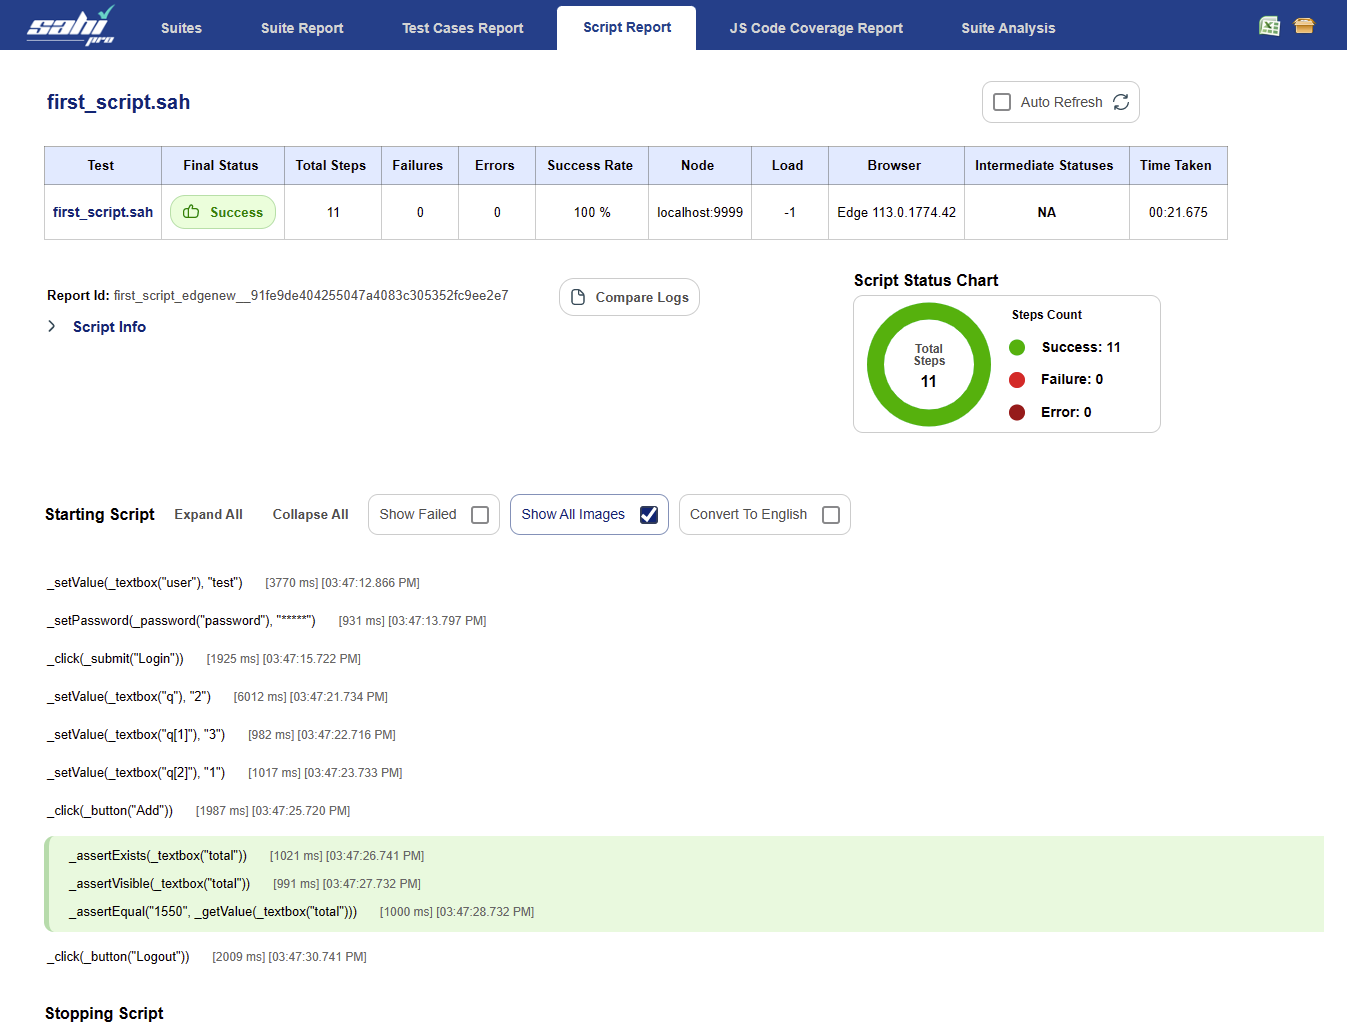 Clicking on a line in the logs will drill down to exact line in script.
 You can also view the logs at http://localhost:9999/logs
Debug during Playback
To perform debugging on the script, you can perform various operations like Pause, Play, Stop and Step on the script. 'Pause' enables you to pause the execution of the script. 'Step' allows you to execute the script step by step.Play Scripts from a URL
Alternatively, you can also playback a script from a URL.- Click on the link "from url" as shown in the figures
- Provide the necessary Script Directory path and Start URL.
infoNote:
Start Mode is only avilable when Sahi Pro Desktop Add-on is installed.infoNote: If
from url is not present in the controller. Please set the property 'script.playback.from_url.enabled' to true in userdata_hidden.properties.Clipboard Tab
You can use this tab to store small pieces of information.
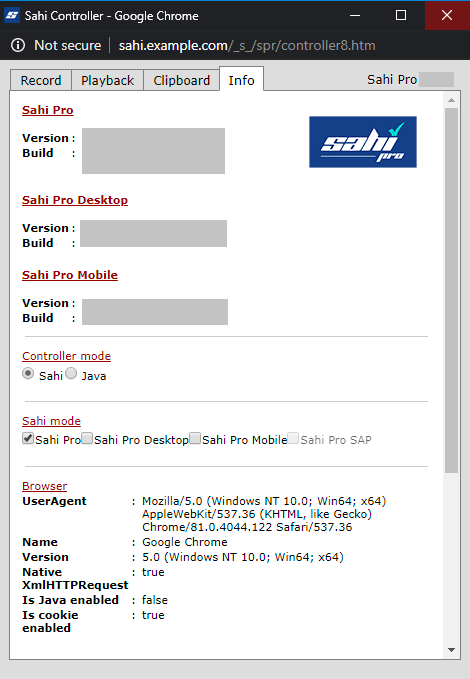
Info Tab
This tab shows the basic information of Sahi Controller, Browser, Operating System and Java.