Integration with Git
Git Configuration
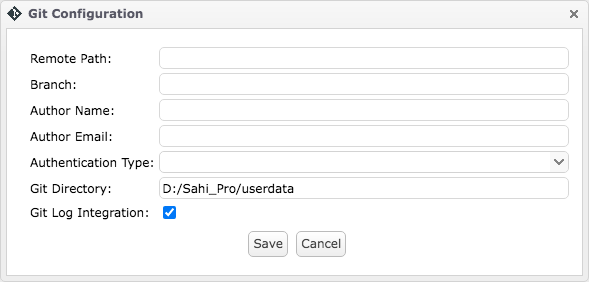
Click on theGit Configuration link in Sahi Editor to launch the Git Configuration dialog.

Understanding the Git Configuration dialog
 Specify the following Git configuration values as applicable:
- Remote Path: URL for the remote Git repository.
- Branch: Remote branch name.
- Author Name: Name of the Git user.
- Author Email: Email of the Git user.
- Authentication Type: Authentication types like HTTPS, SSH, Netrc can be employed. See the Authentication Type section for details.
- Git Directory: Directory path to clone the branch in the system.
- Git Log Integration: Tick this check-box to integrate Git with Sahi logs and view the specific file version after clicking on the line in logs.
- Before saving the Git Configuration in Sahi, ensure that the remote Git repository is initialized.
- Values for
Remote Path,Authentication TypeandGit Directorycan be specified only once. Once Git Configuration is saved successfully, these values will not be editable. - Clicking on the
Savebutton clones the remote Git repository at the specified Git Directory path. To avoid merging errors, ensure the following.- A Git repository should not exist already at this
Git Directorypath. So a directory with name.gitshould not be present at theGit Directorypath. Note that.gitdirectory if present will be hidden. - Files that will get cloned from the remote Git repository should not already exist in the
Git Directory.
- A Git repository should not exist already at this
- For the remote Git repository, it is recommended to have the same directory structure as in the
<Sahi>/userdatadirectory.
Authentication Type
HTTPS Authentication Enter the User Name and Password after selecting HTTPS Authentication from the dropdown.
- HTTPS Authentication works only with an HTTPS URL. For example,
https://github.com/gituser/git_integration.git. - To modify the saved Git configuration, the user must edit the
<sahi_root>/userdata/config/git.propertiesfile.
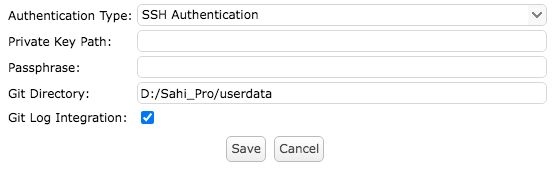
SSH Authentication Choose SSH Authentication from the Authentication Type dropdown. Specify the file path of the private key file. Also, enter the Passphrase for the private key if applicable.
- ssh key should be pem format.
- Use following command to generate ssh key in PEM format:
where: "-m PEM" creates public key to an OpenSSL compatible formatsh-keygen -t ecdsa -b 521 -m PEM -C "your_email@example.com" - Following command can be used to convert existing public key to an OpenSSL compatible PEM format:
ssh-keygen -f id_rsa -e -m pem
- Use following command to generate ssh key in PEM format:
- SSH Authentication works only with an SSH URL which starts with
git. For example,git@github.com:gituser/git_integration.git. - To modify the saved Git configuration, the user must edit the
<sahi_root>/userdata/config/git.propertiesfile.
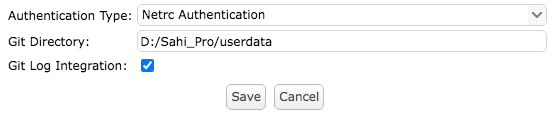
Netrc Authentication Choose Netrc Authentication from the Authentication Type dropdown. Netrc Authentication works with both HTTPS and SSH URLs.
machine, login and password should be present in _netrc (on Windows) or .netrc (on Linux or Mac) file.
Git Commit
Click on theGit Commit link in Sahi Editor to launch Git Commit. Git Commit link will appear only after successfully saving the Git Configuration.

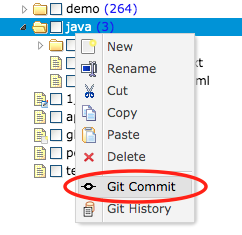
Git Commit can also be launched from the Navigator of Sahi Editor by right-clicking on a file or directory name. Clicking on the context menu item
Git Commit will add the selected file or directory to Staged Changes.
Understanding the Git Commit tab
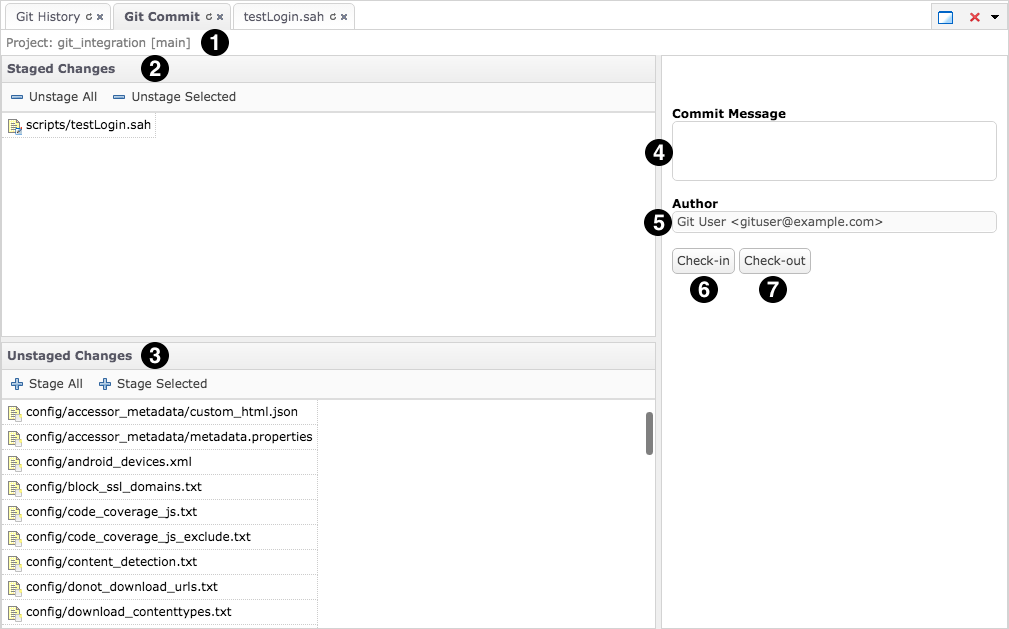
- Project Info: It specifies the Repository name and Branch Name.
- Staged Changes: It contains the list of modified files staged for a commit.
- Unstaged Changes: It contains the list of modified files.
- Commit Message: Message to describe changes in the commit.
- Author: This is the name and email of the author who is checking-in commit. It will be auto-filled using the author details saved in the Git Configuration.
- Check-in: This button will check-in staged changes with a commit message.
- Check-out: This button will check-out the latest changes from the remote repository.
Click on a file to move it to and fro between Staged Changes and Unstaged Changes. Also, right-clicking on a file will show the following context menu.
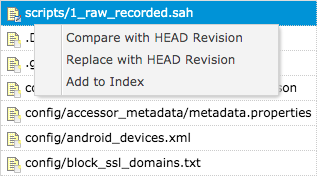
Compare with HEAD Revision: Compares the current file with HEAD Revision.
Replace with HEAD Revision: Replaces the current file with HEAD Revision.
Add to index: Adds the current file to index (Staged Changes).
Git History
Click on theGit History link in Sahi Editor to launch Git History. Git History link will appear only after successfully saving the Git Configuration.

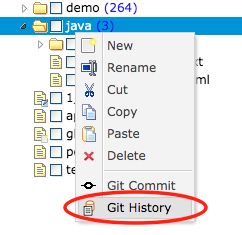
Git History can also be launched from the Navigator of Sahi Editor by right-clicking on a file or directory name. Clicking on the context menu item
Git History will show all commits checked in for the selected file or directory.
Understanding the Git History tab
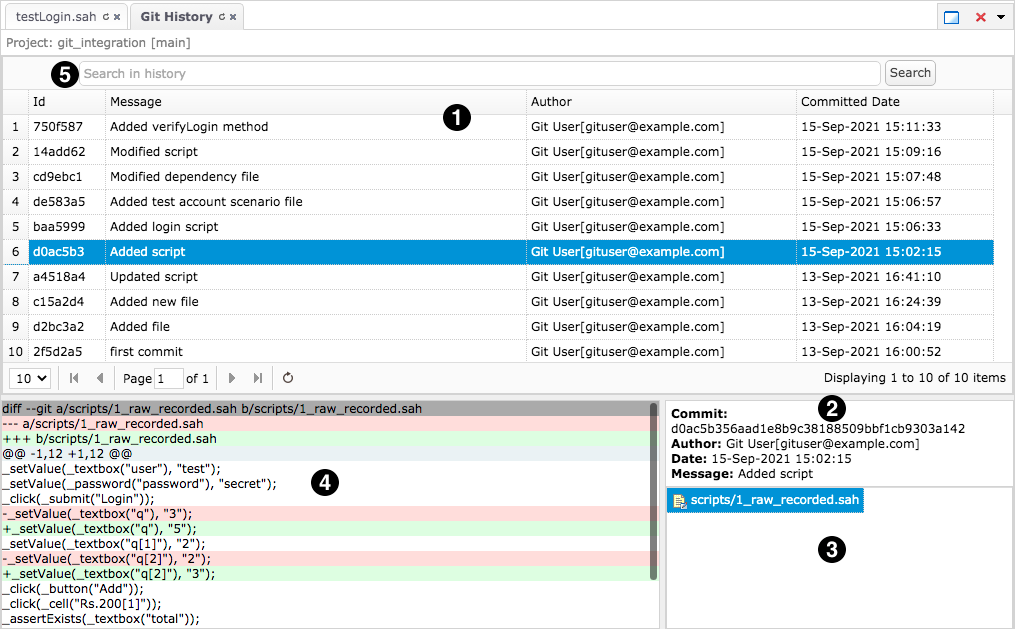
- List of all commits made in the remote repository.
- Information of the selected commit like commit id, author, date and message.
- Files that were changed by the selected commit.
- Line differences that were made in the selected file by the selected commit.
- Search box to search for commits using commit id, message, or author details.
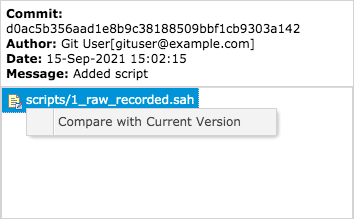
Click on a commit to select and display its information. The list of files changed by the selected commit is shown at the right bottom. Select a file from this list to show the changes made in that file. Also, right-clicking on a file from this list will show a context menu shown in the image below. Clicking on Compare with Current Version will compare the commit version of the file with its current version.
If two commits are selected using ctrl + click, then right-clicking on them will show a context menu shown in the image below. Clicking on Compare with Each Other will compare the selected commits.

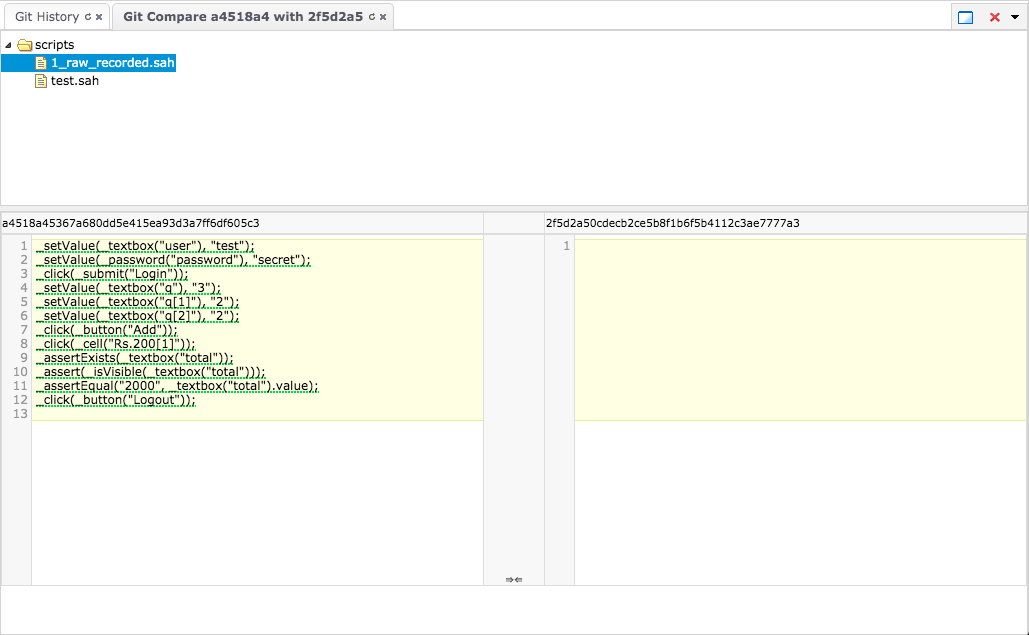
Git Compare
The Git Compare tab will compare and show the differences between two versions of a file. It can show the following comparisons.Comparison between local version and Head version of a file
Right-click on a file in the Git Commit tab and select
Compare with HEAD Revision. This will open a comparison between the local version and the Head version of the selected file.
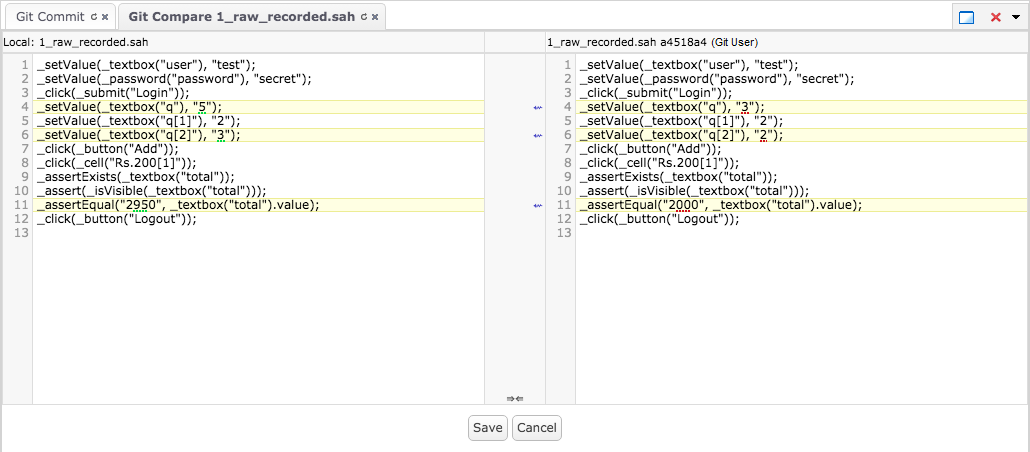
Comparison between local version and Current version of a file
In the Git History tab, the list of files changed by the selected commit is shown at the right bottom. Right-click on a file from this list and select
Compare with Current Version. This will open comparison between the local version of the file and the version of the file in the selected commit.
Comparison between two commits
In the Git History tab, select two commits using
ctrl + click. Right-click on them and select Compare with Each Other. This will open comparison between the two selected commits. This comparison displays all the modified files in a tree structure. Select any file and view the differences.