REST API Editor
Launching the REST Client
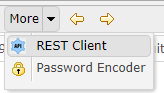
REST Client can be launched by clicking on the REST Client link from Editor.
REST Request
REST request can be entered by one of the following ways:Manual Input
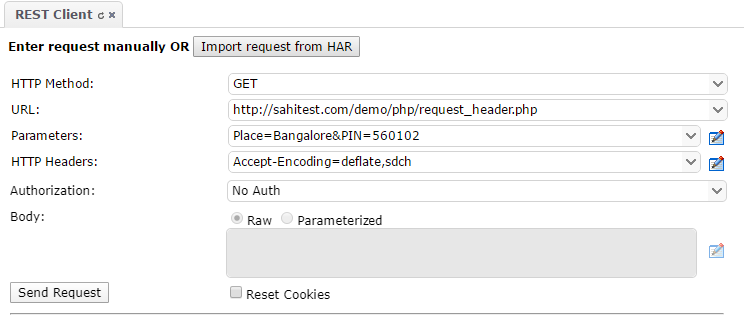 Specify the following request parts as applicable:
- HTTP Method: Select a HTTP method from drop down.
- URL: Enter the REST API URL.
- Parameters: Enter the parameters which will go as query string along with URL.
- HTTP Headers
- Authorization: See Authorization section for details
- Body: Specify the payload (or request body) to be sent to the server.
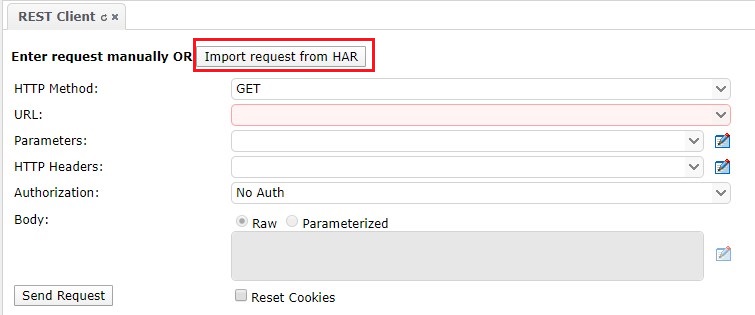
Import from HAR
- Click on Import request from HAR button.
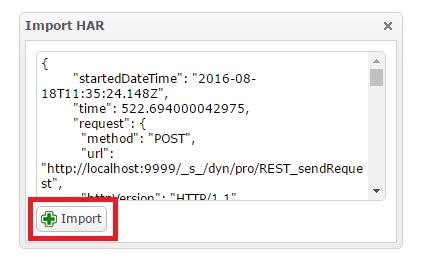
- Paste the request section of the response to be validated from HAR logs and click on Import
- HAR logs can be accessed from developer's console > Network activity > Right click > save HAR.
- A sample request section from HAR logs would look like:
{
"request": {
          "method": "GET",
          "url": "http://sahitest.com/demo/",
          "httpVersion": "HTTP/1.1",
          "headers": [
            {
              "name": "Host",
              "value": "sahitest.com"
            },
            {
              "name": "Connection",
              "value": "keep-alive"
            },
            {
              "name": "Cache-Control",
              "value": "max-age=0"
            },
            {
              "name": "DNT",
              "value": "1"
            },
            {
              "name": "Upgrade-Insecure-Requests",
              "value": "1"
            },
          ],
          "queryString": [],
          "cookies": [],
          "headersSize": 585,
          "bodySize": 0
        }
}
-
Note:
Import from network activity in Sahi logs
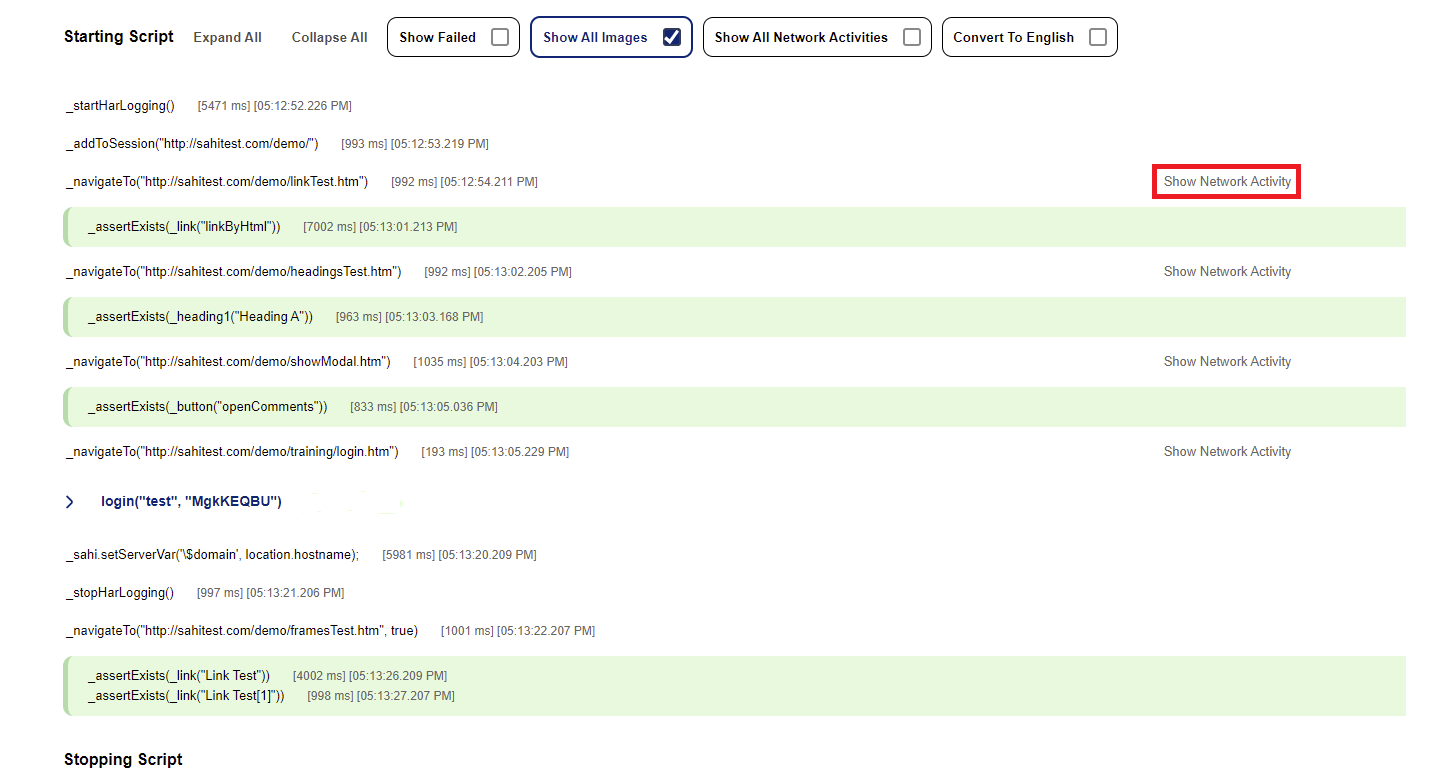
- Record HAR for a network activity using _startHarLogging() and _stopHarLogging() in Sahi script
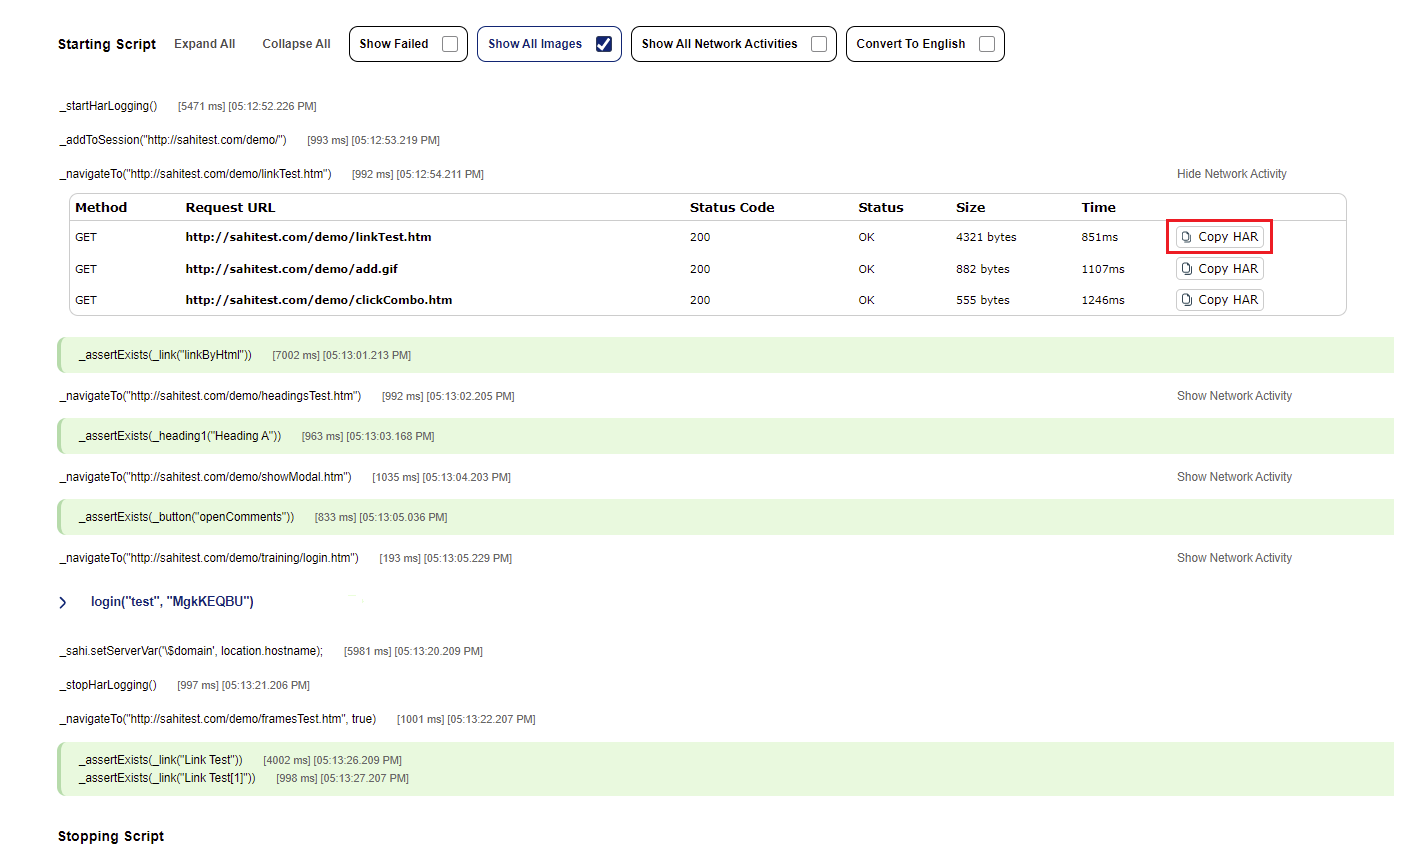
- Click on Show Network Activity from the logs
- Click on Copy HAR button to copy request parameters as HAR. Then paste the logs in Import request from HAR window as mentioned above in Entering the HAR logs in Import request from HAR window
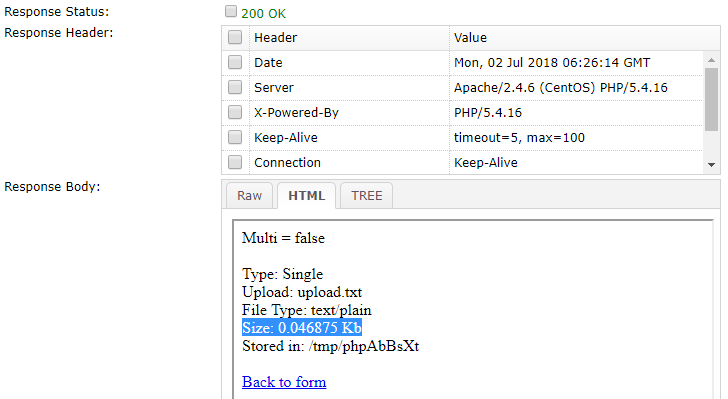
REST Response
REST Response section displays following information:- Response Status: Displays the response code returned by the server.
- Response Header: Displays the response headers returned by the server.
- Response Body: Response Body has 3 tabs:
- Raw: Displays the response body as it is returned.
- HTML: Displays the parsed HTML if content type returned from server is HTML.
- TREE: Displays the response body in tree structure if content type returned from server is JSON or XML.
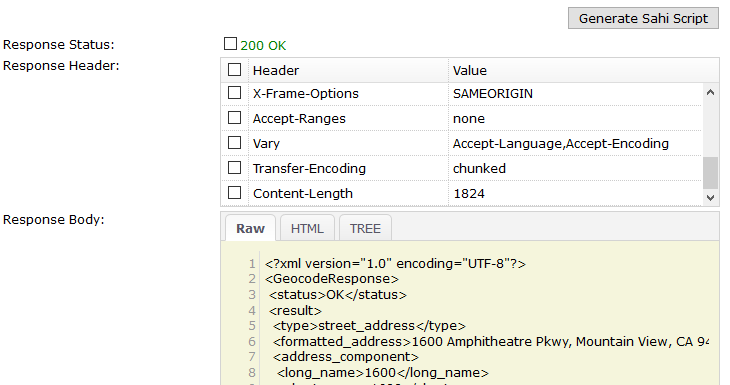
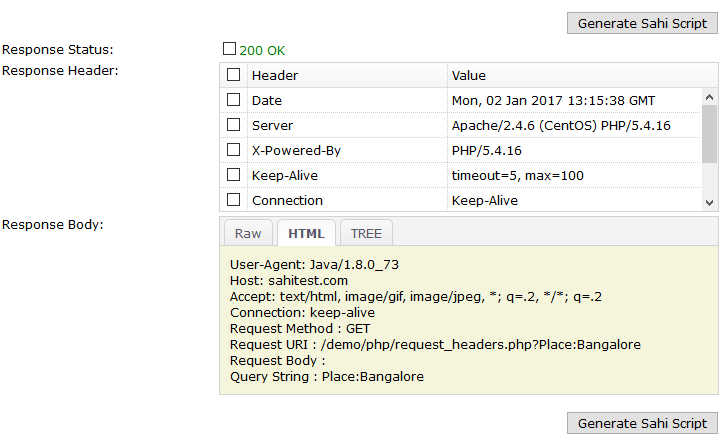

Generate Script
Select the parameters which has to be validated by selecting the checkboxes and click on Generate Sahi Script button. For example: select Response Status, Content Type from Request Headers and place_id from Reponse Body and click on Generate Sahi Script.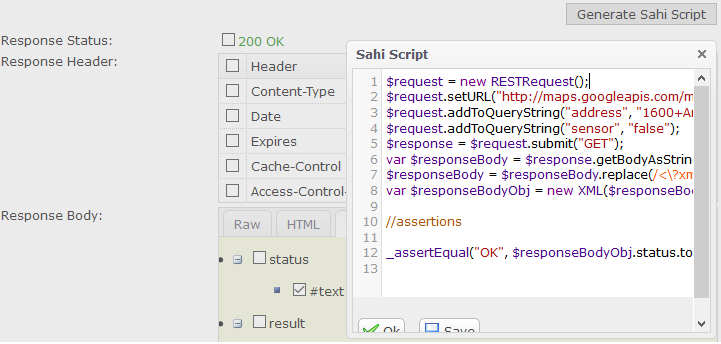
Authorization
Basic Auth
Enter the username and password after selecting Basic Auth from dropdown.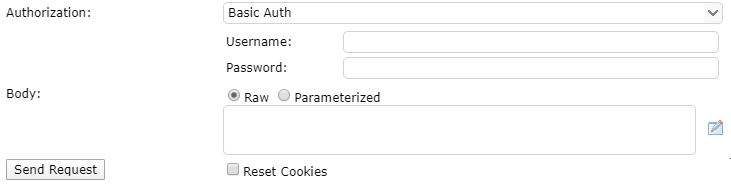
OAuth 1.0:
Choose OAuth 1.0 from the Authorization dropdown.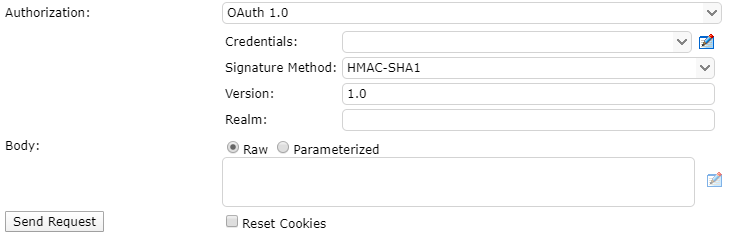
Add New from credentials dropdown to add a new credential.
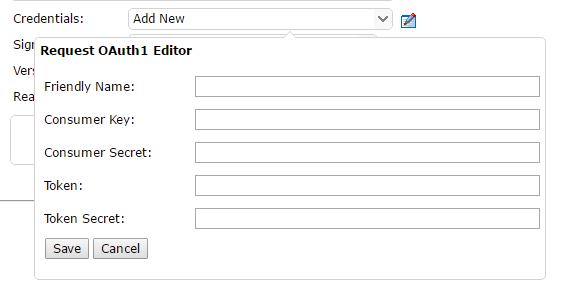 Enter a friendly name to save these credentials against. Enter the
 Consumer Key, Consumer Secret, Token, Token Secret.
These details are provided by the API provider.
OAuth 2.0
| OAuth 2 RFC | https://tools.ietf.org/html/rfc6749 |
| REST API | https://techdocs.ed-fi.org/display/ETKB/REST+API+Guidelines+v2.0+RFC |
- Sahi's OAuth 2 automation can be accessed from the Authorization drop down as shown in the picture below.
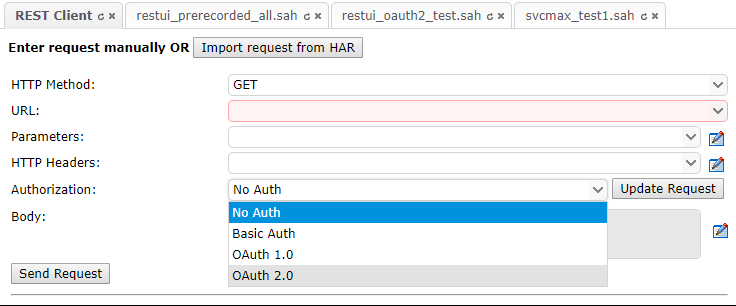
-
This shows the Access Token field.

-
If you already have a token you can use that to proceed with the API calls.
If you do not have an Access Token, click on
Get Access Token ...to open theOAuth 2.0 Consent and Access Token Wizard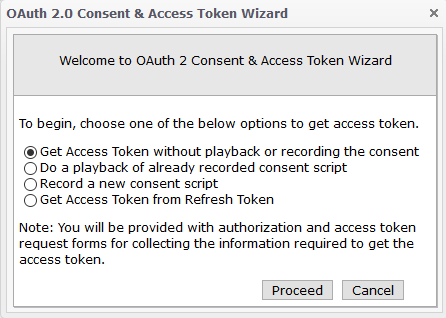
-
Choose one of the options:
Option Use Access Token without Playback/Recording Choose this if you are just playing around with the REST API and are not intending to record a script Playback of recorded consent script Choose this if you already have a recorded consent script which enters the relevant data in a browser window to get the Access Token. You may need this to test different APIs by the same provider Record a new consent script Use this to record the flow on the browser to get the Access Token. This recorded Sahi script is called the consent scriptUsing Refresh Token Use this option if you have a refresh token - Select the
Record a new consent scriptoption from the wizard - Give the consent script a name.
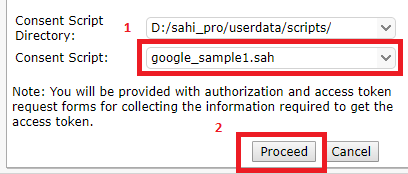
- Once you click on
Proceed, a new browser window will be opened and you will be prompted for authorization information.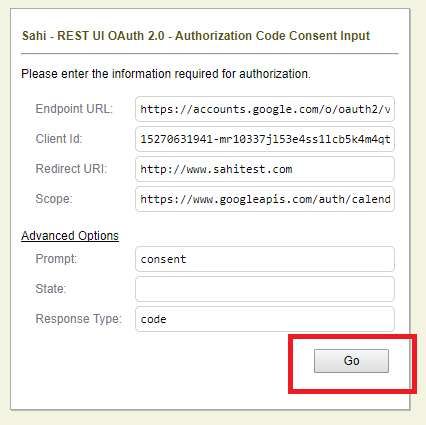
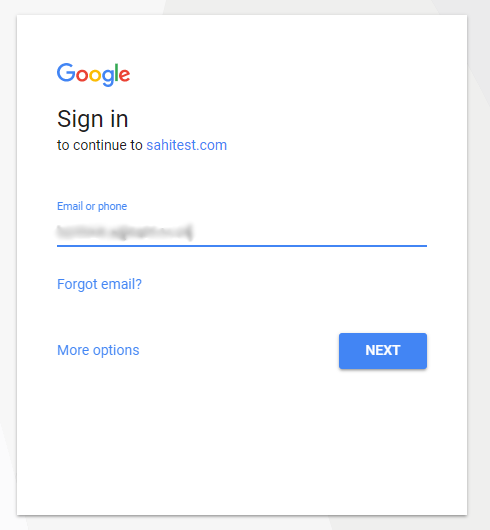
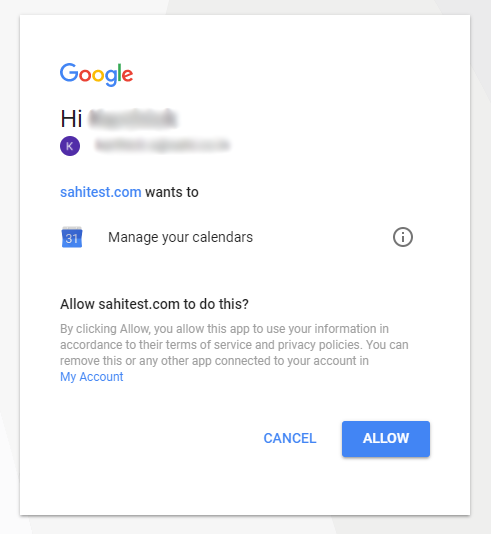
- You will be redirected to the Login page provided by the authorization endpoint where you have to provide the username, password and permissions to allow access to the user's resources
- You will be now prompted with Access Token Request Input form where the Authorization code will be prefilled. Fill rest of the details and click on
Get Access Token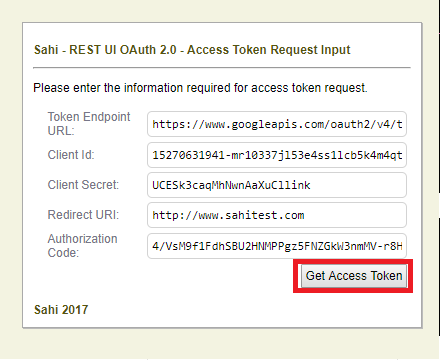
- After the access token request is successful, the Access Token field in the REST Client UI will be updated
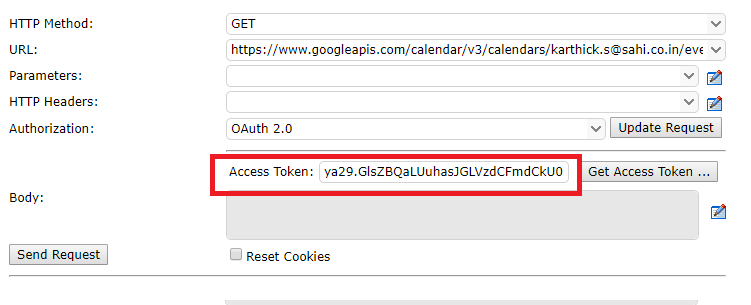
- Click on the
Send Requestbutton. The Service Endpoint will respond with the API result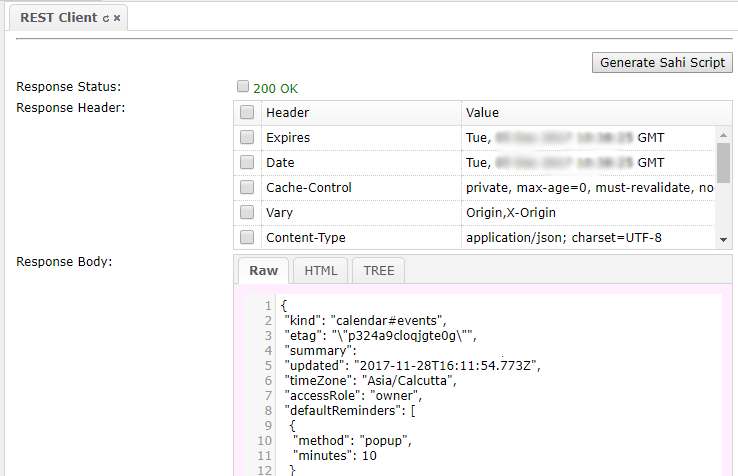
Uploading a file using REST Client
|
Input |
Description |
Example |
||||||||
|---|---|---|---|---|---|---|---|---|---|---|
|
File name |
Absolute file path to the file that should be provided. You can select a file from the File Open dialog by clicking on the |
|||||||||
|
File upload URL |
The URL where you want to upload the file. This URL is usually the action URL which is present in the form element or URL that is passed as an argument for an XML Http Request |
|
||||||||
|
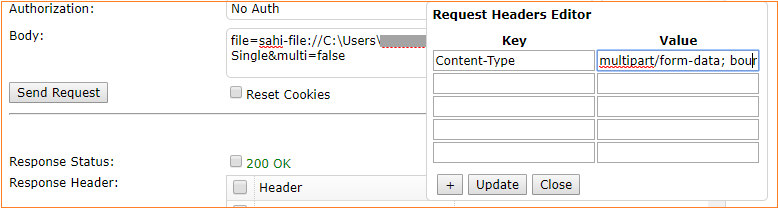
Content Type |
Content type of the POST data that is being sent. The content type for the file upload is multipart/form-data and is being used by all the browsers. There are special cases where you can specify your own content type |
Content-Type: multipart/form-data; boundary=--boundary123456abcd |
||||||||
|
Boundary |
A random string with 2 hyphens at the beginning |
--boundary123456abcd |
Steps:
- Open the Editor from the Sahi Dashboard
- Open REST Client by clicking on the More drop down menu
- Select the POST from HTTP Method combo box

- Specify the file upload URL in the URL field

- Specify the Content-Type header in the HTTP Headers table
- Specify the POST fields
- Specify the file to be uploaded, you can use the browse
 button
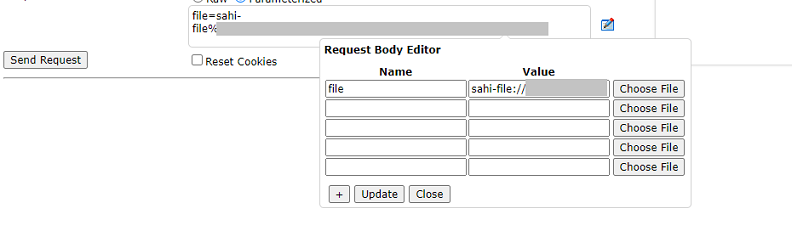
- Specify other body parameters if required, for example on above case, the file upload test application requires 2 other fields for the upload to work
- Click on the Send Request button
- You will get the following result after the file upload, the response may defer depending on the web application